
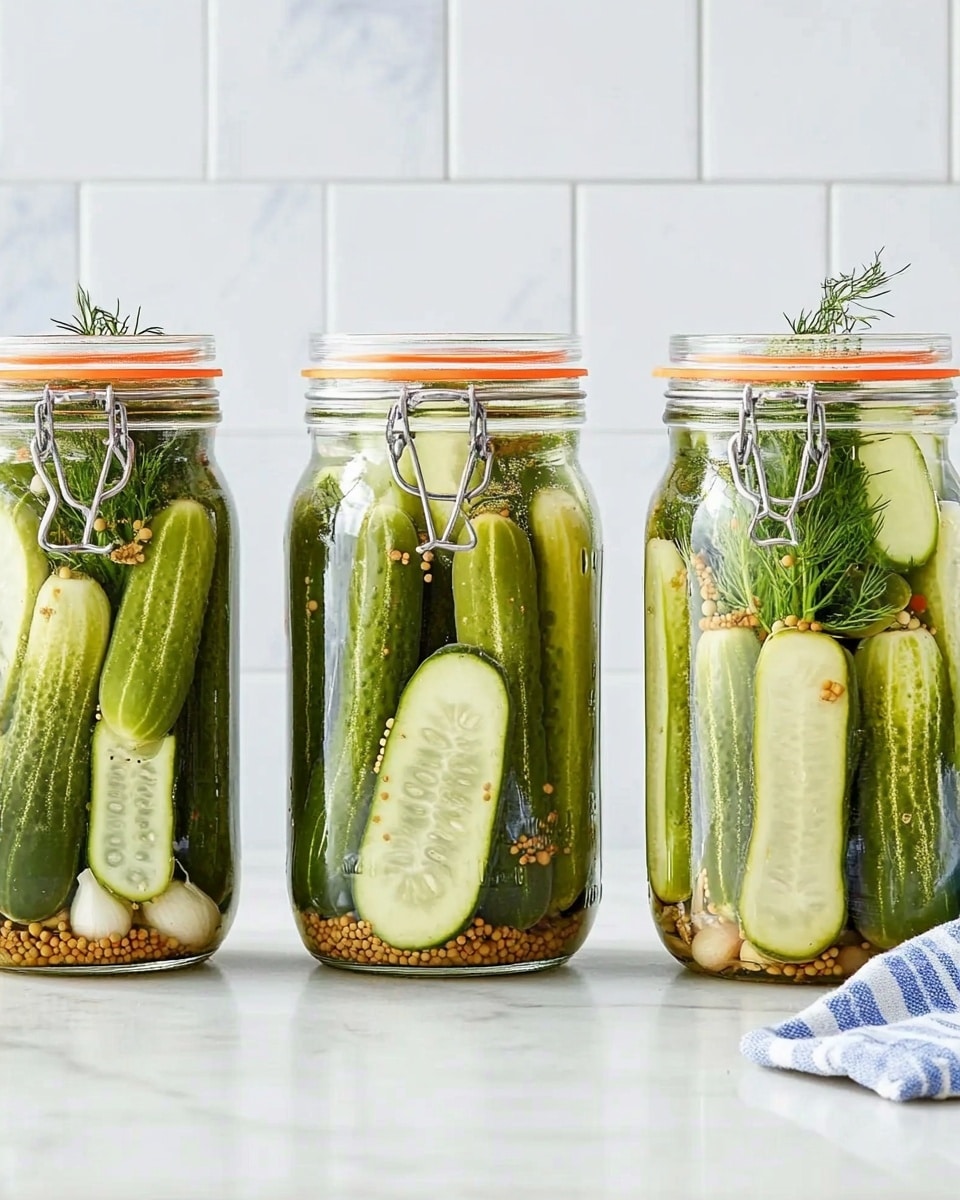
I absolutely love homemade dill pickles because they bring such a satisfying crunch and bright tang to any meal. Whether you’re adding them to sandwiches, salads, or enjoying them straight from the jar, this Homemade Dill Pickles Recipe delivers that perfect balance of fresh dill aroma, garlicky kick, and just the right amount of vinegar tang that you can’t get from store-bought versions.
When I first tried making these pickles at home, I was amazed at how simple the process was and how quickly they developed flavor. This recipe is perfect for a quick batch when you want pickles ready in a day or two, or you can let them mellow longer for that deep, classic taste. Trust me, once you try this Homemade Dill Pickles Recipe, you’ll find it hard to go back to anything else!
Why You’ll Love This Recipe
- Super Quick Prep: You can have these pickles ready to eat in as little as one day.
- Fresh, Crisp Texture: The cucumbers stay crunchy and never get soggy like some store-bought ones.
- Perfectly Balanced Flavor: The mix of garlic, dill, and spices gives a classic pickle taste that hits all the right notes.
- Customizable: Easy to adjust the spice level or try different cucumber cuts from spears to chips.

Ingredients You’ll Need
The magic of this Homemade Dill Pickles Recipe lies in simple, fresh ingredients that come together beautifully. You’ll want good-quality cucumbers, fresh dill, and just the right blend of spices to get that authentic pickle jar flavor right in your fridge.
- Persian or pickling cucumbers: Persian cucumbers are thinner-skinned and typically seedless, making crispier pickles; pickling cucumbers work great too for a classic crunch.
- Garlic cloves: Adds a sharp, savory kick — I like to halve them so the flavor infuses evenly.
- Mustard seeds: These tiny seeds give a subtle nutty flavor and slight pungency that balances the vinegar.
- Peppercorns: Black peppercorns add a gentle heat and aroma; whole ones look lovely in the jar too.
- Fresh dill sprigs: The hero herb — fresh dill brings that unmistakable aroma and flavor.
- Distilled white vinegar: Provides sharp acidity and helps preserve your pickles.
- Water: Used to dilute the vinegar just enough to keep it tangy but not overpowering.
- Cane sugar: A touch of sweetness to soften the vinegar’s bite and balance the flavors.
- Sea salt: Essential for drawing out moisture from the cucumbers and enhancing all the flavors.
Variations
I love to switch up this Homemade Dill Pickles Recipe depending on what I have on hand or my mood. Feel free to get creative and make it truly your own—you’ll enjoy how easy it is to tweak flavors and textures.
- Spicy Dill Pickles: I add a few slices of fresh jalapeño or a pinch of red pepper flakes; my family loves the extra zing!
- Sweet and Tangy: Slightly increase the cane sugar for a sweeter pickle, which pairs wonderfully with BBQ dishes.
- Garlic Lovers’ Pickles: Double the garlic cloves for that bold punch of flavor that makes these pickles addictive.
- Herb Variations: I sometimes toss in fresh thyme or rosemary sprigs for a different herbal twist that’s surprisingly delicious.
How to Make Homemade Dill Pickles Recipe
Step 1: Prep Your Cucumbers
First off, decide how you want your pickles: spears or chips. For spears, slice each cucumber lengthwise into quarters. For chips, slice them horizontally into thin rounds. I usually go with spears for sandwiches and chips for snacking because they soak up flavor differently.
Step 2: Pack Your Jars
Divide your cucumber pieces evenly into your clean jars—about 4 jars for 8-ounce size or 2 jars for 16-ounce. Then add the garlic halves, mustard seeds, peppercorns, and a few fresh dill sprigs to each jar. I like tucking the dill sprigs along the sides so you can see their pretty fronds through the glass!
Step 3: Make the Brine
In a medium saucepan, combine water, distilled white vinegar, cane sugar, and sea salt. Heat over medium heat, stirring until the sugar and salt dissolve—this usually takes about a minute. Don’t boil it vigorously; just enough to dissolve everything comfortably.
Step 4: Pour and Chill
Let the brine cool slightly so you don’t shock the cucumbers, then pour it right over them in the jars, making sure everything’s submerged. Leave the jars uncovered until they reach room temperature—this helps prevent cloudiness—and then seal and store them in the fridge.
Step 5: Wait for Pickle Perfection
Here’s the exciting part: your dill pickle spears will be lightly pickled after 2 days, but if you can wait longer, around 5 to 6 days, that classic pickle depth shows up. Dill pickle chips are ready sooner, usually good by day 1 and getting tastier the longer they sit. Remember, patience pays off here!
Pro Tips for Making Homemade Dill Pickles Recipe
- Choose Firm Cucumbers: I always pick the freshest, firmest cucumbers to ensure crunchy pickles that don’t turn mushy in the fridge.
- Don’t Skip the Dill Sprigs: Fresh dill is a must—dried just won’t give you the same vibrant flavor or aroma I love in these pickles.
- Cool Brine Before Pouring: Pouring hot brine can soften cucumbers too much; letting it cool a bit keeps your pickles perfectly crisp.
- Use Glass Jars: Glass keeps flavors pure and lets you admire the beautiful pickles as they transform day by day.
How to Serve Homemade Dill Pickles Recipe
Garnishes
I like to add a few extra fresh dill sprigs on the serving plate for a fragrant touch and sometimes sprinkle a pinch of smoked paprika or chili powder on top of pickle chips for a smoky twist that surprises guests.
Side Dishes
This Homemade Dill Pickles Recipe pairs beautifully with classic deli sandwiches, potato salads, cheeseburgers, and even grilled meats. My family goes crazy for these pickles alongside picnic spreads and barbecue parties.
Creative Ways to Present
For party platters, I like arranging dill pickle spears upright in small jars or cups with toothpicks for easy grabbing. Another fun idea I discovered is layering pickle chips with slices of cheese and deli meat on mini skewers for impressive hors d’oeuvres.
Make Ahead and Storage
Storing Leftovers
I store these homemade dill pickles in airtight glass jars in the fridge, and they keep well for several weeks. Over time, the flavors deepen, so leftovers often taste even better the next day. Just always make sure your cucumbers are submerged in brine to prevent spoilage.
Freezing
Freezing is generally not recommended since it changes the texture, making cucumbers soft and watery. In my experience, it’s best to enjoy these pickles fresh rather than freezing, so you can appreciate that crispy crunch every time.
Reheating
Since these are cold, crisp pickles meant for snacking, reheating isn’t usually needed or recommended. If you ever want warm pickles for a recipe, try gently warming them in a pan with some butter for a unique twist, but the texture will be different.
FAQs
-
How long does it take to make homemade dill pickles?
It takes about 10 minutes to prepare and 1 minute to make the brine. Your pickles will be lightly ready in 1 to 2 days, but I recommend waiting 5 to 6 days for the best flavor development.
-
Can I use regular cucumbers instead of pickling cucumbers?
You can, but pickling or Persian cucumbers are preferred because of their firm texture and fewer seeds, which ensure crisper pickles that hold up better in brine.
-
Do I need to sterilize the jars before pickling?
While this quick refrigerator pickle method doesn’t require sterilized jars, using clean glass jars prevents any unwanted bacteria and keeps your pickles tasting fresh longer.
-
How long do homemade dill pickles last in the fridge?
Stored properly submerged in brine, these pickles last for several weeks in your fridge—usually 3 to 4 weeks—while developing more flavor over time.
-
Can I make these pickles without vinegar?
Vinegar is essential in this recipe to create the acidic environment that preserves the cucumbers and gives them their classic tangy pickle flavor, so it’s best not to skip it.
Final Thoughts
Making this Homemade Dill Pickles Recipe has become one of my favorite kitchen projects because it’s quick, satisfying, and genuinely fun to watch cucumbers transform into delicious tangy pickles. I hope you give it a try and discover the joy of homemade pickles as much as I have. Once you do, I guarantee your fridge will always have a jar or two ready to brighten up any meal or snack!
Print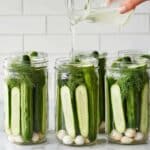
Homemade Dill Pickles Recipe
- Prep Time: 10 minutes
- Cook Time: 1 minute
- Total Time: 10 minutes prep + 1 minute cook + 1 day chilling
- Yield: 16 servings
- Category: Pickles & Ferments
- Method: No-Cook
- Cuisine: American
- Diet: Gluten Free
Description
A simple and refreshing Dill Pickle recipe featuring crunchy Persian or pickling cucumbers, infused with garlic, mustard seeds, peppercorns, and fresh dill. These pickles are quick to prepare and develop their best flavor after a few days in the refrigerator, perfect for a homemade tangy snack or condiment.
Ingredients
Pickles
- 12 to 14 Persian cucumbers or 8 to 10 pickling cucumbers
Flavorings
- 4 garlic cloves, halved
- 2 teaspoons mustard seeds
- 2 teaspoons peppercorns
- Fresh dill sprigs, a few per jar
Pickling Brine
- 2 cups water
- 2 cups distilled white vinegar
- 1/4 cup cane sugar
- 2 tablespoons sea salt
Instructions
- Prepare the cucumbers: To make dill pickle spears, slice the cucumbers lengthwise into quarters. To make dill pickle chips, thinly slice them horizontally. This step ensures the cucumbers absorb the brine and flavors evenly.
- Fill the jars: Divide the cucumber spears or chips evenly among 4 (8-ounce) or 2 (16-ounce) clean glass jars. Distribute the halved garlic cloves, mustard seeds, peppercorns, and fresh dill sprigs evenly into each jar for balanced seasoning.
- Make the pickling brine: In a medium saucepan over medium heat, combine water, distilled white vinegar, cane sugar, and sea salt. Stir the mixture until the sugar and salt completely dissolve, which takes about 1 minute. Then remove from heat and let it cool slightly.
- Pour the brine over cucumbers: Carefully pour the warm brine into each jar, covering the cucumbers and spices completely to ensure proper pickling and flavor infusion.
- Cool and refrigerate: Allow the jars to cool to room temperature. Once cooled, seal the jars with their lids and place them in the refrigerator. This pickling process happens in the fridge, keeping the cucumbers crisp and fresh.
- Pickling timeline: Dill pickle spears will be lightly pickled and ready to eat after about 2 days, with optimal flavor developing around day 5 or 6. Dill pickle chips pickled for 1 day will have some tang, improving in flavor daily thereafter. The pickles can be stored refrigerated for several weeks.
Notes
- Use fresh dill sprigs for the best aromatic flavor.
- Ensure jars and lids are clean and sterilized for safe storage.
- Adjust sugar and salt quantities to taste if desired.
- Cucumbers should be firm and fresh for crisp pickles.
- Store pickles in the refrigerator to keep them crunchy and fresh for weeks.
Nutrition
- Serving Size: 1 pickle spear or equivalent chips
- Calories: 8
- Sugar: 1.5g
- Sodium: 360mg
- Fat: 0g
- Saturated Fat: 0g
- Unsaturated Fat: 0g
- Trans Fat: 0g
- Carbohydrates: 2g
- Fiber: 0.5g
- Protein: 0.3g
- Cholesterol: 0mg

