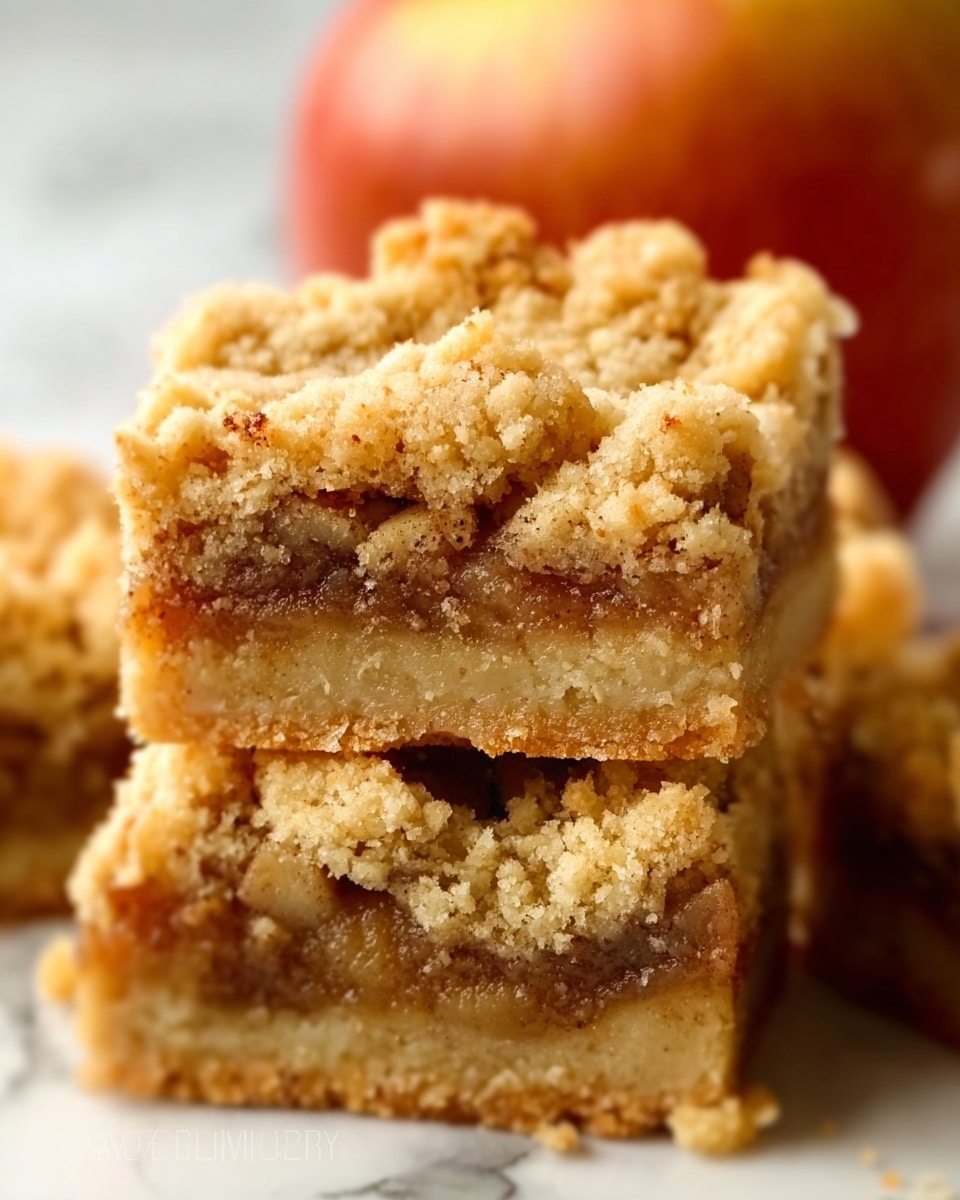
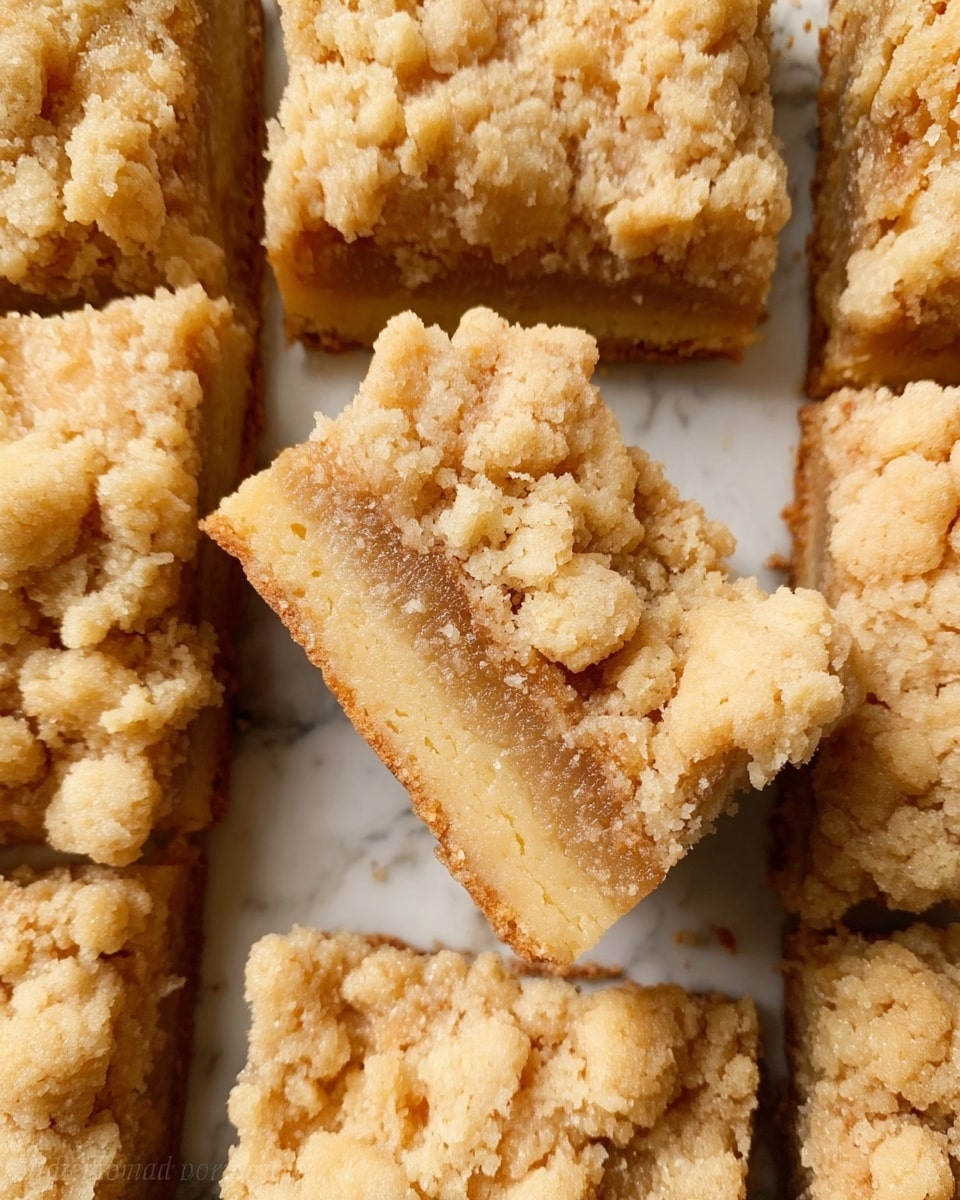
If you’re anything like me, sometimes you want that cozy apple pie flavor but without all the fuss of a traditional pie crust. That’s exactly why I adore this Apple Pie Bars Recipe—it’s like having the soul of apple pie in convenient, handheld portions. You’ll find that these bars bring together a perfectly crumbly, buttery crust with sweet, spiced apples in every bite, making them ideal for lunchbox treats, potlucks, or just an anytime snack with your coffee.
When I first made these apple pie bars, I was surprised by how easy it was to whip them up, and honestly, my family goes crazy for them every time. This recipe works beautifully when you want a dessert that feels homemade but doesn’t demand hours in the kitchen. Plus, because they’re bars, you can slice and save, perfect for busy weeks or spontaneous guests.
Why You’ll Love This Recipe
- Simple Ingredients: Uses pantry staples and fresh apples, no fancy extras needed.
- Easy to Make: No complicated rolling or lattice work like a traditional pie crust.
- Perfect Portioning: Bars are easy to slice, store, and serve for any occasion.
- Deliciously Versatile: Great warm with ice cream or chill and pack for later.
Ingredients You’ll Need
For these apple pie bars, the ingredients are straightforward but thoughtfully chosen to give the perfect balance of sweet, tart, and spice. Picking the right apples and using cold butter really makes a difference here, so I’ll share some tips with you.
- Apples: I recommend using medium-tart varieties like Granny Smith or Honeycrisp for a nice tang and crunch.
- Granulated Sugar: Balances the tartness in the apples and adds caramelized sweetness in the crust and filling.
- All-Purpose Flour: Essential for the crumbs and to thicken the filling; a good quality flour makes the crumb texture perfect.
- Lemon Juice: Adds brightness and prevents your apple filling from browning too fast, which is a small trick I learned over time.
- Ground Cinnamon and Nutmeg: These warm spices are what make this recipe feel so much like fall comfort food.
- Unsalted Butter: Use cold and cubed to create those flaky, melt-in-your-mouth crumbs that hold the apples beautifully.
Variations
I love tweaking this Apple Pie Bars Recipe depending on the season or what I have on hand. Feel free to make this recipe your own with these easy variations.
- Using Cornstarch Instead of Flour: I sometimes swap the flour in the filling for cornstarch to get a clearer, more gel-like apple filling that clings beautifully to the crust.
- Spice It Up: Adding a pinch of ground cloves or ginger elevates the flavor; once I tried a dash of cardamom and it became a family favorite overnight.
- Gluten-Free Version: Substituting the all-purpose flour with a gluten-free blend works well; just make sure the blend contains xanthan gum for structure.
- Mixing Apples: A combination of sweet and tart apples gives great depth; I love pairing Fuji with Granny Smith for a perfect balance.
How to Make Apple Pie Bars Recipe
Step 1: Prep Your Kitchen and Apples
Start by preheating your oven to 350°F (177°C). Then grease an 8-inch square baking dish and line it with parchment paper, making sure to leave about 2 inches of overhang on the sides so you can lift the bars out easily once baked. Peel, core, and chop your apples into small cubes—this helps the filling distribute evenly and cook through. Toss them immediately with lemon juice to keep their color fresh, then mix in sugar, flour, cinnamon, and nutmeg. Set this apple mixture aside while you prepare the crust and crumbles.
Step 2: Make the Crust and Crumbles
In a large bowl, combine the flour, cinnamon, and sugar. Add the cold cubed butter on top and cover it with a little flour mixture to make cutting it in easier. Now, this is the fun part — use two forks, a pastry blender, or your fingertips to cut the butter into the flour mixture until it resembles coarse crumbs. Don’t overwork it; you want bits of butter to remain, which will create a crumbly, flaky texture once baked.
Step 3: Assemble and Bake Your Apple Pie Bars
Take about two-thirds of the dough mixture and press or spoon it evenly into the bottom of your prepared baking dish. I like to flour my spoon or use my hand for spreading because the dough can be sticky. Next, spread the apple filling in an even layer over the crust. Finally, crumble the remaining dough over the apple layer — you can create some larger clusters by squeezing the dough between your fingers for that signature crumbly look. Pop it in the oven and bake for about 55 minutes until the top turns golden brown and crunchy. Let the bars cool completely before slicing—this step is key so the filling sets beautifully and the bars hold together.
Pro Tips for Making Apple Pie Bars Recipe
- Choosing Apples: I always use a tart apple variety for balance; it keeps the filling bright, never too sweet or mushy.
- Cold Butter is a Must: Keeping your butter chilled creates those tender, flaky crumbles you want—warm butter just won’t give the same texture.
- Let It Cool Completely: I learned the hard way that slicing too soon leads to soggy bars; cooling helps the filling set properly.
- Flour Your Spoon: Avoid sticking when spreading the crumb dough by lightly flouring your spoon or using your hand instead.
How to Serve Apple Pie Bars Recipe
Garnishes
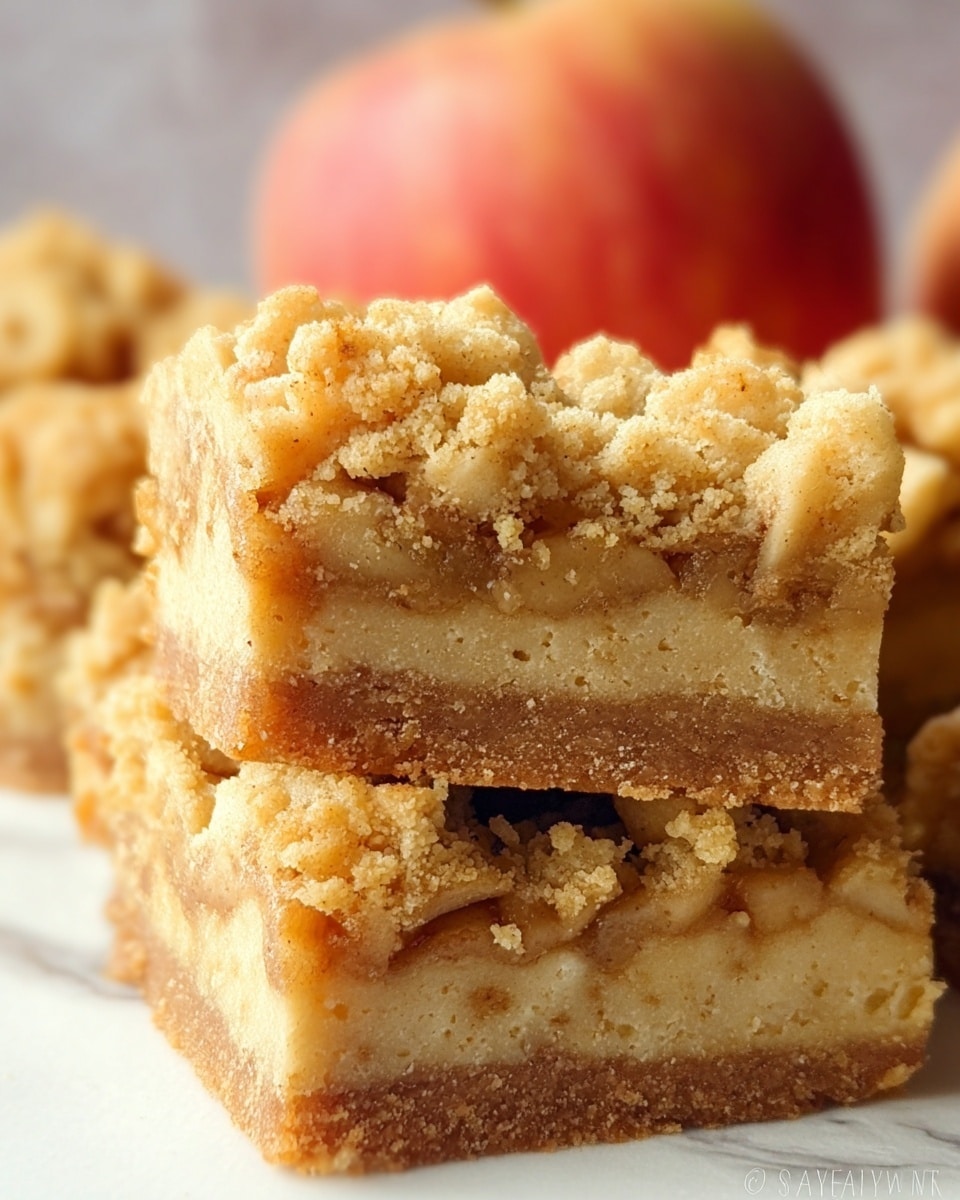
I usually keep things simple with a dusting of powdered sugar or a drizzle of warm caramel sauce over the bars. Sometimes, a scoop of vanilla ice cream on top helps turn these into an irresistible dessert any time of year. A sprinkle of chopped toasted pecans adds a lovely crunch and nutty flavor that pairs beautifully with the apples and cinnamon.
Side Dishes
When serving these bars, I like to keep the sides light and complementary — a dollop of whipped cream or a small bowl of yogurt works well. If it’s breakfast or brunch, they pair wonderfully with a hot cup of coffee or tea and some fresh fruit, making a well-rounded spread without overpowering the bars.
Creative Ways to Present
For holiday gatherings, I’ve made mini versions by cutting the bars smaller and arranging them on a festive platter with apple slices and sprigs of fresh rosemary for a rustic look. You can also serve the bars in pretty cupcake liners to make individual portions feel extra special at parties or potlucks.
Make Ahead and Storage
Storing Leftovers
Once your apple pie bars are fully cooled, I store them in an airtight container in the fridge where they keep well for up to 4 days. I find this gives enough time to savor them without the crust getting soggy. Just bring them to room temperature or warm slightly before enjoying.
Freezing
I’ve frozen these bars multiple times, and they freeze wonderfully. After cooling, wrap individual bars tightly in plastic wrap and place them in a freezer-safe bag or container. They’ll keep for up to 3 months, which is great for prepping desserts ahead of time or saving treats for later.
Reheating
To reheat, I unwrap the bars and warm them in a 325°F oven for about 10 minutes until heated through and the crumb topping regains its crunch. Microwaving works in a pinch, but the topping won’t be as crisp afterward. This little step makes all the difference in preserving the fresh-baked texture.
FAQs
-
Can I use frozen apples for this Apple Pie Bars Recipe?
You can use frozen apples, but it’s best to thaw and drain them first to avoid excess moisture making the crust soggy. Fresh apples give the best texture and flavor, but frozen apples work in a pinch if prepped properly.
-
What’s the best way to get a crunchy topping for these bars?
Using cold butter and cutting it into the flour mixture creates a crumbly texture that crisps up nicely when baked. Avoid overmixing, and bake until the top is golden brown for the crunchiest topping.
-
Can I make these Apple Pie Bars vegan?
Yes! Swap the unsalted butter with a vegan butter substitute. Make sure the substitute is firm and cold to mimic traditional butter for the best crumb texture.
-
How long can I keep apple pie bars at room temperature?
It’s best not to leave apple pie bars out at room temperature for more than two days. After that, refrigeration helps maintain freshness and prevents spoilage.
-
What type of apples do you recommend for best results?
I recommend using tart, firm apples like Granny Smith or Honeycrisp for a good balance of flavor and texture that holds up well during baking.
Final Thoughts
This Apple Pie Bars Recipe has become one of my go-to desserts because it’s simple, reliable, and always pleasing to a crowd. I love how the flavors remind me of crisp autumn days without the fuss of rolling out crust dough or worrying about lattice tops. If you’re craving that classic apple pie taste but in a quicker, more portable form, this recipe is absolutely worth trying. Trust me, once you make these, they’ll become a favorite in your kitchen too!
Print
Apple Pie Bars Recipe
- Prep Time: 20 minutes
- Cook Time: 55 minutes
- Total Time: 1 hour 15 minutes
- Yield: 16 bars
- Category: Dessert
- Method: Baking
- Cuisine: American
Description
Delight in these homemade Apple Pie Bars featuring a buttery, crumbly crust and a tender cinnamon-spiced apple filling. Perfectly baked to a golden brown with crunchy crumbles on top, these bars make a fantastic dessert or snack that captures all the comforting flavors of classic apple pie in an easy-to-serve bar form.
Ingredients
Apple Filling
- 550 g (4 and ½ cups, about 4 medium) chopped cubed apples
- 30 g (2 tablespoons) granulated sugar
- 25 g (2 tablespoons and 1 teaspoon) all-purpose flour* (or use 1 tablespoon cornstarch)
- 2 teaspoons lemon juice
- 1 teaspoon ground cinnamon
- ¼ teaspoon ground nutmeg
Crust & Crumbles
- 280 g (2 cups, dip and sweep method) all-purpose flour**
- 185 g (¾ cup and 1 tablespoon) unsalted butter, cut into small cubes, cold
- 105 g (½ cup) granulated sugar
- 1 teaspoon ground cinnamon
Instructions
- Prepare the oven and dish: Preheat your oven to 350°F (177°C). Grease an 8-inch (20 cm) square oven-proof dish, then line it with parchment paper, allowing about 2 inches (5 cm) overhang on all sides for easy removal.
- Make the apple filling: Peel, core, and chop the apples into small cubes. In a medium bowl, toss the apples with lemon juice, sugar, flour (or cornstarch), cinnamon, and nutmeg to coat evenly. Set aside to allow the flavors to meld.
- Prepare the crust and crumbles: In a large bowl, combine flour, cinnamon, and sugar. Add the cold cubed butter, making sure each piece is covered by the flour mixture. Using two forks, a pastry blender, or your fingertips, cut or rub the butter into the flour until the mixture resembles coarse crumbs.
- Assemble the bars: Spoon about two-thirds of the dough mixture into the prepared dish, spreading it evenly to form the base. Lightly flour your spoon or use your hands to avoid sticking. Layer the apple filling evenly over the crust, then sprinkle the remaining one-third of the dough mixture over top, pressing some down to form larger crumbles.
- Bake: Place the assembled dish in the oven and bake for 55 minutes, or until the top is golden brown and the crumbles are crunchy.
- Cool and serve: Allow the bars to cool completely at room temperature for 1 to 1.5 hours. For quicker cooling, you may place the bars in the freezer. Once cool, use the parchment paper overhang to lift the bars from the dish. Cut into 16 squares and serve. Store leftover bars in an airtight container in the refrigerator for up to 4 days or freeze for up to 3 months.
Notes
- You can substitute 1 tablespoon of cornstarch for the 2 tablespoons and 1 teaspoon of all-purpose flour in the apple filling to achieve a slightly clearer filling.
- The dip and sweep method for measuring flour helps ensure accuracy when using cup measurements.
- Use a sharp knife for cleanly cutting the apple pie bars.
- Measuring cups and spoons used can affect ingredient amounts—using the dip and sweep method for flour prevents packing and too dense a crust.
- Nutrition info is an estimate from an online nutrition calculator and may vary based on specific brands and ingredients used.
Nutrition
- Serving Size: 1 bar (1/16th of the recipe)
- Calories: 205 kcal
- Sugar: 15 g
- Sodium: 50 mg
- Fat: 10 g
- Saturated Fat: 6 g
- Unsaturated Fat: 3.5 g
- Trans Fat: 0 g
- Carbohydrates: 29 g
- Fiber: 3 g
- Protein: 2 g
- Cholesterol: 25 mg

