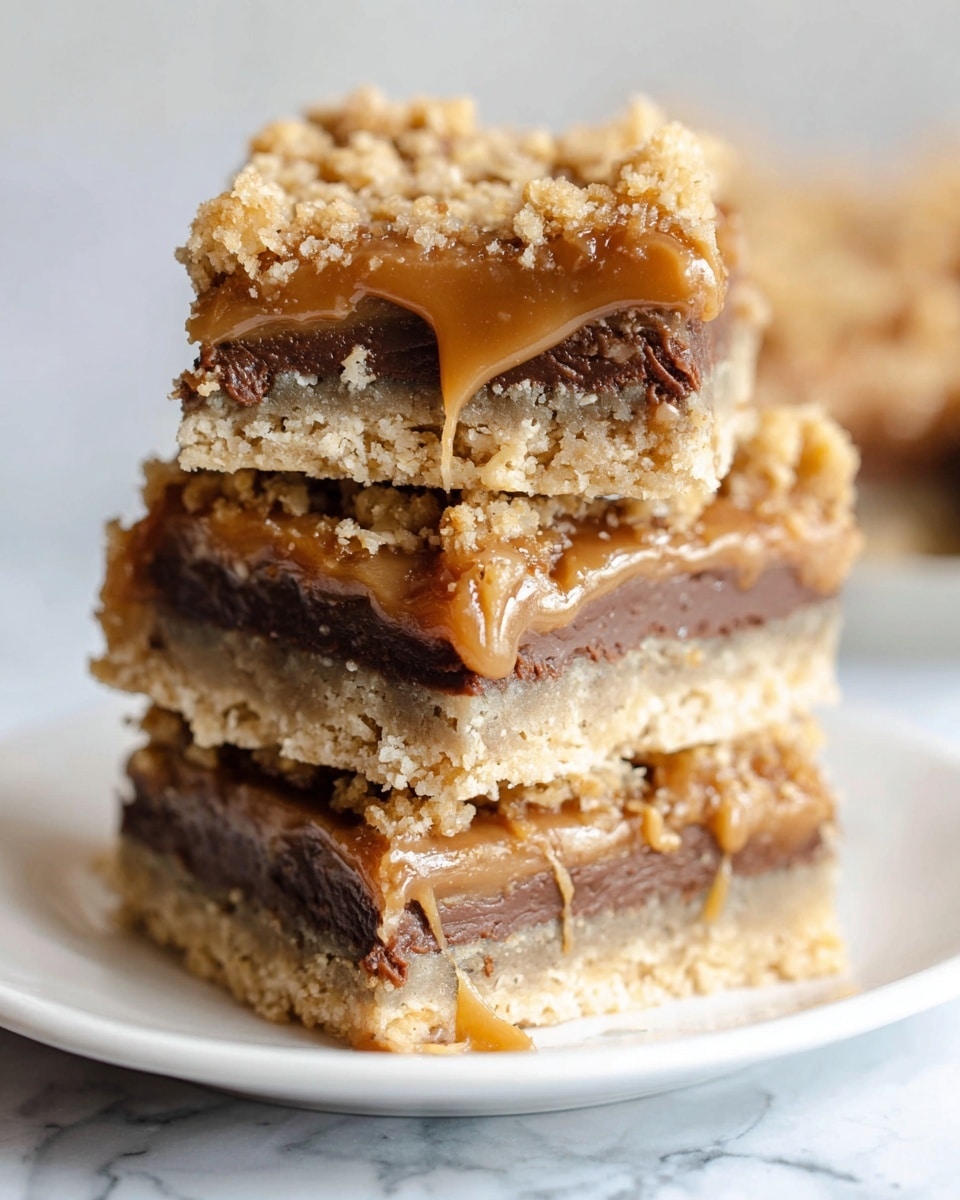
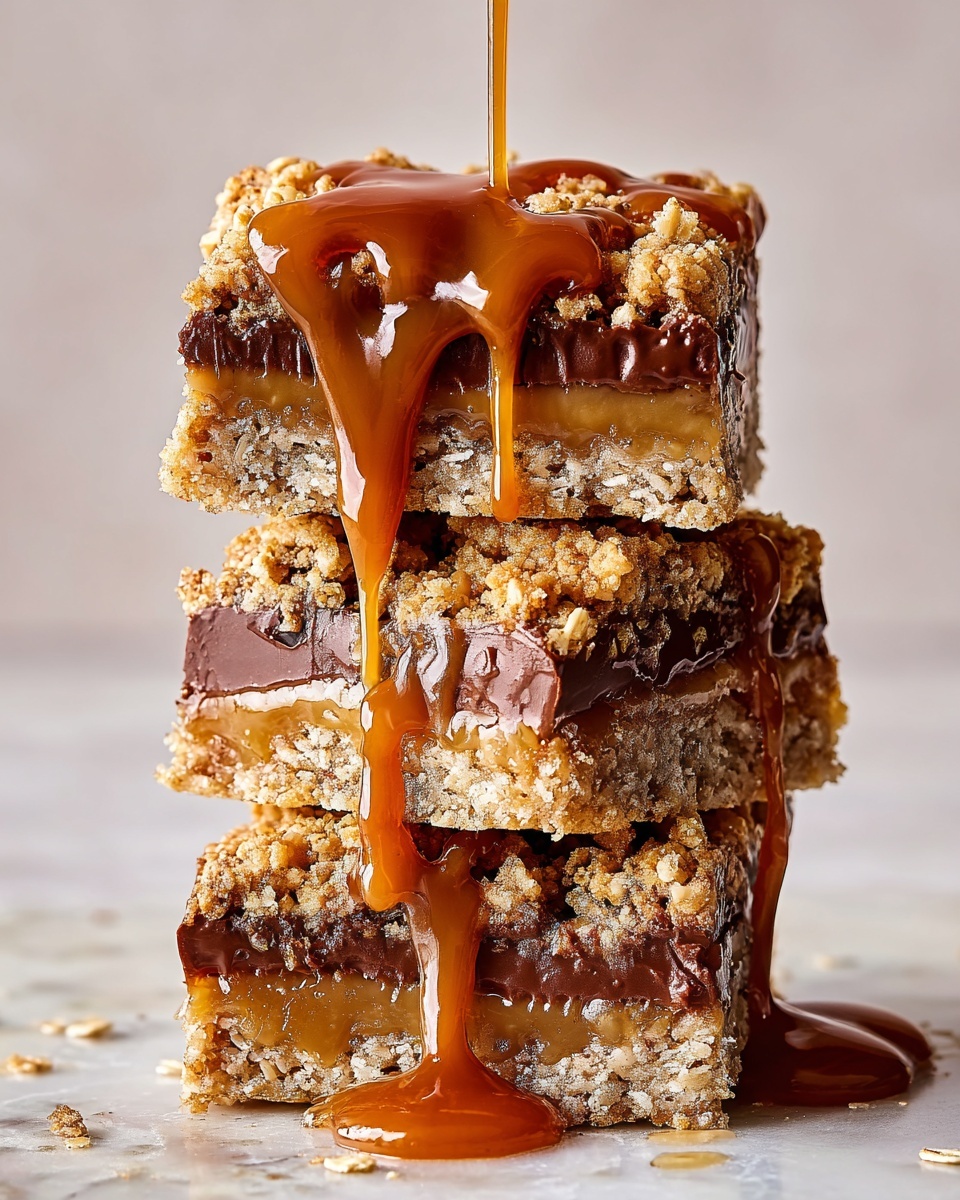
I absolutely love making this Caramelitas Recipe whenever I need a sweet treat that’s both comforting and a little bit fancy. The combination of buttery oat crumble, gooey caramel, and melted chocolate chips is just irresistible—and somehow, it feels both nostalgic and special at the same time. Whenever I bring a pan of these to gatherings, friends always ask for seconds, so I know you’ll appreciate how crowd-pleasing this one is.
What makes this Caramelitas Recipe really shine is its perfect balance of textures and flavors. You get the crisp oats on top and bottom, with a rich, gooey caramel middle that’s studded with chocolate. It’s honestly one of those recipes you’ll want to save as a go-to for potlucks, holiday treats, or anytime you want to wow without fuss. Plus, it’s surprisingly straightforward to pull together, even if you’re not a baking pro.
Why You’ll Love This Recipe
- Simple Ingredients: You probably already have most of them in your pantry, making it easy to whip up anytime.
- Perfect Texture Combo: The contrast of crunchy oats, smooth caramel, and melty chocolate is nothing short of delightful.
- Versatile Dessert: Great for after-dinner treats, coffee breaks, or sharing with friends and family.
- Failsafe Formula: The step-by-step method ensures your Caramelitas come out perfect every time—no baking anxiety!

Ingredients You’ll Need
These ingredients come together beautifully to create a dessert that’s rich, chewy, and crunchy all at once. When shopping, get quality caramels and good chocolate chips to really elevate the flavor.
- Cooking spray: Helps you get your bars out easily without sticking, so don’t skip it.
- All-purpose flour: Forms the sturdy base and top of these bars for that perfect crumble.
- Old-fashioned oats: Adds chewy texture and a wholesome flavor that balances the sweetness.
- Unsalted butter: I always choose unsalted so I can control the salt levels better.
- Light brown sugar: Brings a deep caramel flavor that complements the caramel layer perfectly.
- Pure vanilla extract: Just a splash to enhance all the other flavors.
- Kosher salt: A pinch balances the sweetness and brings out the richness.
- Soft caramels: These melt beautifully to create the gooey center—look for soft, chewy caramels for the best results.
- Whole milk: Keeps the caramel smooth and creamy without making it too runny.
- Flaky sea salt: A sprinkle on top adds that little savory pop that makes these bars unforgettable.
- Semisweet chocolate chips: I love the contrast they add against the caramel’s sweetness, but feel free to swap for milk or dark chocolate.
Variations
I love how versatile this Caramelitas Recipe can be. Over time, I’ve experimented with a few tweaks that you might want to try out to make it your own or to fit different occasions.
- Nutty Twist: Adding chopped pecans or walnuts into the oat mixture adds a satisfying crunch, and my family goes crazy for this upgrade.
- Salted Caramel: Sprinkle extra flaky sea salt over the top before baking for a sweet-salty combo that’s absolutely addictive.
- Vegan Version: Swap the butter for dairy-free margarine and use vegan caramel alternatives to make these plant-based and still delicious.
- Chocolate Variety: Mix semisweet and white chocolate chips to add a pretty contrast and boost sweetness.
How to Make Caramelitas Recipe
Step 1: Prep and start the crust
Begin by preheating your oven to 350°F (175°C). Grease a 13″x9″ pan with cooking spray, then carefully line it with parchment paper—trust me, this helps when it’s time to lift the bars out neatly. Mix together the flour, oats, softened butter, brown sugar, vanilla, and kosher salt until the mixture is crumbly but holds together when pressed. Press half of this oat mixture into the prepared pan to form the crust, then pop it in the oven for about 12 minutes until the edges start turning golden. Let it cool for 10 minutes once it’s out—this step stops the caramel from making the crust soggy later.
Step 2: Make the luscious caramel layer
While your crust is baking, melt the soft caramels and whole milk together in a small saucepan over low heat. Stir gently and patiently—it takes around 12 minutes for everything to become a smooth, creamy caramel sauce. Once melted, stir in a pinch of flaky sea salt to balance that creamy sweetness.
Step 3: Layer chocolate and caramel, then top with oats
Once the crust is cooled, scatter your semisweet chocolate chips evenly over it. Pour the warm caramel sauce right on top and gently spread it to cover all the chocolate. Don’t worry if the caramel isn’t perfectly even—it’ll set beautifully. Finally, sprinkle the reserved oat crumble mixture across the top, pressing down lightly so it stays in place when baking.
Step 4: Bake and cool to perfection
Bake your Caramelitas for about 25 minutes until the oat topping is golden and you can see the caramel bubbling around the edges. When you take it out, let it cool completely in the pan—that waiting game is worth it for clean, easy slicing. Once cool, cut into squares and get ready to enjoy!
Pro Tips for Making Caramelitas Recipe
- Use Soft Caramels: If your caramels are too hard, they won’t melt smoothly—I warm them in the microwave for a few seconds before melting.
- Don’t Overbake the Crust: Pull the crust out when it’s just starting to turn golden to avoid dryness under the caramel layer.
- Parchment is Your Friend: Lining the pan makes lifting the whole batch out a breeze and ensures nice edges.
- Cool Completely Before Cutting: This prevents the caramel from oozing out and keeps your squares neat and tidy.
How to Serve Caramelitas Recipe
Garnishes
I love finishing off these bars with a light sprinkle of flaky sea salt right before serving—it cuts through the sweetness beautifully. Sometimes, I’ll dust a little powdered sugar on top for a pretty, festive touch when sharing during the holidays.
Side Dishes
Caramelitas are pretty rich, so I like to serve them alongside fresh fruit or a scoop of vanilla ice cream. A cup of strong coffee or milk also pairs perfectly to balance the decadence of the caramel and chocolate.
Creative Ways to Present
For parties, I love arranging the Caramelitas on a pretty platter with fresh berries around the edges. Another fun idea I’ve tried is cutting them into bite-sized squares and serving them on cocktail sticks—you can’t help but grab one (or three) at a time!
Make Ahead and Storage
Storing Leftovers
I store leftover Caramelitas in an airtight container at room temperature for up to 4 days. They stay soft but hold their shape nicely, making them perfect for quick snacks throughout the week.
Freezing
You can freeze these bars by wrapping them tightly in plastic wrap and placing them in a freezer-safe bag. I usually cut them into squares first so I can thaw just what I need—then pop them back in the oven for a few minutes to freshen up.
Reheating
To reheat, I warm Caramelitas in a low oven (around 300°F) for about 5-7 minutes to restore that melty caramel texture. You can also microwave individual squares for 10-15 seconds if you’re in a hurry, but be careful not to overheat and make them too soft.
FAQs
-
Can I use caramel sauce instead of caramels for the caramel layer?
Great question! While caramel sauce might seem like a shortcut, it’s often too thin and won’t set as well as melted soft caramels mixed with milk. Using soft caramels gives the perfect thickness and gooey texture that holds up once baked.
-
What can I substitute for semisweet chocolate chips?
You can use milk chocolate, dark chocolate, or even white chocolate chips depending on your preference. Just keep the amount the same, and you’ll still get a lovely chocolate layer that melts beautifully into the caramel.
-
How do I prevent my caramel from burning while melting?
Be sure to melt the caramels and milk over very low heat and stir constantly. Patience is key here—rushing the process or using high heat can cause the caramel to scorch, resulting in a bitter taste.
-
Can I make Caramelitas gluten-free?
Absolutely! Swap the all-purpose flour for a gluten-free blend and ensure your oats are certified gluten-free. The texture might vary slightly but it’s still delicious and worth trying!
Final Thoughts
This Caramelitas Recipe holds a special place in my recipe box because it’s one that always brings smiles. I love how approachable it is—you don’t need fancy ingredients or complicated steps, just a little patience and care. If you try it out, I have a feeling you’ll end up making it again and again for those cozy weekend baking sessions or special celebrations. Trust me, your friends and family will be thanking you!
Print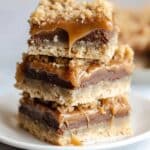
Caramelitas Recipe
- Prep Time: 15 mins
- Cook Time: 37 mins
- Total Time: 1 hr 2 mins
- Yield: 12 bars
- Category: Dessert
- Method: Baking
- Cuisine: American
Description
Delicious and chewy Carmelitas featuring a buttery oat crust, gooey caramel layer, and melted semisweet chocolate chips. This classic bar cookie recipe is perfect for dessert or an indulgent snack, combining rich caramel, chocolate, and oat textures baked to golden perfection.
Ingredients
For the Crust and Topping
- 2 cups (240 g) all-purpose flour
- 2 cups old-fashioned oats
- 1 1/2 cups (3 sticks) unsalted butter, softened
- 1 1/2 cups (320 g) packed light brown sugar
- 2 tsp pure vanilla extract
- 1/4 tsp kosher salt
For the Caramel Layer
- 1 (11-oz) bag soft caramels
- 1/4 cup whole milk
- Pinch of flaky sea salt
Other
- 2 cups semisweet chocolate chips
- Cooking spray
- Parchment paper for lining pan
Instructions
- Preheat and Prepare: Preheat your oven to 350°F (175°C). Grease a 13″ x 9″ baking pan with cooking spray, then line it with parchment paper to prevent sticking and for easy removal of bars.
- Make the Crust Mixture: In a large bowl, combine the all-purpose flour, old-fashioned oats, softened unsalted butter, packed light brown sugar, pure vanilla extract, and kosher salt. Mix everything together until the ingredients form a crumbly, combined mixture. Reserve half of this oat mixture to use as the topping later.
- Form and Bake Crust: Press half of the oat mixture firmly and evenly into the bottom of the prepared pan to form the crust layer. Bake the crust in the oven until it just starts turning golden brown, approximately 12 minutes. Once done, remove and let it cool for 10 minutes to set slightly.
- Prepare Caramel Sauce: While the crust is baking, place the soft caramels and whole milk in a small saucepan over low heat. Stir occasionally and gently cook until the caramels have fully melted and combined with the milk to form a smooth sauce, about 12 minutes. Stir in a pinch of flaky sea salt for added flavor complexity.
- Assemble Layers: Evenly scatter the semisweet chocolate chips over the cooled crust. Pour the warm caramel sauce over the chocolate chips and gently spread it to cover them completely. Then, sprinkle and flatten the reserved oat mixture over the caramel layer to create the topping.
- Bake Final Carmelitas: Return the pan to the oven and bake until the oat crumble is golden and the caramel is bubbling around the edges, about 25 minutes. Once baked, remove from oven and allow the Carmelitas to cool completely in the pan.
- Serve: Slice the cooled Carmelitas into 12 squares and serve. These bars are delicious served at room temperature or slightly chilled.
Notes
- For easier slicing, refrigerate the Carmelitas for at least 1 hour after baking.
- You can substitute light brown sugar with dark brown sugar for a deeper molasses flavor.
- Use parchment paper with overhang on the sides for easier removal from the pan.
- Store leftovers in an airtight container at room temperature for up to 3 days or refrigerate for up to 1 week.
Nutrition
- Serving Size: 1 bar (approx. 80g)
- Calories: 380
- Sugar: 28g
- Sodium: 110mg
- Fat: 22g
- Saturated Fat: 14g
- Unsaturated Fat: 7g
- Trans Fat: 0.3g
- Carbohydrates: 45g
- Fiber: 3g
- Protein: 4g
- Cholesterol: 55mg


