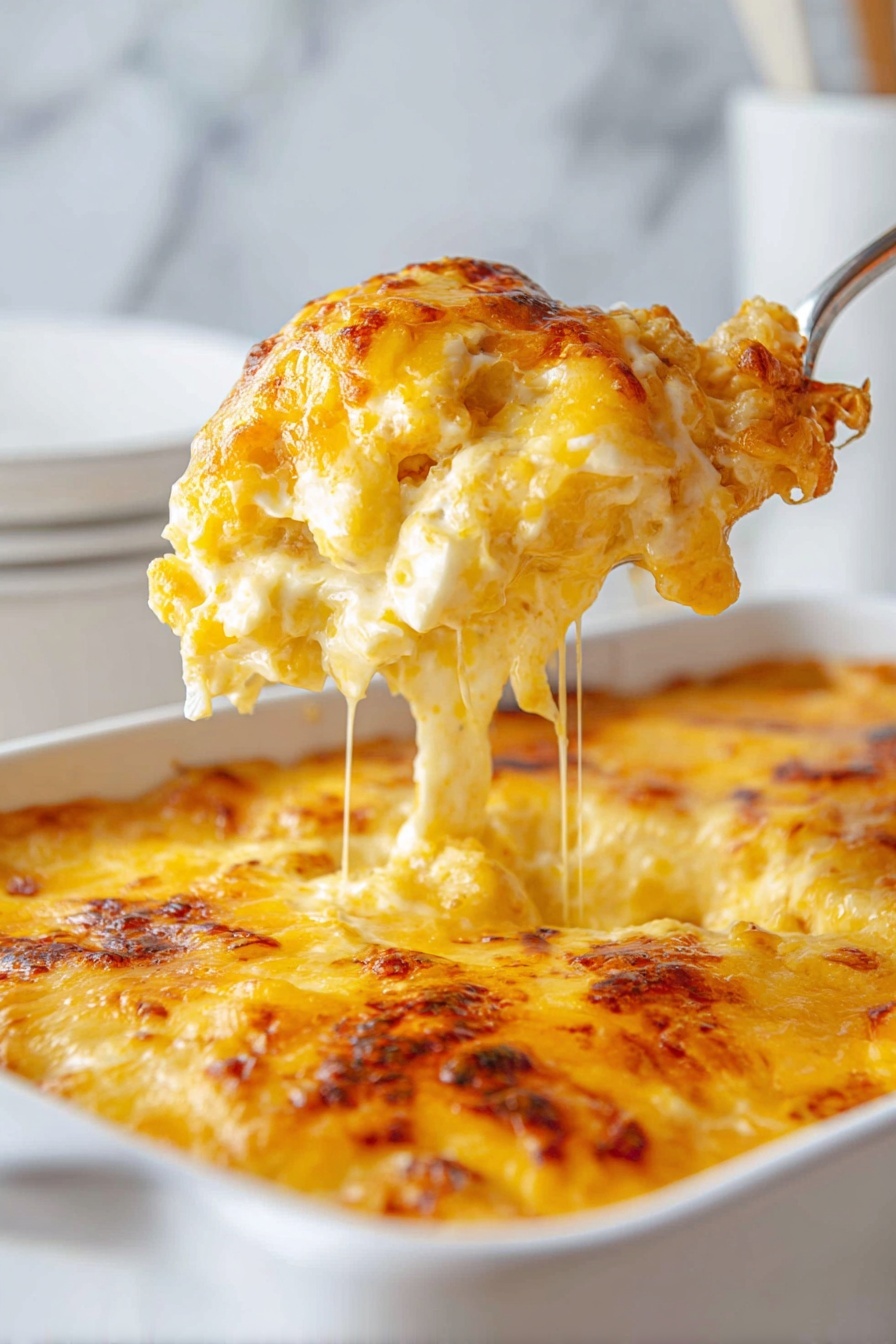
If you’re craving that cozy, comforting dish that takes you straight back to childhood dinners and family gatherings, I’ve got you covered with my Classic Baked Macaroni and Cheese Recipe. This isn’t just any mac and cheese — it’s that velvety, cheesy, baked goodness that becomes everyone’s favorite when it arrives at the table. Believe me, once you try this recipe, it will become your go-to for potlucks, weeknight dinners, or whenever you need a little extra comfort on your plate.
Why You’ll Love This Recipe
- Authentic Flavor Blend: The mix of Velveeta with sharp cheddar, Colby, and Monterey Jack cheeses gives buttery richness and depth you just can’t beat.
- Creamy Custard Magic: Using evaporated milk and a spiced custard base ensures the cheese sauce bakes into perfectly creamy, not runny or dried out.
- Golden Topping Every Time: The paprika finish and perfect bake time guarantee a bubbly, golden crust that gets the whole family excited.
- Family Favorite Versatility: You can customize seasonings or add-ins easily, making it a guaranteed hit for any crowd.

Ingredients You’ll Need
Getting the right balance of cheeses and seasonings really sets this Classic Baked Macaroni and Cheese Recipe apart. Don’t skip the Velveeta—it melts like a dream and blends beautifully with the sharper shredded cheeses.
- Elbow macaroni: Classic shape that holds the creamy sauce nicely.
- Large egg: Helps bind the sauce for that custard texture.
- Evaporated milk: Adds creaminess without watering down flavor.
- Velveeta cheese: Provides smooth meltiness and a mild cheese base.
- Colby cheese: A mild shredded cheese that melts well.
- Monterey Jack cheese: Adds a creamy, mild tang to the blend.
- Sharp cheddar cheese: Brings a punch of bold cheese flavor.
- Heavy cream: Richens the sauce for a luscious mouthfeel.
- Salted butter: Adds richness and helps with melting infusing flavor.
- Sour cream: Gives a subtle tang that balances richness.
- Cracked black pepper: For a gentle kick of spice.
- Seasoned salt: Adds depth and enhances all flavors.
- Cayenne pepper: Just a hint to brighten the cheese.
- Ground white pepper: Helps create a smooth flavor without dark specks.
- Garlic powder: Ultimate umami booster.
- Ground mustard: Cuts through richness with subtle sharpness.
- Onion powder: Adds savory sweetness.
- Paprika: For color and a mild smoky note on top.
- Granulated sugar: Balances acidity and enhances flavors.
- Ground nutmeg: A secret warming spice that rounds it all out.
Variations
I love that this Classic Baked Macaroni and Cheese Recipe is a great canvas—you can tweak it to suit your taste or dietary needs without losing what makes it special.
- Add Bacon or Ham: My family goes crazy when I toss in crispy bacon bits or small ham chunks for some smoky, meaty bites.
- Make it Spicy: For a little heat, I’ve added chopped jalapeños or swapped cayenne for smoked chipotle powder—delicious twist!
- Gluten-Free Pasta: I usually swap elbow macaroni for a gluten-free alternative and it bakes up just as creamy.
- Extra Veggies: Throw in some steamed broccoli or sauteed mushrooms to sneak in a little nutritious goodness.
How to Make Classic Baked Macaroni and Cheese Recipe
Step 1: Prepare Your Dish and Cheeses
Start by greasing your 8×8 inch baking dish so your mac and cheese doesn’t stick. Preheat your oven to 350ºF—trust me, you want it ready to go as soon as you finish tossing everything together. Grate all your shredded cheeses and dice the Velveeta and butter into small cubes. I like to combine half of the shredded cheeses with the Velveeta and butter right in the baking dish to start layering flavor from the bottom up.
Step 2: Cook Pasta to Al Dente
Boil your elbow macaroni in salted water according to package instructions, but make sure to take it off the heat just as it reaches al dente—it will finish cooking in the oven. Overcooked pasta can end up mushy, and that’s not what we’re aiming for in this recipe.
Step 3: Whisk Together the Custard Sauce
While your pasta is boiling, mix evaporated milk, heavy cream, sour cream, egg, granulated sugar, and all the spices—except the paprika—in a large bowl. Whisk until you don’t see any streaks of egg. This creamy custard mixture is the secret to getting that smooth, rich baked sauce everyone raves about.
Step 4: Combine Pasta and Cheese Layers
Drain the noodles and immediately add the hot pasta to your baking dish with butter and cheeses. Stir well so the heat from the pasta starts melting the cheese and butter. Spread out evenly, then sprinkle a thin layer of the remaining shredded cheese on top.
Step 5: Pour Your Custard and Top
Pour the custard liquid slowly over the cheese and noodles. The liquid should come just to the top edge of the noodles—too much and it’ll be soupy, too little and it won’t be creamy enough. Then add the last cheese layer and sprinkle on the paprika for that lovely golden color.
Step 6: Bake Until Bubbling and Golden
Bake for 40-45 minutes until bubbly around the edges and perfectly golden on top. If you want that extra crisp, switch the oven to broil for 2-3 minutes at the end—but watch it carefully so it doesn’t burn. Then, and I can’t stress this enough, let the baked mac cool and rest for at least 10 minutes before serving. I literally had to remind my family not to dive in immediately—it sets beautifully and slices so much nicer after resting.
Pro Tips for Making Classic Baked Macaroni and Cheese Recipe
- Cheese Shred Size Matters: I shred my cheeses finely to ensure they melt smoothly and evenly throughout the dish.
- Don’t Skip Sour Cream: I learned this twist adds that touch of tang and creaminess that brightens the flavor beautifully.
- Watch the Broil: When browning the top, keep a close eye—those last few minutes can flip from perfect gold to burned quick.
- Rest Time is Key: Letting it rest is a game-changer—it firms up the custard and makes serving so much cleaner and easier.
How to Serve Classic Baked Macaroni and Cheese Recipe
Garnishes
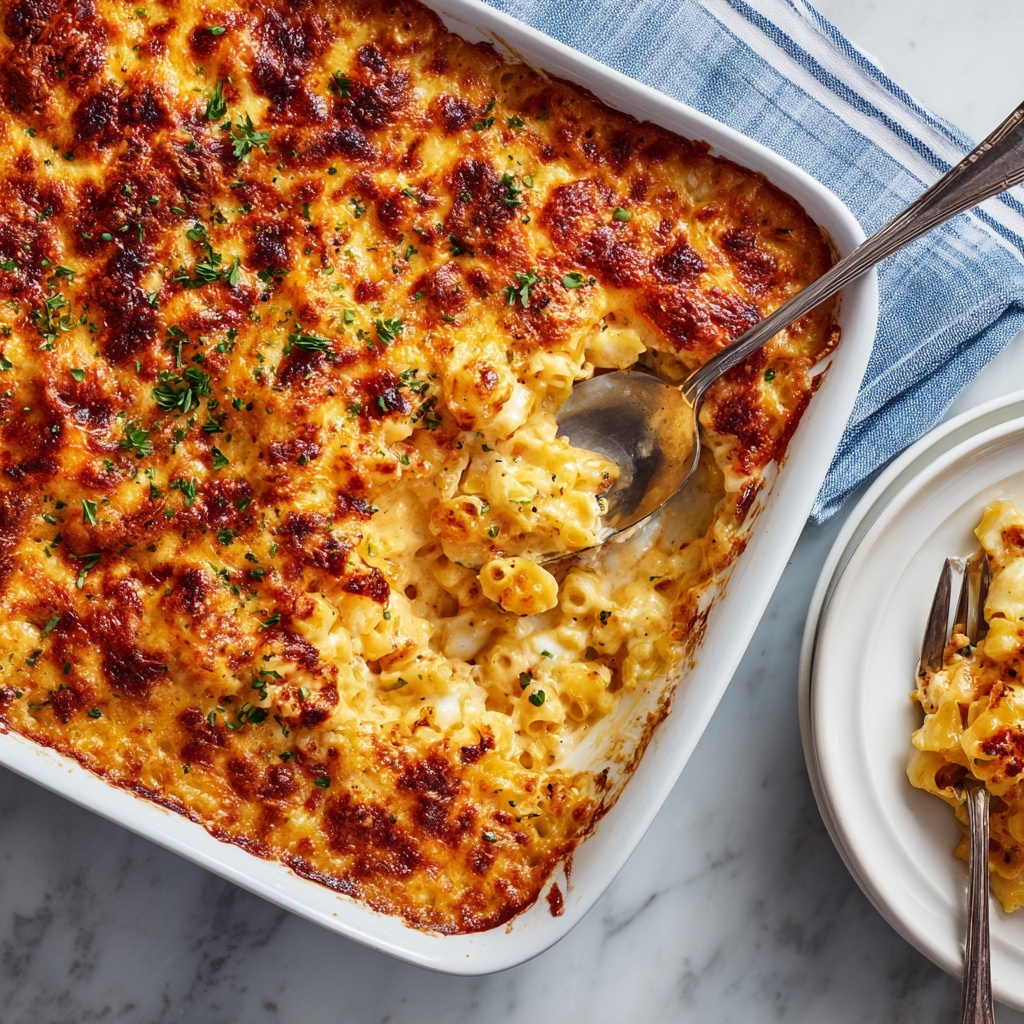
I usually keep it simple with freshly cracked black pepper on top and sometimes a sprinkle of chopped fresh parsley to add a pop of color. Occasionally, I like a dusting of extra paprika or a few red pepper flakes for subtle heat. These little touches really enhance the visual appeal without overpowering that cheesy richness.
Side Dishes
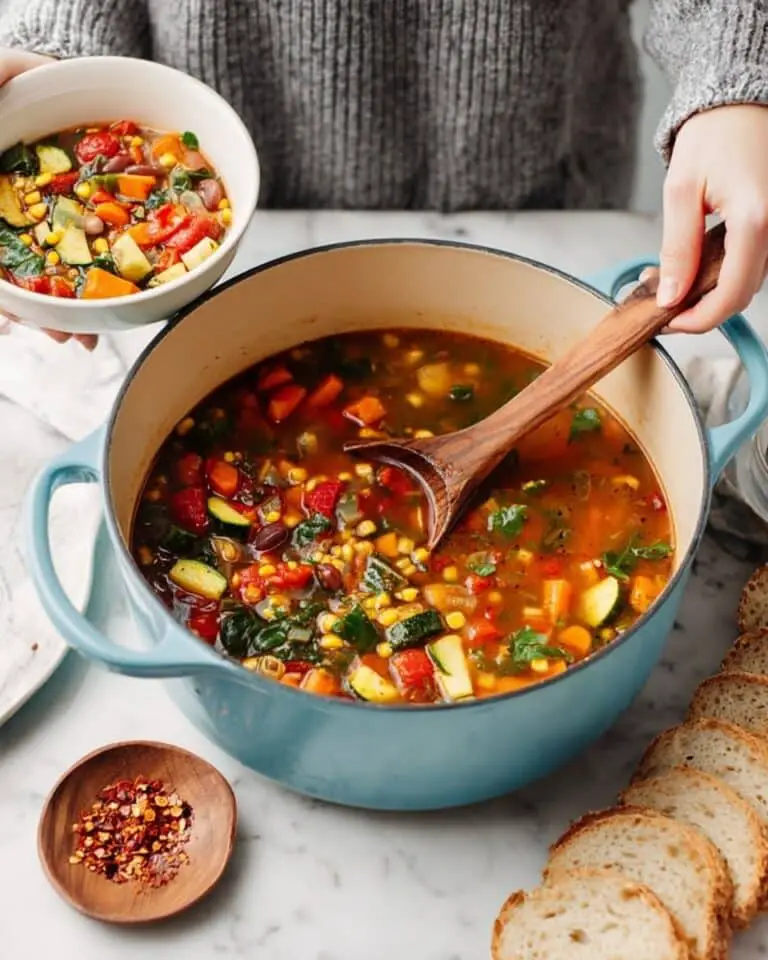
This mac and cheese pairs wonderfully with a crisp green salad or steamed green beans to cut through the richness. When I want heartier options, some roasted chicken or barbecue ribs on the side make the meal feel complete and festive.
Creative Ways to Present
For special occasions, I’ve served this baked mac and cheese in individual ramekins—everyone loves having their own personal cheesy casserole. Sometimes, I add a crunchy breadcrumb topping mixed with Parmesan for extra texture. It turns a classic into something a bit more gourmet-looking without much extra effort.
Make Ahead and Storage
Storing Leftovers
Leftover mac and cheese stores beautifully in an airtight container in the fridge for up to 4 days. I recommend letting it cool completely before sealing the container to keep that creamy texture intact. I always find that storing it this way keeps the flavors fresh and the cheese sauce from separating.
Freezing
I’ve frozen this recipe a few times with good success. Just make sure to cool it fully, portion it into freezer-safe containers, and freeze for up to 3 months. Thaw overnight in the fridge before reheating to maintain the creamy texture and avoid watery sauce.
Reheating
To reheat, cover the mac and cheese with foil to keep moisture in and bake at 350ºF for about 20-25 minutes until warmed through. If you want to refresh the crust, remove the foil during the last 5 minutes of baking. Microwaving works for a quick fix but can sometimes make it less creamy.
FAQs
-
Can I use regular milk instead of evaporated milk?
You could, but evaporated milk gives a richer, thicker texture that regular milk doesn’t provide as well. If you replace it with regular milk, I recommend using whole milk and consider reducing any additional cream to keep the sauce creamy.
-
Why does my mac and cheese sometimes come out watery?
This usually happens if the pasta is overcooked or the custard mixture has too much liquid. Make sure the macaroni is just al dente before baking and pour the custard slowly—do not exceed the noodles’ top line in the dish.
-
Can I make this recipe ahead of time?
Absolutely! You can assemble the mac and cheese a day ahead, cover it tightly, and refrigerate. When you’re ready, bake it straight from the fridge—just add a few extra minutes to the baking time.
-
What’s the best cheese to use for the creamiest result?
The combination of Velveeta for smooth melt, sharp cheddar for flavor, and Monterey Jack and Colby for creamy texture is what I found works best for an indulgent, creamy dish every time.
Final Thoughts
This Classic Baked Macaroni and Cheese Recipe has absolutely become a staple in my kitchen and I’m excited for you to try it. The way the cheese custard melds with perfectly cooked pasta and bakes up golden and bubbly is pure magic. Whether you’re new to baking mac and cheese or looking for a foolproof traditional recipe, this one will have you coming back again and again—just like my family does. I can’t wait to hear how it turns out for you!
Print
Classic Baked Macaroni and Cheese Recipe
- Prep Time: 30 minutes
- Cook Time: 45 minutes
- Total Time: 1 hour 15 minutes
- Yield: 8 servings
- Category: Main Dish
- Method: Baking
- Cuisine: American
Description
Ol’ School Macaroni and Cheese is a creamy, cheesy baked pasta dish that combines multiple cheese varieties with a rich custard base for an indulgent classic comfort food perfect for family dinners or special occasions.
Ingredients
Pasta
- ½ Lb elbow macaroni
Cheeses and Dairy
- 1 C Velveeta (diced)
- 1 C Colby cheese (shredded)
- 1 C Monterey jack cheese (shredded)
- 1 C sharp cheddar cheese (shredded)
- ⅓ C heavy cream
- 4 Tbsp salted butter (diced)
- 2 Tbsp sour cream
Custard and Seasonings
- 1 large egg
- 1 12-oz can evaporated milk
- ½ Tbsp cracked black pepper
- ½ Tbsp seasoned salt (to taste)
- ¼ Tsp cayenne pepper
- 1 Tsp ground white pepper
- 1 Tsp garlic powder
- ½ Tsp ground mustard
- ½ Tsp onion powder
- ½ Tsp paprika
- ½ Tsp granulated sugar
- ⅛ Tsp ground nutmeg
Instructions
- Prepare the Baking Dish and Oven: Grease an 8×8″ square baking dish thoroughly and preheat your oven to 350ºF to ensure even baking.
- Grate and Combine Cheeses: Grate the Colby, Monterey Jack, and sharp cheddar cheeses and combine them in a large bowl. Cut the Velveeta and butter into small cubes. Place the butter, Velveeta, and half of the shredded cheeses into the prepared baking dish.
- Cook the Macaroni: On the stovetop, boil the elbow macaroni in salted water until just al dente according to package directions. Drain immediately.
- Prepare the Custard Mixture: While the pasta cooks, whisk together evaporated milk, heavy cream, sour cream, egg, sugar, and all seasonings except paprika in a large bowl until fully combined and smooth with no streaks of egg.
- Combine Pasta and Cheese in Baking Dish: Add the hot drained noodles to the baking dish with the butter, Velveeta, and half the shredded cheeses. Stir gently to start melting the cheeses and distribute evenly.
- Add Cheese Layer and Pour Custard: Sprinkle a thin layer of shredded cheese over the noodles, then pour the prepared custard over the entire dish, making sure the liquid reaches just to the top of the noodles.
- Final Cheese Topping and Seasoning: Sprinkle the remaining shredded cheese evenly on top and finish with a dusting of paprika.
- Bake the Dish: Bake in the preheated oven for 40-45 minutes until golden brown and bubbling around the edges. If the top isn’t browned enough after 45 minutes, broil for 2-3 minutes but watch carefully to prevent burning.
- Rest Before Serving: Allow the macaroni and cheese to rest for at least 10 minutes before serving to let it set properly and enhance flavors. Resist the urge to cut into it immediately!
Notes
- This recipe is a classic take inspired by traditional family-style cooking, reminiscent of the way your grandmother might have made it.
- Adapted from Sweetie Pie’s recipe for that nostalgic, bold cheese flavor.
- Letting the dish rest after baking is essential for the best texture and ease of serving.
- You can adjust seasoning salts and peppers to taste depending on your preference for spice and saltiness.
Nutrition
- Serving Size: 1 serving
- Calories: 450 kcal
- Sugar: 4 g
- Sodium: 1241 mg
- Fat: 28 g
- Saturated Fat: 17 g
- Unsaturated Fat: 8 g
- Trans Fat: 0.2 g
- Carbohydrates: 27 g
- Fiber: 1 g
- Protein: 21 g
- Cholesterol: 103 mg


