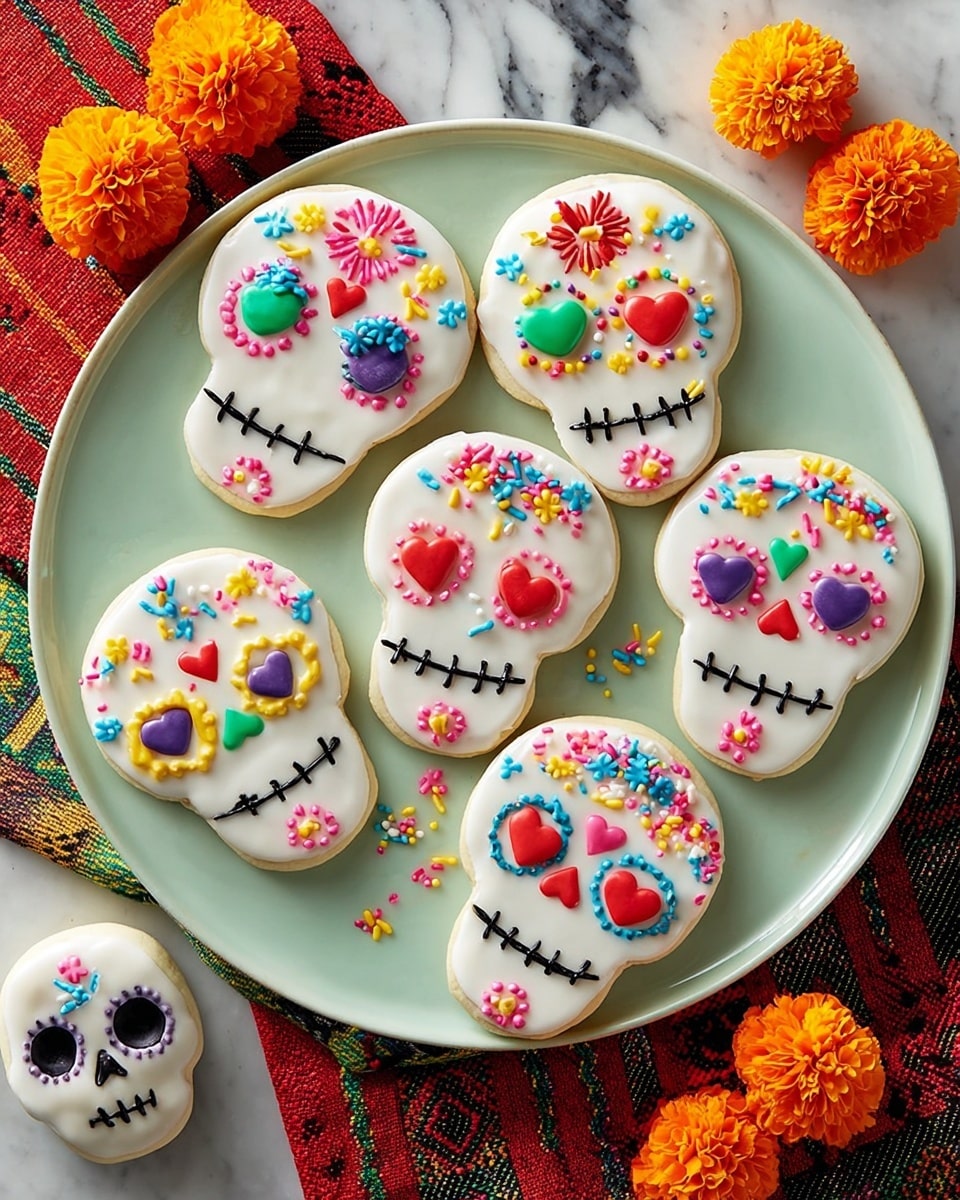
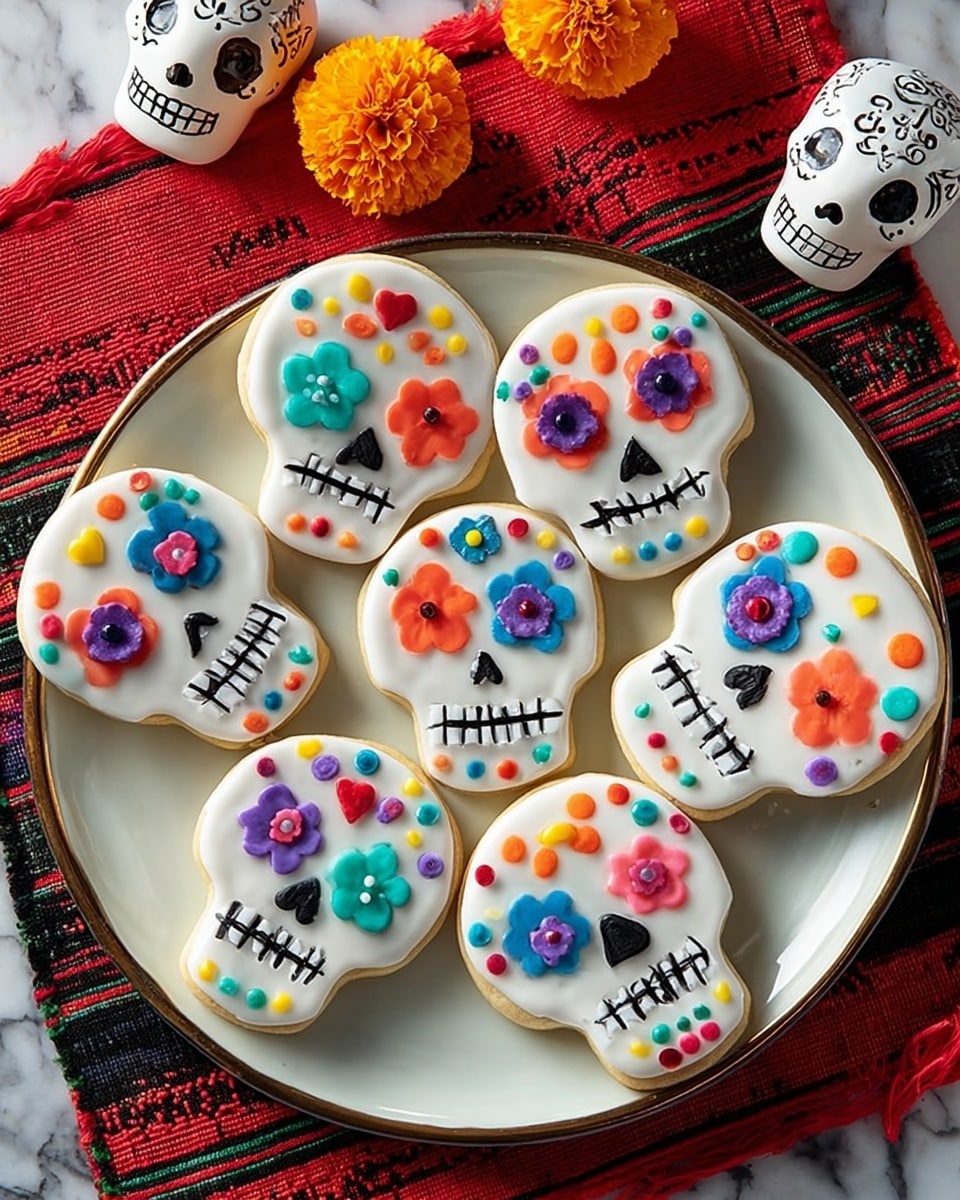
If you’re anything like me, the vibrant colors and festive spirit of Día de los Muertos immediately bring a smile—and what better way to celebrate than with a batch of deliciously fun cookies? This Day of the Dead Cookies Recipe is truly fan-freaking-tastic, combining tender almond-flavored dough with a sweet, white candy coating adorned with colorful decorations. You’ll find that these cookies not only taste incredible but also bring a joyful pop of color to your holiday table! Stick around—I can’t wait to share all my tips and secrets to help you nail these festive cookies perfectly every time.
Why You’ll Love This Recipe
- Rich Almond Flavor: The almond paste gives the dough such a wonderful nutty depth that makes these cookies stand out from your usual sugar cookies.
- Perfectly Soft and Tender: Thanks to a bit of milk and careful baking, these cookies stay soft with just the right chew.
- Fun and Festive Decoration: The white candy coating and colorful candies let you get really creative with your decorating, making them a hit with kids and adults alike.
- Makes a Sweet Tradition: They’re great for sharing with family or gifting—every year, my family goes crazy for these around the holiday!
Ingredients You’ll Need
This Day of the Dead Cookies Recipe uses simple pantry staples but brings them together for something a little special. A couple of key tips: use almond paste for flavor depth, and get that dough chilled well—trust me on this one, it makes rolling and cutting easier than you’d expect!
- Butter: Make sure it’s softened to room temperature for smooth creaming with sugar.
- Confectioners’ Sugar: Gives the dough a delicate sweetness and helps keep the texture tender.
- Almond Paste: This ingredient adds that signature nutty flavor I just adore in these cookies.
- Egg: For binding and richness; room temperature is best so it incorporates smoothly.
- 2% Milk: Adds moisture without making the dough too soft.
- Vanilla Extract: Just a touch to round out all the flavors.
- All-Purpose Flour: The base that holds everything together; sifted or well mixed to avoid lumps.
- Salt: Small but mighty—it balances sweetness and enhances flavor.
- White Candy Coating Melts: Melts easily for dipping and sets with a nice smooth finish, perfect for decorating.
- Optional Decorations: From jumbo sprinkles to Skittles and even Twizzlers, these add personality and fun—plus kids love picking their favorites to customize their cookies.
- Black Paste Food Coloring: For piping the iconic Day of the Dead skull “mouths” and accents with precision.
Variations
I love making this Day of the Dead Cookies Recipe my own by switching up decorations and even playing with flavors. You can easily make it your own, and the cookies still come out amazing—believe me, I’ve tried a few different ways!
- Almond-Free: If you’re allergic or just don’t love almond paste, substitute with more butter and a splash of almond extract or vanilla for a different but tasty cookie.
- Chocolate Candy Coating: Instead of white melts, you can dip the cookies in dark or milk chocolate melts and decorate with bright candies for a rich twist.
- Gluten-Free Version: I’ve had success swapping in a gluten-free all-purpose flour blend—just make sure it’s one that measures cup-for-cup.
- Decorating Fun: Try piping royal icing in vibrant colors or using edible markers to add details beyond just candy decorations.
How to Make Day of the Dead Cookies Recipe
Step 1: Cream Butter, Sugar & Almond Paste
Start by beating the softened butter and confectioners’ sugar together in a large bowl until the mixture becomes nice and light—about 3 to 4 minutes. This step makes a huge difference in the cookie texture, so don’t rush it! Then add in the almond paste and beat until it’s fully combined. I discovered this trick early on, and it takes the flavor to the next level.
Step 2: Mix in Egg, Milk, and Vanilla
Next, add the large egg, the 2% milk, and the vanilla extract. Beat until everything is creamy and smooth. I like to use room temperature eggs because it helps the ingredients blend seamlessly without curdling.
Step 3: Add Dry Ingredients & Chill the Dough
Whisk together the flour and salt separately. Then gradually add this to your wet mixture, mixing well until it forms a soft dough. Here’s where patience pays off—once mixed, cover the dough and refrigerate for at least an hour. Chilling makes it much easier to roll out and cut, and it helps keep your cookies from spreading too much during baking.
Step 4: Roll and Cut Your Cookies
On a lightly floured surface, roll out the dough to about 1/4-inch thickness. I like using a floured 5-inch skull-shaped cookie cutter for the authentic Day of the Dead vibe. You’ll want to space your cookies about an inch apart on ungreased baking sheets—trust me, they bake best without greasing.
Step 5: Bake and Cool
Bake them at 375°F for 7-9 minutes until they’re firm but not browned. Since every oven is different, keep an eye after 7 minutes—you’re looking for firm edges but still soft centers. Let them cool on the baking sheet for 2 minutes before transferring to wire racks to cool completely. This little wait makes handling them easier and keeps them from breaking.
Step 6: Dip and Decorate
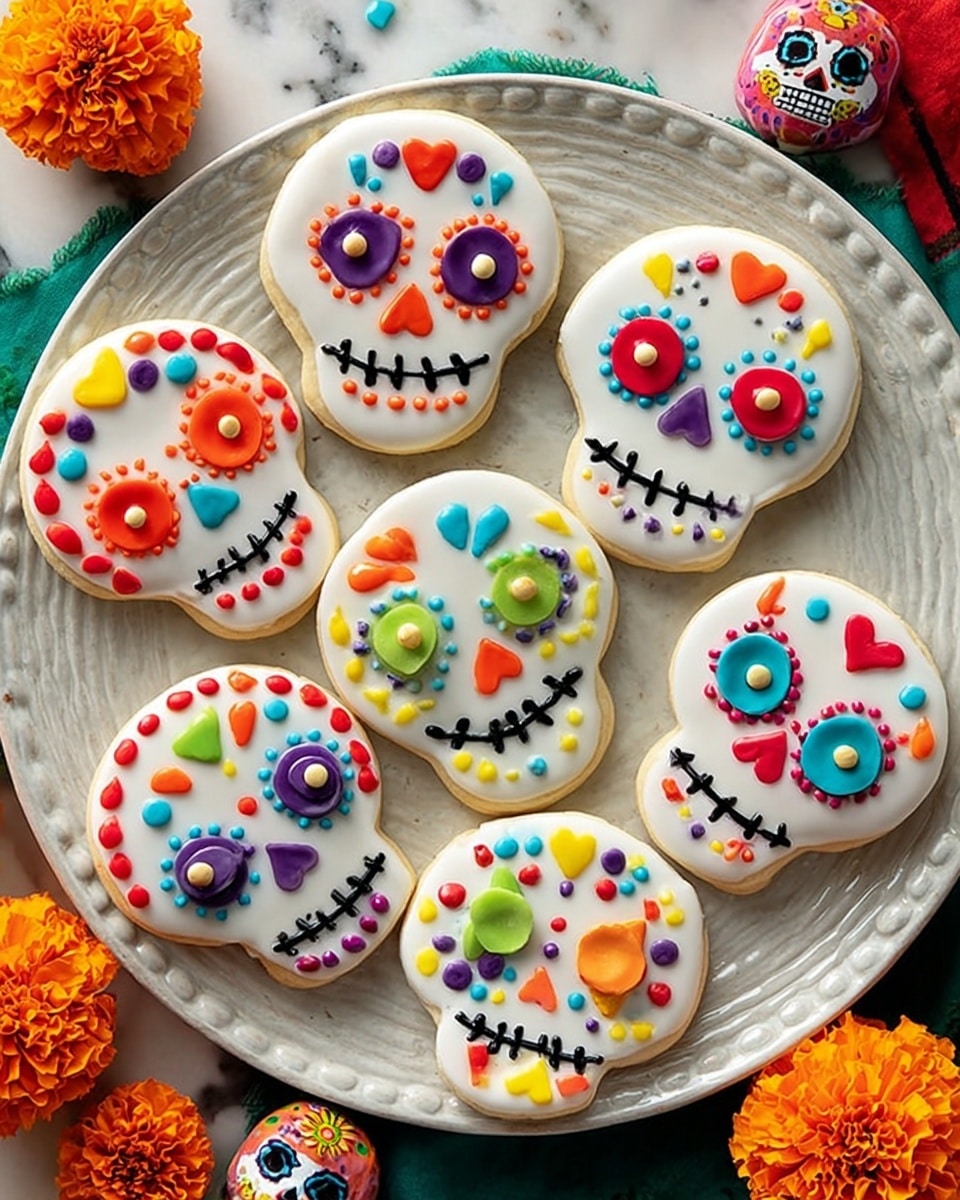
Now for my favorite part! Melt the white candy coating melts in a shallow microwave-safe dish according to the package instructions. Dip the top side of each cooled cookie into the coating, gently shaking off excess. Place them on waxed paper and immediately add your decorations—jumbo sprinkles, peppermint candies, Skittles, or whatever you love. I always keep extra candies on hand so everyone can customize their own.
Use a little black paste food coloring to tint some of the remaining white coating, then pipe on the iconic mouths and teeth to complete your beautiful Day of the Dead cookies. Let stand until fully set before serving or storing.
Pro Tips for Making Day of the Dead Cookies Recipe
- Chill Your Dough Enough: I learned that less than an hour in the fridge makes the dough tough to roll—don’t skip this step!
- Use Room Temperature Ingredients: This helps everything blend smoothly and keeps your dough consistent.
- Don’t Overbake: Cookies will firm up as they cool; pulling them out a bit early keeps them soft and tender.
- Be Creative with Decorations: I always keep a variety of candies nearby to experiment—sometimes the most unexpected combos turn out to be crowd-pleasers!
How to Serve Day of the Dead Cookies Recipe
Garnishes
For garnishes, I love adding vibrant jumbo sprinkles and colorful candy pieces right after dipping, while the coating is still wet. It not only looks festive but adds a fun crunch. For the tiny details, black piping really brings the cookies to life. I sometimes even add edible glitter for a subtle sparkle that kids adore.
Side Dishes
These cookies pair beautifully with a cup of rich Mexican hot chocolate or a smooth chai latte—perfect for cozy gatherings. I sometimes serve them alongside pan dulce or fresh fruit to balance out the sweetness and add variety to my Day of the Dead celebrations.
Creative Ways to Present
For parties, I like to arrange these cookies on bright, colorful platters or wooden boards decorated with marigold flowers, which tie into Día de los Muertos traditions. Another fun idea is packaging them individually in clear gift bags tied with ribbon—these make wonderful gifts or festive party favors!
Make Ahead and Storage
Storing Leftovers
I keep leftover cookies in an airtight container at room temperature, layered with parchment paper to prevent sticking. They stay fresh and soft for about 4-5 days—though honestly, they rarely last that long in my house!
Freezing
You can definitely freeze these cookies, either baked or unbaked dough. For baked cookies, freeze after decorating on a single layer, then transfer to a sealed container with parchment layers. When ready to eat, thaw at room temperature. I’ve found freezing is great for prepping ahead of celebrations.
Reheating
If you want to warm them up a bit, I gently microwave each cookie for about 10-15 seconds—enough to make them soft and cozy without melting decorations. Alternatively, a quick 3-4 minute bake at 300°F revives the fresh-baked feel wonderfully.
FAQs
-
Can I use regular sugar instead of confectioners’ sugar in the Day of the Dead Cookies Recipe?
While you technically can, confectioners’ sugar is best because it dissolves smoothly into the dough, resulting in a tender, melt-in-your-mouth texture. Regular granulated sugar can make the dough grainy and less soft.
-
What can I substitute for almond paste if I don’t have any?
If you’re avoiding almonds, you can replace almond paste with an equal amount of butter for richness plus a teaspoon of almond or vanilla extract for flavor. However, this will change the distinct nutty note a bit, but your cookies will still be delicious.
-
How do I prevent the candy coating from cracking on the cookies?
Make sure to melt the candy coating gently and avoid overheating—it should be smooth and runny but not hot. Dip the cookies at room temperature and let them set in a cool, dry place. Rapid temperature changes can cause cracking, so don’t refrigerate them until fully set.
-
Can I make these cookies gluten-free?
Yes! Swap the all-purpose flour for a gluten-free blend that measures cup-for-cup. Just be sure it contains xanthan gum or another binder for best results. The texture might be slightly different but still tasty and festive.
-
How long do decorated Day of the Dead cookies last?
When stored in an airtight container at room temperature, these cookies stay fresh for up to 4-5 days. If you want to keep them longer, freezing is a great option, especially before decorating.
Final Thoughts
This Day of the Dead Cookies Recipe holds a special place in my heart—not only because of the delicious, comforting flavor but also because it brings my family together each year for a fun and meaningful celebration. The combination of almond-scented dough and bright, colorful decorations makes each bite feel like a small festival. I really hope you give this recipe a try—it’s one of those treats that’s as joyful to make as it is to eat. Trust me, once you make these, they’ll become a seasonal favorite that you’ll look forward to year after year.
Print
Day of the Dead Cookies Recipe
- Prep Time: 2 hours including chilling
- Cook Time: 7-9 minutes per batch
- Total Time: 2 hours 20 minutes including baking and cooling
- Yield: 1 dozen cookies
- Category: Dessert
- Method: Baking
- Cuisine: Mexican-inspired
Description
Celebrate the Day of the Dead with these festive skull-shaped cookies featuring a tender almond-infused dough, coated in white candy melts, and decorated with colorful candies for a fun and vibrant treat perfect for the occasion.
Ingredients
Cookie Dough
- 1-1/4 cups butter, softened
- 1-3/4 cups confectioners’ sugar
- 2 ounces almond paste
- 1 large egg, room temperature
- 1/4 cup 2% milk
- 1 teaspoon vanilla extract
- 4 cups all-purpose flour
- 1/2 teaspoon salt
Coating and Decorations
- 2 packages (12 ounces each) white candy coating melts
- Optional decorations: Jumbo sprinkles, peppermint candies, candy-coated sunflower kernels, Skittles, Twizzlers Rainbow Twists, Good & Plenty candies
- Black paste food coloring
Instructions
- Cream and mix dough: In a large bowl, cream together the softened butter and confectioners’ sugar until light and fluffy, about 3-4 minutes. Add the almond paste and beat until combined. Then beat in the egg, milk, and vanilla extract until smooth.
- Combine dry ingredients and chill dough: In a separate bowl, whisk together flour and salt. Gradually add the flour mixture to the creamed mixture, mixing well. Once incorporated, cover the dough and refrigerate for 1 hour to firm up.
- Roll out and cut shapes: On a lightly floured surface, roll the chilled dough to about 1/4-inch thickness. Using a 5-inch skull-shaped cookie cutter dusted with flour, cut out cookie shapes and place them 1 inch apart on ungreased baking sheets.
- Bake the cookies: Bake at 375°F (190°C) for 7-9 minutes or until the cookies are firm to the touch. After baking, let the cookies stand on the baking sheet for 2 minutes before transferring them to wire racks to cool completely.
- Melt candy coating and decorate: In a large, shallow microwave-safe dish, melt the white candy coating melts according to package instructions. Dip the topsides of each cooled cookie into the melted coating, allowing excess to drip off. Place the dipped cookies on waxed paper.
- Add decorations and finish piping: Decorate the dipped cookies as desired with jumbo sprinkles, peppermint candies, candy-coated sunflower kernels, Skittles, Twizzlers, Good & Plenty candies. Tint any remaining white candy coating black using paste food coloring, then pipe on mouths and other details. Let the decoration set completely before serving.
Notes
- Make sure the dough is chilled well to prevent spreading during baking.
- Use a variety of colorful candies to create vibrant and festive decorations.
- The candy coating melts set quickly, so work efficiently when dipping and decorating.
- Store cookies in an airtight container at room temperature for up to 5 days.
Nutrition
- Serving Size: 1 cookie
- Calories: 250
- Sugar: 15g
- Sodium: 80mg
- Fat: 15g
- Saturated Fat: 9g
- Unsaturated Fat: 5g
- Trans Fat: 0g
- Carbohydrates: 27g
- Fiber: 1g
- Protein: 3g
- Cholesterol: 40mg

