
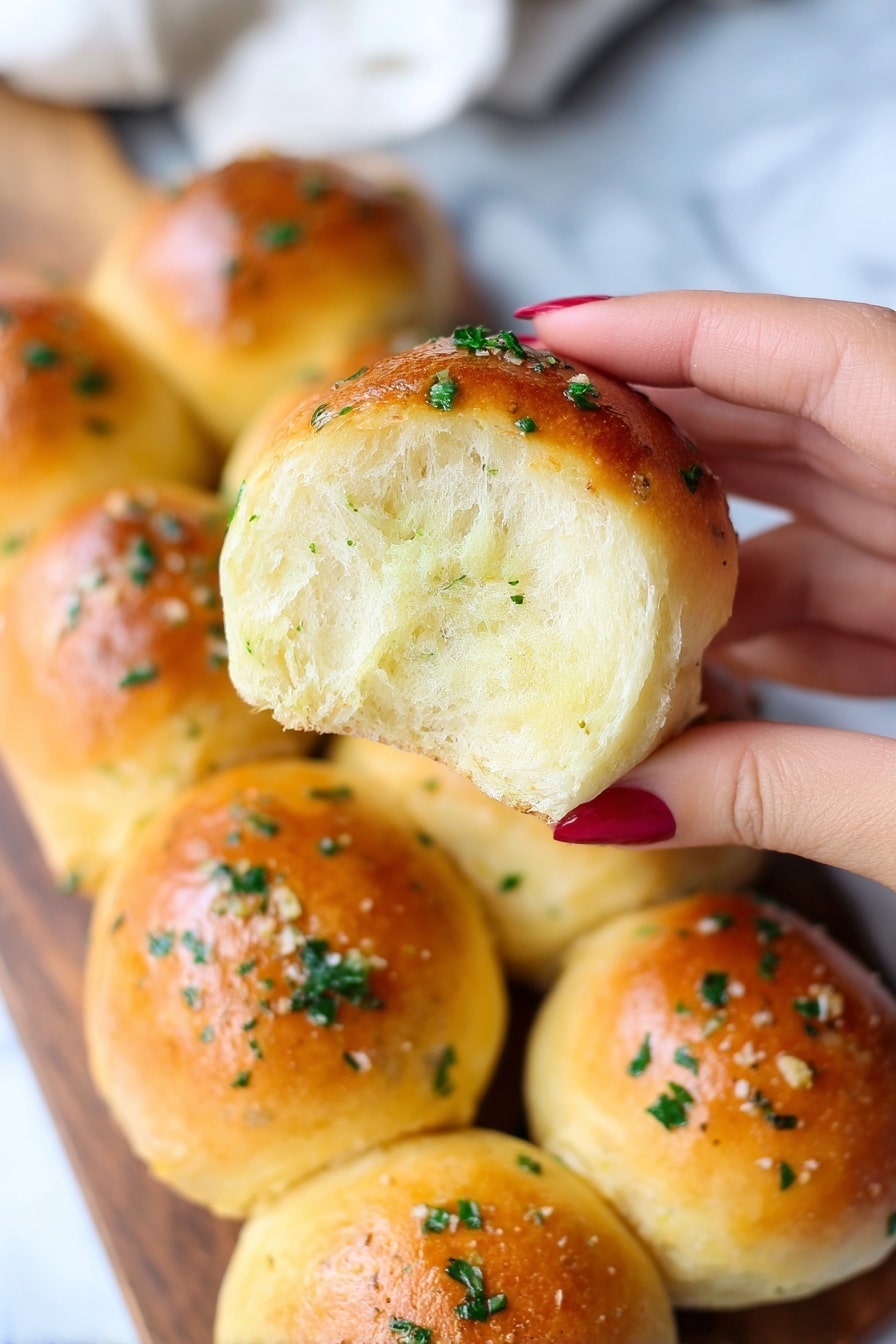
If you’re on the hunt for the ultimate soft, fluffy, and flavorful rolls to elevate any meal, then this Garlic Butter Dinner Rolls Recipe is about to become your new kitchen favorite. I absolutely love how these rolls come out – pillowy on the inside with a golden, buttery, garlicky crust that just melts in your mouth. Whether you’re serving them for a special holiday feast or just a cozy weeknight dinner, you’ll find these rolls are ridiculously easy to make and insanely delicious.
Why You’ll Love This Recipe
- Unbeatable Flavor: The garlic butter glaze adds a mouthwatering richness that makes these rolls stand out from the usual.
- Soft & Fluffy Texture: Thanks to a gentle kneading process and the perfect rise, they come out ultra tender every time.
- Beginner-Friendly: Even if you’ve never made yeast dough before, this recipe walks you through it step-by-step.
- Perfect Crowd-Pleaser: My family goes crazy for these rolls—they’re always the first thing to disappear at the table.

Ingredients You’ll Need
The ingredients in this Garlic Butter Dinner Rolls Recipe are simple and easy to find, but they work beautifully together to create something truly special. I recommend using whole milk and quality butter for the richest flavor, and fresh garlic really makes the topping pop.
- Whole milk: Warmed just right to activate the yeast without killing it—make sure it’s around 110°F.
- Active dry yeast or instant yeast: Either works; I usually keep instant yeast on hand for convenience.
- Sugar: Just enough to feed the yeast and add a touch of sweetness.
- All-purpose flour: The backbone of the dough — sifted for best results.
- Large egg: Adds richness and helps with structure.
- Salt: Balances sweetness and enhances flavor.
- Unsalted butter (softened): For the dough—soft butter blends seamlessly into the mix.
- Egg yolk and milk (for egg wash): Creates that gorgeous golden crust.
- Salted butter (for garlic butter topping): Adds plenty of savory flavor.
- Garlic cloves: Fresh and finely chopped — this is where the magic happens.
- Fresh parsley: Adds a bright, herby note to cut through the richness.
Variations
One of the best parts about this Garlic Butter Dinner Rolls Recipe is just how easy it is to customize. Over time, I’ve played around with adding different herbs and even dairy-free tweaks, and you can totally make it your own too.
- Herb-infused rolls: I sometimes add rosemary or thyme to the dough for a fragrant twist—my guests love the extra herbal aroma.
- Cheesy garlic rolls: Folding shredded parmesan or mozzarella into the dough takes these rolls over the top.
- Dairy-free version: Swap out butter for vegan butter and milk for a plant-based alternative like almond milk—just make sure it’s warmed to the right temperature.
- Spicy garlic butter: Adding a pinch of red pepper flakes to the garlic butter topping gives them a subtle kick that wakes up your taste buds.
How to Make Garlic Butter Dinner Rolls Recipe
Step 1: Activate the yeast and mix the dough
Start by warming your milk to about 110°F—warm enough to feel slightly hot but not scalding. Stir in the yeast and sugar, then let it sit for a few minutes until it bubbles a little or smells yeasty—this step is where the magic starts. Once you see that foam, add all the other dough ingredients right into the same bowl: flour, egg, salt, and softened butter. Stir everything together until you get a shaggy, sticky dough.
Step 2: Knead the dough till smooth
Now comes the part that used to intimidate me—kneading. I found that kneading for a full 15 minutes using a push-and-pull motion with my palms really helps develop that stretchy, smooth dough that bakes up so fluffy. Don’t be tempted to add extra flour, even if it feels sticky at first—sticky dough is the secret to softness. To check if you’re done, try the window-pane test: gently stretch a small bit of dough between your fingers. It should stretch thin without tearing. If it breaks easily, knead a bit longer.
Step 3: First rise in a warm spot
Transfer your dough to a lightly oiled clean bowl and cover it tightly with plastic wrap or a damp towel. Find a warm, draft-free spot in your kitchen—near a sunny window or on top of the fridge works great. Let it rise until it doubles in size, which usually takes about 90 minutes. I once rushed this step, and my rolls were denser, so I promise patience pays off here!
Step 4: Shape the rolls
After your dough has doubled, punch it down gently to release the air. Place it on a clean surface and divide into 12 equal pieces. To roll each piece into a smooth ball, I place the dough on one palm (flat) and use my other palm, slightly cupped, to gently twist the dough around. This technique helps keep the surface smooth without cracks or wrinkles, which means a beautiful finish after baking.
Step 5: Second rise and egg wash
Place your rolls on a parchment-lined baking sheet with some space between each one so they can puff up nicely. Mix together one egg yolk and a tablespoon of milk to make the egg wash and brush the rolls generously—this is what gives them that irresistible golden shine. Let the rolls rise again for about 30 to 45 minutes until they look puffy and soft.
Step 6: Bake and garlic butter finish
While your rolls are rising for the second time, preheat your oven to 350°F. Right before baking, give them one more brush of egg wash for extra shine. Bake for 20 to 22 minutes until they’re beautifully golden on top. While the rolls bake, melt butter in a saucepan and gently sauté the minced garlic for a minute or two until fragrant—don’t let it brown. Take the pan off the heat and stir in the fresh parsley. Once your rolls are out of the oven, brush them immediately with this garlic butter. Trust me, this final step is what takes the rolls from heavenly to unforgettable.
Pro Tips for Making Garlic Butter Dinner Rolls Recipe
- Test Your Yeast: I learned the hard way that yeast needs warmth and sugar—if your milk’s too hot or cold, the dough won’t rise properly.
- Don’t Over-Flour During Kneading: Sticky dough can be intimidating, but adding flour will toughen your rolls. Stick with the windowpane test instead.
- Use Room Temperature Butter: Softened butter blends better into the dough and prevents lumps.
- Brush Garlic Butter Immediately: Brushing the rolls while hot helps the butter absorb beautifully for that rich, garlicky finish.
How to Serve Garlic Butter Dinner Rolls Recipe
Garnishes
I love sprinkling a bit of extra fresh parsley or finely grated parmesan on top after brushing the garlic butter—it adds color and a lovely fresh touch. Sometimes a pinch of flaky sea salt on top right after baking gives an irresistible crunch and flavor boost.
Side Dishes
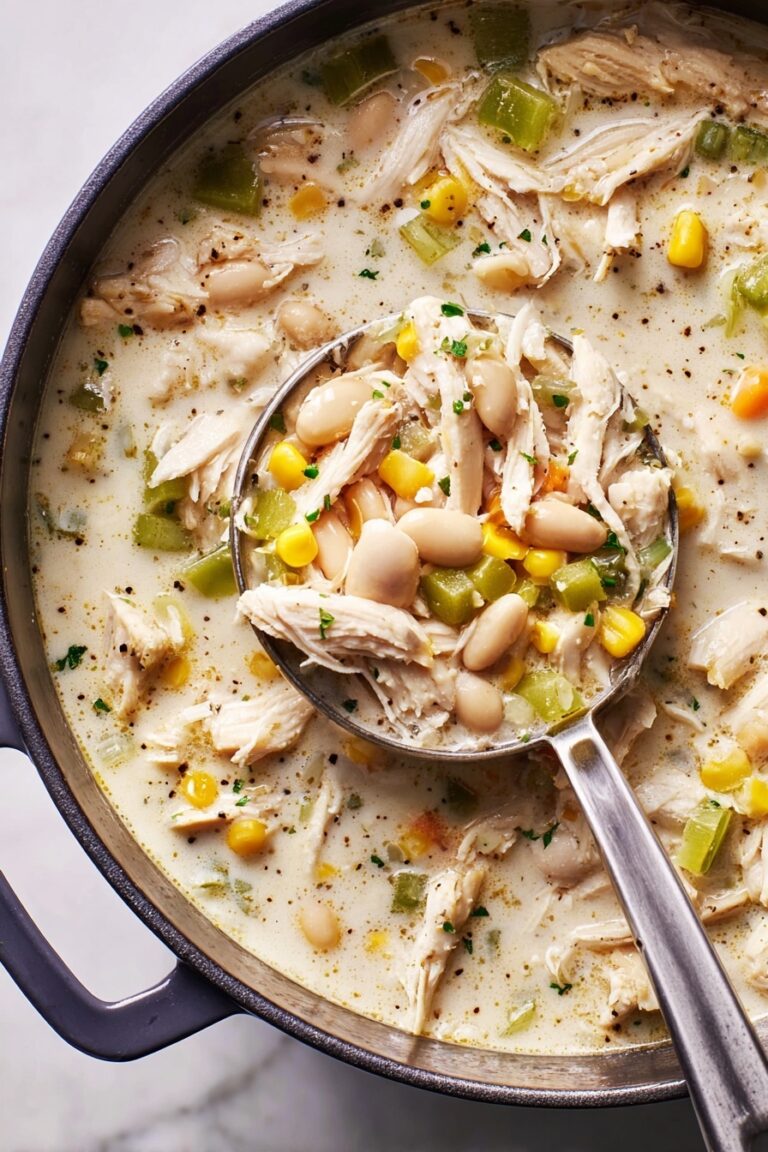
These rolls are dreamy alongside hearty soups like tomato basil or creamy chicken chowder. I also often pair them with classic comfort foods like meatloaf, roasted chicken, or even a fresh salad for a lighter meal. They’re the perfect vehicle for soaking up gravy or sauces.
Creative Ways to Present
For holiday dinners or parties, I arrange the rolls in a flower shape on a round platter, brushing each with the garlic butter as they’re pulled apart—everyone loves tearing them fresh and warm. Another fun idea is to bake them inside a cast-iron skillet for a rustic, shareable presentation that keeps them warm longer.
Make Ahead and Storage
Storing Leftovers
I usually store leftover rolls in an airtight container at room temperature for up to two days—they stay soft but if you want to keep them fresh longer, definitely freeze them. Make sure to keep the garlic butter separate or add fresh after reheating to preserve flavor and texture.
Freezing
I freeze these rolls unbaked or fully baked, wrapping them tightly in plastic wrap and then foil. When I freeze unbaked dough balls, I thaw and let them rise fully before baking for best results. This trick saves me so much time during busy weeks.
Reheating
The best way I found to reheat leftover rolls is to pop them in a preheated 300°F oven for 10-12 minutes wrapped loosely in foil to keep the moisture in. If you want that fresh-baked garlic butter flavor, melt some more butter with garlic and parsley and brush on after reheating—it tastes like they just came out of the oven.
FAQs
-
Can I use instant yeast instead of active dry yeast in this Garlic Butter Dinner Rolls Recipe?
Absolutely! Instant yeast can be used interchangeably with active dry yeast, and it even dissolves more easily without needing to be proofed first. Just reduce the rising time slightly, since instant yeast acts faster.
-
What if I don’t have fresh garlic for the butter topping?
Fresh garlic gives the best flavor, but if you’re in a pinch, you can use garlic powder—just sprinkle a little into the melted butter and adjust to taste. Remember not to sauté powdered garlic as it can burn quickly.
-
Why are my rolls dense instead of fluffy?
Dense rolls usually mean the dough didn’t rise enough or wasn’t kneaded enough to develop the gluten. Make sure your milk is warm but not hot, your yeast is active, and you knead the dough until it passes the window-pane test.
-
Can I make these rolls gluten-free?
Making yeast rolls gluten-free can be tricky because gluten provides the structure and stretch. However, with the right gluten-free flour blend and a xanthan gum addition, it can be done—though the texture will be different. I recommend looking up specialized gluten-free roll recipes for best success.
Final Thoughts
I have to say, this Garlic Butter Dinner Rolls Recipe holds a special place in my heart because it’s my go-to when I want to impress without stressing out in the kitchen. It’s approachable for any skill level and delivers that homemade warmth and flavor that makes everyone feel like they’re being wrapped in a comforting hug. I can’t wait for you to try making these yourself—you’ll soon find, just like me, that soft, buttery, garlicky rolls have never tasted so good or been so satisfying to bake at home.
Print
Garlic Butter Dinner Rolls Recipe
- Prep Time: 40 minutes
- Cook Time: 20 minutes
- Total Time: 1 hour 50 minutes
- Yield: 12 dinner rolls
- Category: Bread
- Method: Baking
- Cuisine: American
Description
These easy garlic butter dinner rolls are soft, fluffy, and perfect for any meal. Made with simple ingredients and enriched with a flavorful garlic butter glaze, these rolls have a tender crumb and a beautifully golden crust. The recipe involves kneading the dough by hand, letting it rise twice, and baking until golden, making them an ideal homemade bread to impress family and friends.
Ingredients
Dough Ingredients
- 1 cup whole milk (240g), warm (around 110°F)
- 3 teaspoons active dry yeast or instant yeast
- 1/3 cup sugar (70g)
- 3 3/4 cups all purpose flour (490g)
- 1 large egg
- 1.5 teaspoon salt
- 6 tbsp unsalted butter, softened at room temperature (85g)
Egg Wash
- 1 egg yolk
- 1 tbsp milk
Garlic Butter Topping
- 1/4 cup salted butter (57g)
- 2-3 garlic cloves, finely chopped
- 1-2 tbsp freshly chopped parsley
Instructions
- Activate Yeast: In a large bowl, stir together the warm milk with the yeast until combined and let it sit briefly to activate.
- Combine Dough Ingredients: Add the sugar, flour, egg, salt, and softened unsalted butter to the yeast mixture. Stir all ingredients together until a shaggy dough forms.
- Knead the Dough: Turn the dough onto a clean surface and knead using a push-pull motion with your palms for 15 minutes. The dough will begin sticky but will become smooth and stretchy as you knead; do not add extra flour. The dough is ready when it passes the window-pane test.
- First Rise: Place the dough into a large clean bowl greased lightly with oil, cover tightly with cling wrap, and put in a warm, humid spot to rise until it doubles in size, approximately 90 minutes.
- Shape Rolls: Punch down the risen dough, turn it onto a clean surface, and divide into 12 equal pieces. Roll each piece into a tight, smooth ball without wrinkles or cracks, using your palms.
- Arrange on Baking Sheet: Line a 9×13 inch baking sheet with parchment paper and space the rolls evenly on the sheet.
- Egg Wash: Mix the egg yolk and milk in a small bowl, then generously brush the rolls with this egg wash using a pastry brush.
- Second Rise: Let the rolls rise a second time in a warm spot for 30-45 minutes until puffy.
- Preheat Oven: Preheat your conventional oven to 350°F during the last 20 minutes of the second rise.
- Final Egg Wash: Brush the rolls again with a generous layer of egg wash before baking.
- Bake: Bake the rolls for 20-22 minutes until they develop a shiny, golden brown crust.
- Prepare Garlic Butter: While the rolls bake, melt the salted butter in a saucepan over medium heat, add finely chopped garlic, and sauté for 1-2 minutes until fragrant. Remove from heat and stir in freshly chopped parsley.
- Brush Rolls: Immediately after removing from the oven, brush the hot rolls generously with the garlic butter mixture.
- Serve: Serve warm and enjoy the soft, flavorful garlic butter dinner rolls.
Notes
- For best results, use warm milk at approximately 110°F to activate the yeast without killing it.
- Kneading time is important to develop gluten for a soft, fluffy texture—do not rush or add extra flour during kneading.
- The window-pane test is crucial to ensure sufficient gluten development before the first rise.
- Use fresh garlic and parsley for the best flavor in the garlic butter topping.
- Allowing the rolls to rise twice improves their lightness and texture.
- Brush with egg wash twice for a shiny, golden crust.
- Serve the rolls immediately after brushing with garlic butter to enjoy maximum flavor and softness.
Nutrition
- Serving Size: 1 roll (approx. 70g)
- Calories: 180 kcal
- Sugar: 4.5 g
- Sodium: 160 mg
- Fat: 7 g
- Saturated Fat: 4.5 g
- Unsaturated Fat: 2 g
- Trans Fat: 0 g
- Carbohydrates: 25 g
- Fiber: 1 g
- Protein: 4 g
- Cholesterol: 45 mg


