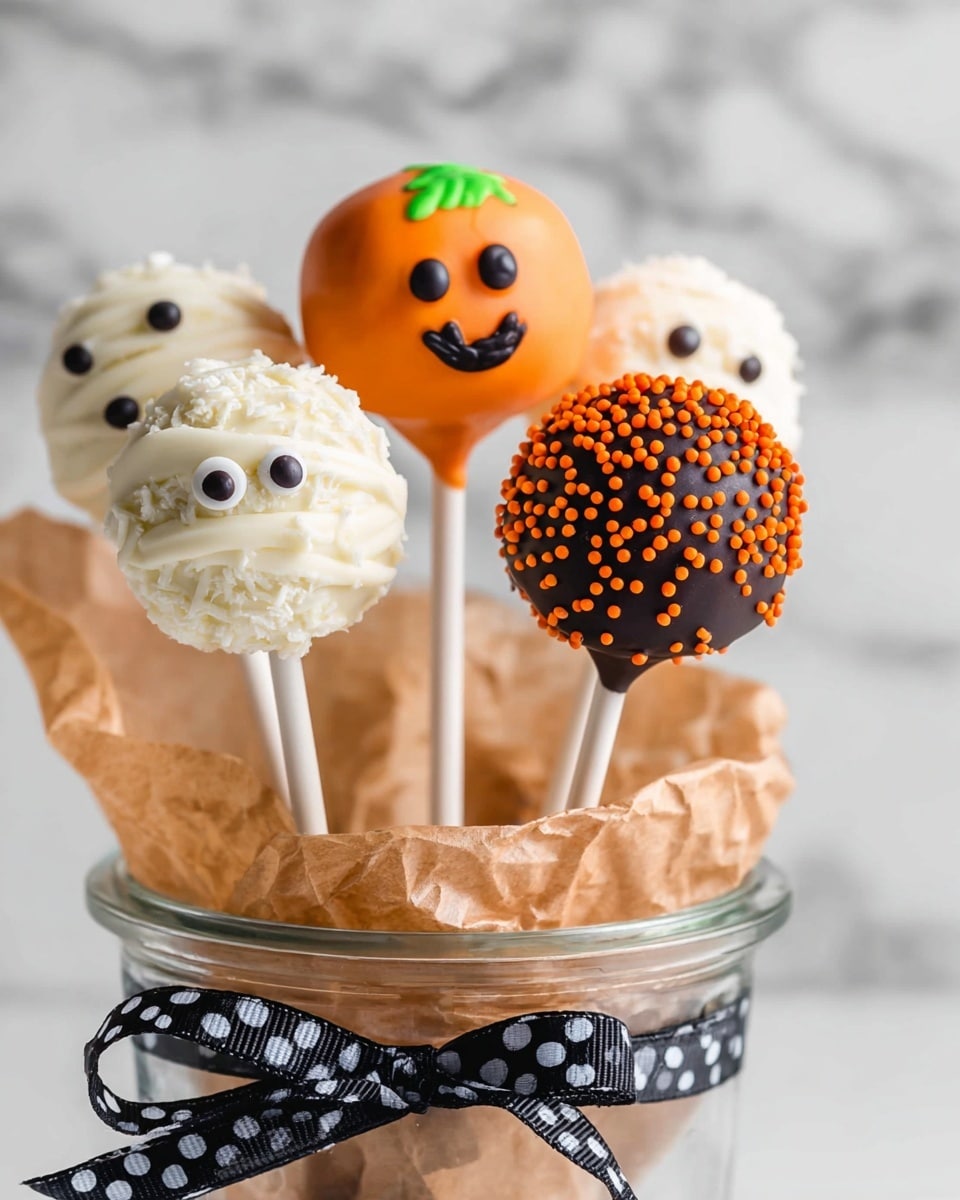
If you’re looking for a spooky yet absolutely delicious treat to wow your friends and family this year, you’ve gotta try this Halloween Cake Pops Recipe. I absolutely love how these bite-sized goodies combine moist cake, creamy frosting, and a smooth chocolate coating—all decked out in festive Halloween colors. When I first made them, my family went crazy for both the taste and the cute decorations, and I bet you’ll have just as much fun making and eating them!
Why You’ll Love This Recipe
- Super Simple Steps: Even if you’re not a pro baker, you’ll find these cake pops easy and fun to make.
- Customizable Decorations: You can create pumpkins, mummies, or just go wild with sprinkles and colors.
- Kid-Friendly Treats: My kids love getting involved with decorating—and eating—these pops!
- Perfect for Parties: Bite-sized and mess-free, they’re ideal for Halloween gatherings or classroom treats.

Ingredients You’ll Need
All the ingredients combine to give you a moist, rich cake pop that’s easy to shape and decorate. I usually suggest buying quality melting wafers because they give a glossy finish that’s super satisfying.
- White cake mix: Ready-made mix keeps things simple and consistent; plus, white cake lets the colors pop beautifully when decorating.
- Chocolate melting wafers (for coating): These melt smoothly and set hard, perfect for creating that signature cake pop shell.
- White chocolate melting wafers: I like Ghirardelli for their creamy texture and subtle sweetness.
- Salted butter: Adds richness and moisture—don’t skip softening it first for easy mixing!
- Powdered sugar: Helps thicken your frosting mixture to just the right consistency for binding the cake crumbs.
- Vanilla extract: A little boost of flavor that makes everything taste like home.
- Heavy cream or milk: Use whichever you have; it smooths the frosting and keeps it from being dry.
- Orange melting wafers: Perfect for painting your pops bright pumpkin orange.
- Green frosting: Essential for crafting those leafy pumpkin stems and details.
- Black edible ink pen: Great for drawing spooky faces or mummy eyes with precision.
Variations
I love customizing these Halloween cake pops depending on the mood and who I’m making them for—so feel free to get creative! Here are a few tweaks I’ve tried and loved.
- Gluten-Free Version: I swapped out the cake mix for a gluten-free one and had zero complaints—just make sure your wafers are GF-certified.
- Spooky Flavors: Adding a pinch of cinnamon or pumpkin spice to the cake mix makes them taste seasonally fantastic.
- Vegan Alternative: Use dairy-free butter and vegan cake mix to cater to friends who avoid animal products.
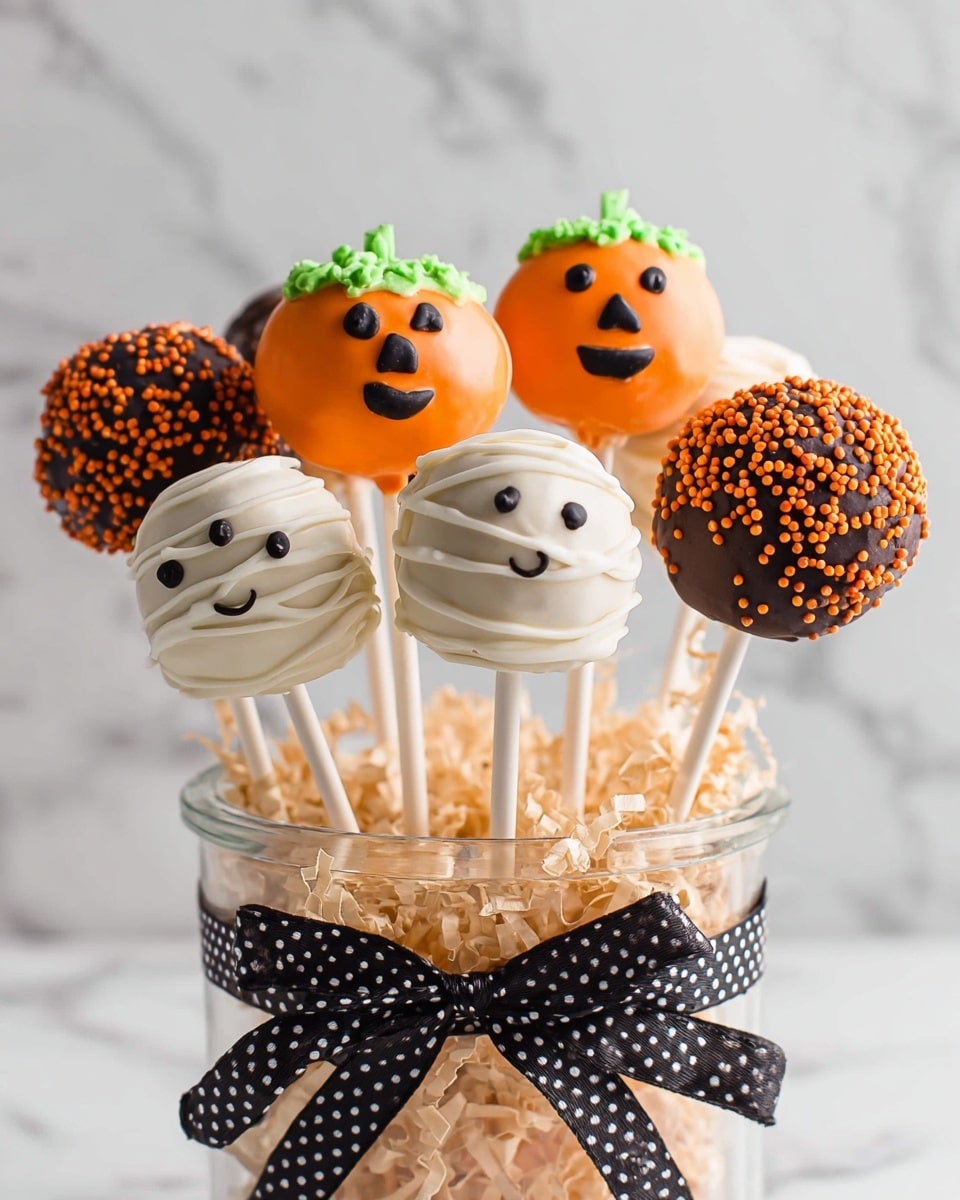
- Decorating Styles: My family loves making mummy pops with white chocolate drizzles and edible eyes—it’s super fun and looks so cute!
How to Make Halloween Cake Pops Recipe
Step 1: Bake Your Cake Just Right
Start by preparing your white cake mix according to the package instructions in a 9×13″ pan. Here’s what I learned: don’t overbake! Check a few minutes before the suggested time since you want the cake moist—not dry. Once it’s cooled completely, crumble it into fine crumbs in a large bowl; this is the base of your cake pops.
Step 2: Make the Frosting Binder
Mix the softened butter, powdered sugar, vanilla extract, and heavy cream (or milk) together until smooth. This isn’t ordinary frosting—it should be thick enough to hold the crumbs together but creamy enough to mix easily. I usually start with 2 cups powdered sugar and add more if needed.
Step 3: Combine and Shape Your Cake Balls
Pour your frosting into the cake crumbs and stir until the mixture feels like dough. It might be a bit sticky, but that’s perfect. Roll into small 1-inch balls. Here’s my trick: chill them in the fridge for 30 minutes to firm up before dipping.
Step 4: Melt the Coating and Dip
Melt your orange melting wafers and white chocolate wafers separately, using short bursts in the microwave to avoid burning. Dip each cake ball into the chocolate, letting excess drip off, then place them on parchment paper to set. If you want pumpkin pops, dip in orange; for mummies, use white.
Step 5: Decorate Your Masterpieces
Before the coating hardens, add green frosting for pumpkin stems, or drizzle with white chocolate for mummy wraps. Once dry, use a black edible ink pen to draw faces or eyes. I discovered this trick when I wanted clean lines without the mess of piped icing—totally saves time and looks professional!
Pro Tips for Making Halloween Cake Pops Recipe
- Chill Thoroughly: Always chill your cake balls before dipping to avoid crumbly pops and messy coatings.
- Use Candy Melts Wisely: If your melting wafers get too thick, add a teaspoon of vegetable oil—not water—to keep them smooth.
- Stick Stability: Dip the tip of your stick into melted coating before poking it into the cake ball—this creates a glue-like hold so the pop doesn’t fall apart.
- Decoration Timing: Don’t wait too long to add details after dipping—the coating needs to be tacky but not fully hardened for best adherence.
How to Serve Halloween Cake Pops Recipe
Garnishes
I like topping my pops with a sprinkle of edible glitter or orange and black sprinkles right after dipping for a little extra Halloween pizzazz. The green frosting on top for pumpkin stems is non-negotiable in my book—it adds that perfect pop of color and authenticity.
Side Dishes
These cake pops are a sweet star all on their own, but if you want to serve them with a little something extra, pumpkin spice cookies or a warm apple cider make a fantastic pairing. Trust me—your guests will be impressed.
Creative Ways to Present
I’ve tried arranging the cake pops in a small pumpkin-shaped foam base covered with tissue paper—makes for an adorable Halloween centerpiece! You can also wrap each pop in clear cellophane tied with ribbon for cute party favors or school treats.
Make Ahead and Storage
Storing Leftovers
After they’re fully set, I store cake pops in an airtight container in the fridge. They last well for about 5 days, but honestly, they’re usually eaten before then! Just bring them to room temperature for a bit before serving to soften the coating.
Freezing
I have frozen cake pops for up to a month by placing them on a tray to freeze solid, then transferring to a sealed bag. When ready, thaw them in the fridge overnight to keep moisture in—this way the cake stays moist and the coating remains crisp.
Reheating
Reheating isn’t really necessary with cake pops but if you like your chocolate a little melty, I gently warm them for 10 seconds in the microwave. Just keep an eye on them to prevent melting or sogginess—less is more here.
FAQs
-
Can I use a different cake flavor for this Halloween Cake Pops Recipe?
Absolutely! While the white cake base looks great with bright Halloween colors, you can try chocolate, spice, or even pumpkin cake mixes. Just keep in mind that darker colors might show less vibrantly under some coatings.
-
What if I don’t have cake pop sticks?
No worries! You can use sturdy lollipop sticks, wooden skewers cut shorter, or even just serve the cake balls on a decorative plate as bite-sized treats without sticks.
-
How do I avoid cracks in the chocolate coating?
Make sure to dip chilled cake balls and avoid dipping too thickly. If the coating is too cold when applied, it can crack. Also, tempering the candy melts or adding a tiny bit of shortening can help keep the surface smooth.
-
Can you prepare these cake pops in advance?
Yes, you can prepare and decorate them a day or two before your event. Just keep them refrigerated in an airtight container and handle gently to protect the decorations.
Final Thoughts
I love how this Halloween Cake Pops Recipe always brings smiles around the table. Whether you’re making them with kids or for a spooky party, they’re a guaranteed hit that’s simple, customizable, and downright fun. If you want a treat that’s as cute as it is tasty, give these a try—you might just find they become your new holiday tradition.
Print
Halloween Cake Pops Recipe
- Prep Time: 40 min
- Cook Time: 20 min
- Total Time: 60 min
- Yield: 24 cake pops
- Category: Dessert
- Method: Baking
- Cuisine: American
Description
Halloween Cake Pops are delightful bite-sized treats featuring moist white cake mixed with creamy frosting, coated in vibrant chocolate melts, and decorated with festive designs such as pumpkins and mummies. Perfect for Halloween parties, these easy-to-make treats combine sweet, buttery flavors with fun, colorful finishes.
Ingredients
Cake
- 15 ounce box white cake mix
- Ingredients as required by cake mix package directions (usually eggs, oil, water)
Frosting
- 1 stick salted butter, softened
- 2 to 2 1/2 cups powdered sugar
- 1 teaspoon vanilla extract
- 1 tablespoon heavy cream or milk
Coating and Decoration
- 5 ounce chocolate melting wafers
- 10 ounce package white chocolate melting wafers (preferably Ghirardelli)
- 10 ounces orange melting wafers
- Green frosting for decoration
- Black edible ink pen
Instructions
- Prepare the Cake: Follow the directions on the 15-ounce box of white cake mix to bake the cake in a 9×13-inch pan. Make sure the cake is fully baked and cooled completely before proceeding.
- Make the Frosting: In a bowl, combine the softened salted butter, powdered sugar (start with 2 cups and add more as needed), vanilla extract, and heavy cream or milk. Beat until smooth and creamy to create a frosting that’s firm enough to bind the cake crumbs but still smooth.
- Form Cake Pops: Crumble the cooled cake into a large bowl. Add the prepared frosting and mix thoroughly until the mixture holds together and can be shaped. Roll the mixture into 24 equal bite-sized balls.
- Chill Cake Balls: Place the cake balls on a baking sheet lined with parchment paper and refrigerate for about 30 minutes to firm up before coating.
- Melt Coating Wafers: Melt the chocolate melting wafers and the white chocolate melting wafers separately according to package directions, usually by microwaving in short intervals and stirring until smooth.
- Coat Cake Pops: Using a fork or dipping tool, dip each chilled cake ball into the melted orange chocolate wafers for a festive pumpkin look or white chocolate for other designs. Allow excess coating to drip off.
- Decorate: Before the coating fully sets, decorate using green frosting to mimic pumpkin vines and use the black edible ink pen to create mummy faces or pumpkin details. Optionally, add sprinkles for more festive flair.
- Set and Serve: Let the decorated cake pops set completely at room temperature or in the refrigerator until firm. Serve and enjoy!
Notes
- Use of green frosting and black edible ink pen allows for creative Halloween-themed decorations.
- For a firmer frosting, adjust powdered sugar quantity as needed to achieve the right consistency.
- Ensure cake is completely cooled before mixing with frosting to avoid melting.
- Refrigerating cake balls before coating helps maintain their shape during dipping.
- Melting wafers carefully is important to avoid burning and ensure smooth coating.
Nutrition
- Serving Size: 1 cake pop
- Calories: 110 kcal
- Sugar: 15 g
- Sodium: 36 mg
- Fat: 6 g
- Saturated Fat: 4 g
- Unsaturated Fat: 2 g
- Trans Fat: 0 g
- Carbohydrates: 15 g
- Fiber: 0 g
- Protein: 1 g
- Cholesterol: 9 mg


