If you’re gearing up for some festive fun this season, I absolutely have to share my go-to Halloween Rice Krispie Treats Recipe that never fails to wow. I discovered this easy, bright, and spooky take on a classic treat, and trust me, it’s perfect for parties, quick snacks, or even last-minute bake sales. The best part? They’re super simple to make, but they look like you spent a lot more time in the kitchen. Let me walk you through how to create these fun, crispy, and colorful delights that your whole crew will adore.
Why You’ll Love This Recipe
- Simple & Quick: You’ll have these treats ready in just 15 minutes from start to finish, perfect for last-minute parties.
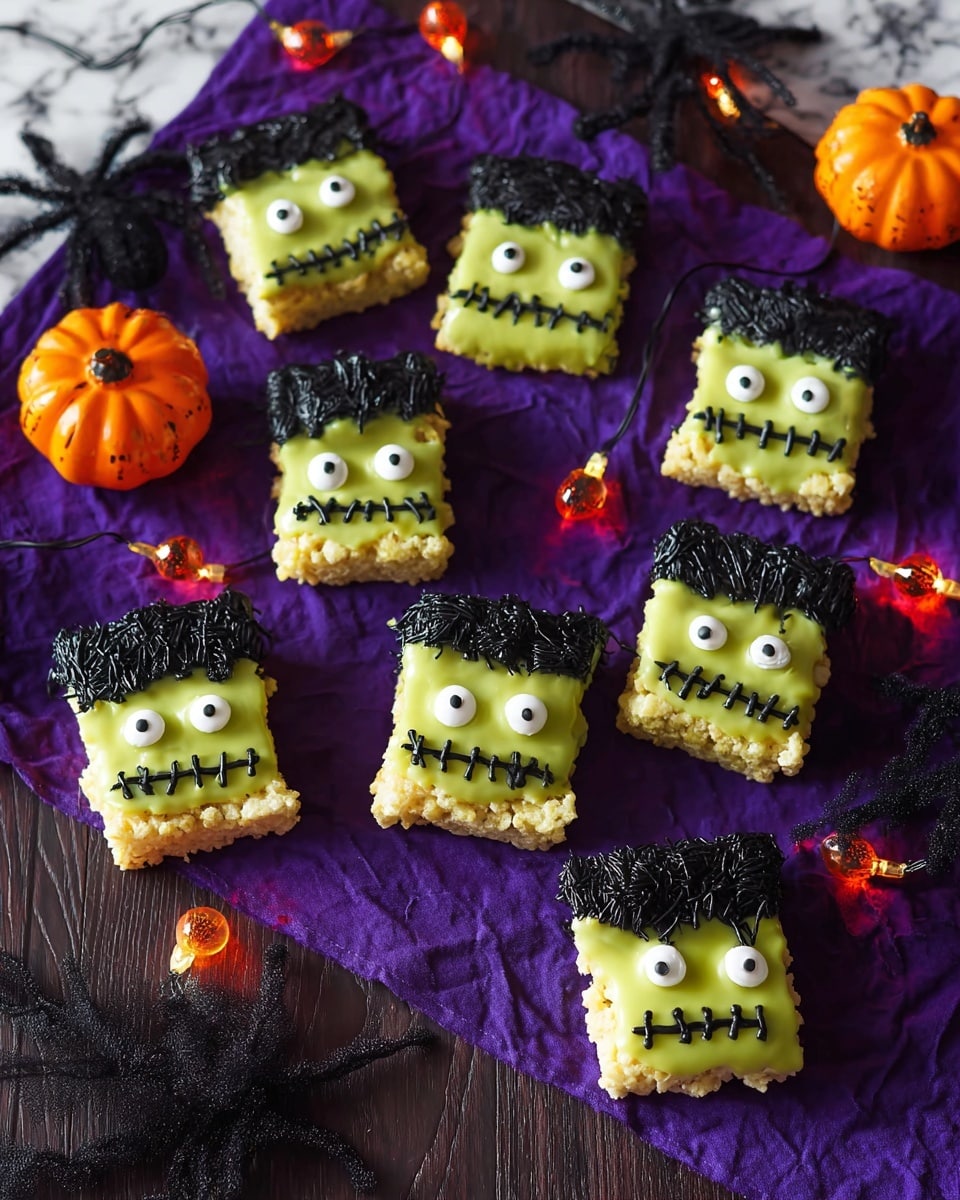
- Bright & Festive: The green and white candy melts add a fun, spooky touch that makes them stand out on any Halloween table.
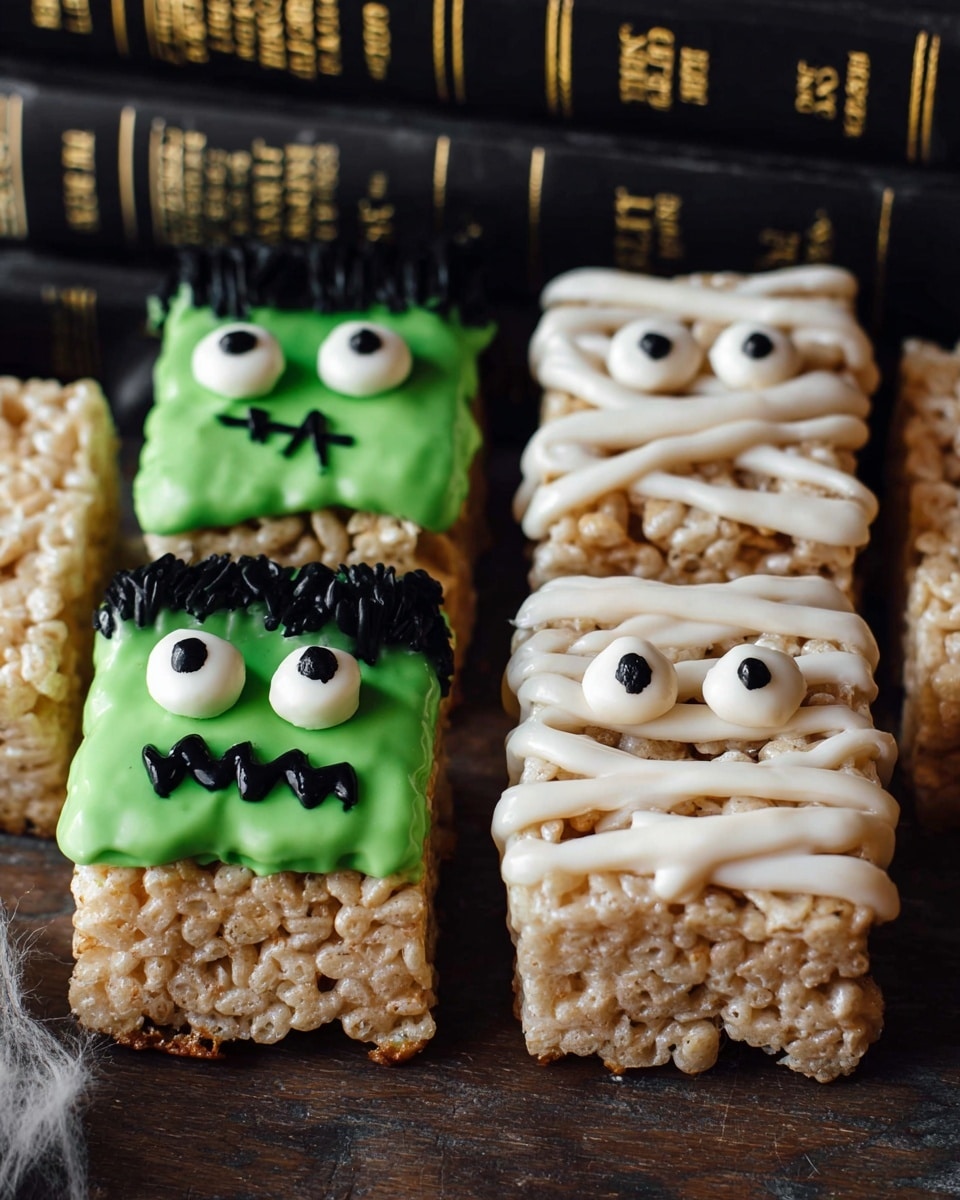
- Customizable Fun: You can add candy eyes and black buttercream frosting to create cute (or creepy!) faces everyone will love.
- Kid-Friendly: These treats are a hit with kids and adults alike—soft, chewy, and loaded with fun textures and flavors.

Ingredients You’ll Need
All the ingredients for this Halloween Rice Krispie Treats Recipe come together beautifully, blending classic textures with Halloween colors and whimsy. Here’s the lowdown on what you’ll want to have ready before you start melting marshmallows and stirring in that cereal.
- Butter: It adds richness and helps melt the marshmallows smoothly, essential for that classic sticky texture.
- Mini Marshmallows: The star ingredient for gooey binding and sweetness—stick with minis for quick melting.
- Salt: Just a pinch to balance the sweetness and bring out all the flavors.
- Vanilla Extract: Adds a nice warm depth to the treat’s flavor; don’t skimp on this!
- Puffed Rice Cereal: The crunchy base that gives these treats their signature crisp and light bite.
- Bright/Light Green Candy Melts: These create the fun Halloween color pop—perfect for dipping or drizzling.
- Bright White Candy Melts: Adds contrast and lets you get creative decorating your treats.
- Refined Coconut Oil or Shortening: Helps smooth out the candy melts for easy dipping and shiny finishes.
- Candy Eyes: These are a game-changer for spooky decoration—kids especially love this touch.
- Black Buttercream Frosting: Use to add spooky details like mouths or spider webs—I’ll share tips on making this below.
Variations
While I love the classic green and white theme for Halloween Rice Krispie Treats Recipe, I always encourage you to play around and make it your own. Whether it’s swapping colors or adding your favorite candy flair, there are plenty of ways to customize these treats.
- Color Swaps: I’ve swapped the green candy melts for orange or purple to match different Halloween vibes, and honestly, it’s just as fun and festive.
- Vegan Adaptation: Using vegan butter and marshmallows makes these great for plant-based diets—just expect a slight texture difference.
- Extra Crunch: Toss in some chopped pretzels or candy corn for unexpected crunchy texture that my family goes wild for.
- Frosting Flavors: Try different frosting colors or flavors like pumpkin spice or chocolate for a new twist on those spooky decorations.
How to Make Halloween Rice Krispie Treats Recipe
Step 1: Prep Your Pan and Get Ready
Before you get started with melting marshmallows, I always line a baking sheet with parchment paper and set it aside for candy melts later. Then, butter or spray a 9×13 baking dish—this helps the Rice Krispies release easily once set. I find prepping ahead keeps things moving smoothly and saves any sticky frustration.
Step 2: Melt the Butter and Marshmallows
On medium-low heat, melt your butter in a medium stock pot. Once melted, add the mini marshmallows, salt, and vanilla. Stir continuously until everything is smooth and fully melted—this takes about 3-5 minutes. It’s key to keep the heat low so nothing burns. When I first tried rushing this part, I ended up with clumpy marshmallows—no fun!
Step 3: Stir in Your Puffed Rice Cereal and Press
Remove the pot from heat and immediately stir in the puffed rice cereal. Make sure all the cereal is evenly coated with that sticky marshmallow mixture. Pour it into your prepared pan and press down firmly but gently with a buttered spatula or wax paper. The key here is firm enough for the treats to stick together but not so hard that they become too dense. Let them cool completely before cutting into 24 squares.
Step 4: Decorate with Candy Melts, Candy Eyes, and Frosting
Now comes the fun part—melting the bright green and white candy melts with a little refined coconut oil or shortening until smooth. Use this to dip or drizzle your treats with spooky colors. I like to press candy eyes onto the treats while the candy melt is still tacky, then pipe on black buttercream frosting for mouths or spider webs. It’s a simple step that transforms your treats from basic to wickedly cute.
Pro Tips for Making Halloween Rice Krispie Treats Recipe
- Low & Slow Melting: Taking the time to melt marshmallows over low heat keeps the mixture smooth and prevents scorching—even if it feels slow at first, it’s worth it.
- Use Coconut Oil with Candy Melts: Adding 2-4 tablespoons of refined coconut oil thins the candy melts perfectly for glossy finishes and clean drizzling.
- Let Rice Krispies Fully Cool: Don’t cut into the treats before they’re cool and set; otherwise, they’ll crumble and get messy.
- Press Decorations While Coating is Wet: Candy eyes or sprinkles stick best when you apply them before candy melts dry—this keeps your designs intact.
How to Serve Halloween Rice Krispie Treats Recipe
Garnishes
I typically use candy eyes for that cute creepy effect, plus a quick swirl of black buttercream for mouths or spider webs because it’s easy to pipe and looks sharp. Sometimes I add a sprinkle of Halloween-themed edible glitter for an extra magical touch. I find even simple decorations bring these treats to life.
Side Dishes
These treats pair perfectly with a simple glass of milk or a hot cider during cool fall nights. For parties, I like to set them alongside popcorn balls or chocolate-covered pretzels for variety. It creates a fun spooky snack spread that everyone digs into.
Creative Ways to Present
For a Halloween party, I’ve layered the treats on black or orange cake stands and wrapped individual squares in cellophane with mini spider rings tied around them. Another time, I cut them into fun shapes using cookie cutters—ghosts and pumpkins—and decorated each with candy eyes and frosting details. These little touches make them stand out and make your party table super inviting!
Make Ahead and Storage
Storing Leftovers
I store leftover Halloween Rice Krispie Treats in an airtight container at room temperature, and they typically stay fresh and chewy for up to 3 days. I always keep the container sealed well to prevent them from drying out or getting stale, especially after decorating.
Freezing
If I want to keep them longer, I wrap individual treats tightly in plastic wrap and pop them in a freezer bag. I’ve frozen them successfully for up to a month. Just thaw them at room temperature before enjoying; they retain most of their original texture and flavor.
Reheating
These treats are best enjoyed as-is, but if you prefer a softer texture, a quick 10-second zap in the microwave revives that fresh-from-the-pot gooeyness perfectly. Just don’t overdo it or they’ll get too sticky!
FAQs
-
Can I make Halloween Rice Krispie Treats Recipe gluten-free?
Absolutely! Most puffed rice cereals are naturally gluten-free, but it’s always best to double-check the packaging to ensure there’s no cross-contamination. The rest of the ingredients like marshmallows and butter are naturally gluten-free, so you’re good to go.
-
What can I substitute if I can’t find candy melts?
If candy melts aren’t available, you can use white chocolate chips or colored melting chocolates designed for candy making. Just melt gently with a bit of coconut oil or shortening to get that perfect drizzling consistency.
-
How do I make black buttercream frosting for decorating?
Mix your favorite buttercream frosting with a few drops of black gel food coloring until you reach your desired dark hue. I usually add the color bit by bit to avoid making it too dark or watery. It’s easy and gives you full control over the color intensity.
-
Can kids help make this recipe?
Definitely! Kids love stirring the marshmallows in and helping press the cereal mixture into the pan. Just keep an eye during the melting step since it involves heat. Decorating is especially fun for kids because they get to be creative with candy eyes and frosting.
Final Thoughts
This Halloween Rice Krispie Treats Recipe has become a fall staple in my home because it’s just so easy and festive. I love how customizable it is, and it always draws compliments for looking more complicated than it is. If you want a quick, crowd-pleasing, and absolutely adorable treat this season, you really can’t go wrong here. Give it a try—you’ll be so glad you did, and your friends might just start requesting it every Halloween!
Print
Halloween Rice Krispie Treats Recipe
- Prep Time: 5 minutes
- Cook Time: 10 minutes
- Total Time: 15 minutes
- Yield: 24 treats
- Category: Dessert
- Method: Stovetop
- Cuisine: American
Description
These Halloween Rice Krispie Treats are a fun and festive twist on the classic treat, perfect for spooky-season parties and bake sales. Made with melted marshmallows, butter, and puffed rice cereal, then decorated with colorful candy melts and candy eyes, these treats are easy to make and sure to delight both kids and adults alike.
Ingredients
Main Ingredients
- 4 tablespoons butter
- 7 cups mini marshmallows
- 1/4 teaspoon salt
- 1/4 teaspoon vanilla extract
- 6 cups puffed rice cereal
Decorations
- 12 ounces bright/light green candy melts
- 6 ounces bright white candy melts
- 2-4 tablespoons refined coconut oil (or shortening)
- Candy eyes
- Black buttercream frosting* (see notes on how to make or substitutions)
Instructions
- Prepare Baking Surfaces: Line a baking sheet with parchment paper and set aside. Butter or spray a 9×13-inch baking dish with non-stick cooking spray and set aside.
- Melt Butter and Marshmallows: In a medium stockpot over medium-low heat, melt the butter. Add the mini marshmallows, salt, and vanilla. Stir continuously until the marshmallows are completely melted and the mixture is smooth.
- Combine with Cereal: Remove the pot from heat. Immediately stir in the puffed rice cereal, ensuring the cereal is thoroughly coated with the marshmallow mixture.
- Press Mixture into Dish: Transfer the sticky mixture into the prepared 9×13 baking dish. Press it down firmly and evenly using a spatula or buttered hands.
- Cool and Cut: Allow the Rice Krispies to cool and set completely in the dish. Once set, cut into 24 squares.
- Decorate Treats: Melt the green and white candy melts separately with the coconut oil according to package instructions. Use these to decorate the treats along with candy eyes and black buttercream to create fun Halloween designs.
Notes
- These treats are simple, quick to make, and perfect for Halloween parties or bake sales.
- Black buttercream frosting can be made by coloring vanilla buttercream with black gel food coloring or substituted with store-bought black icing.
- Refined coconut oil or shortening helps candy melts achieve a smooth consistency for easier decoration.
Nutrition
- Serving Size: 1 treat
- Calories: 81 kcal
- Sugar: 8 g
- Sodium: 53 mg
- Fat: 2 g
- Saturated Fat: 1 g
- Unsaturated Fat: 1 g
- Trans Fat: 0 g
- Carbohydrates: 16 g
- Fiber: 1 g
- Protein: 1 g
- Cholesterol: 5 mg


