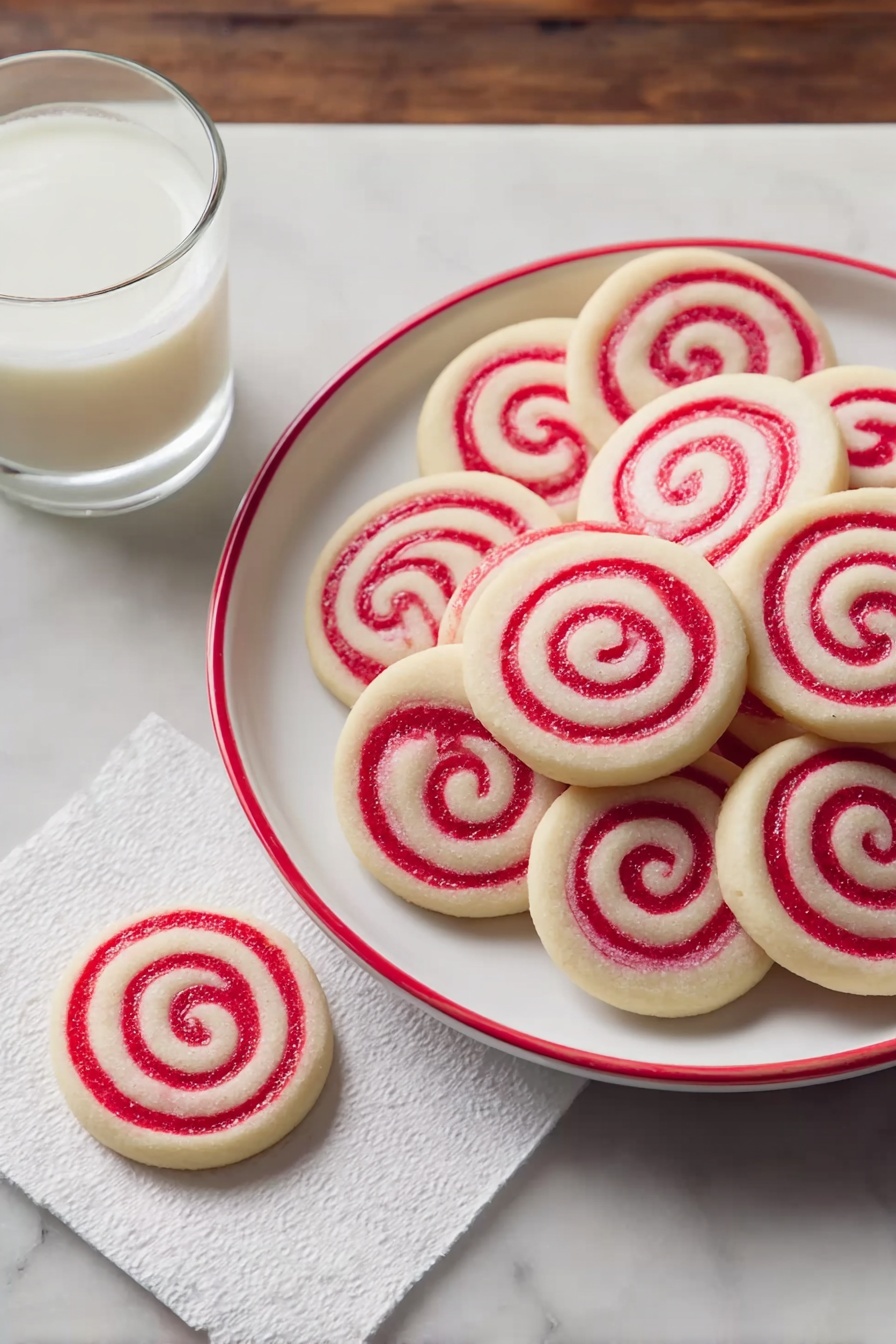
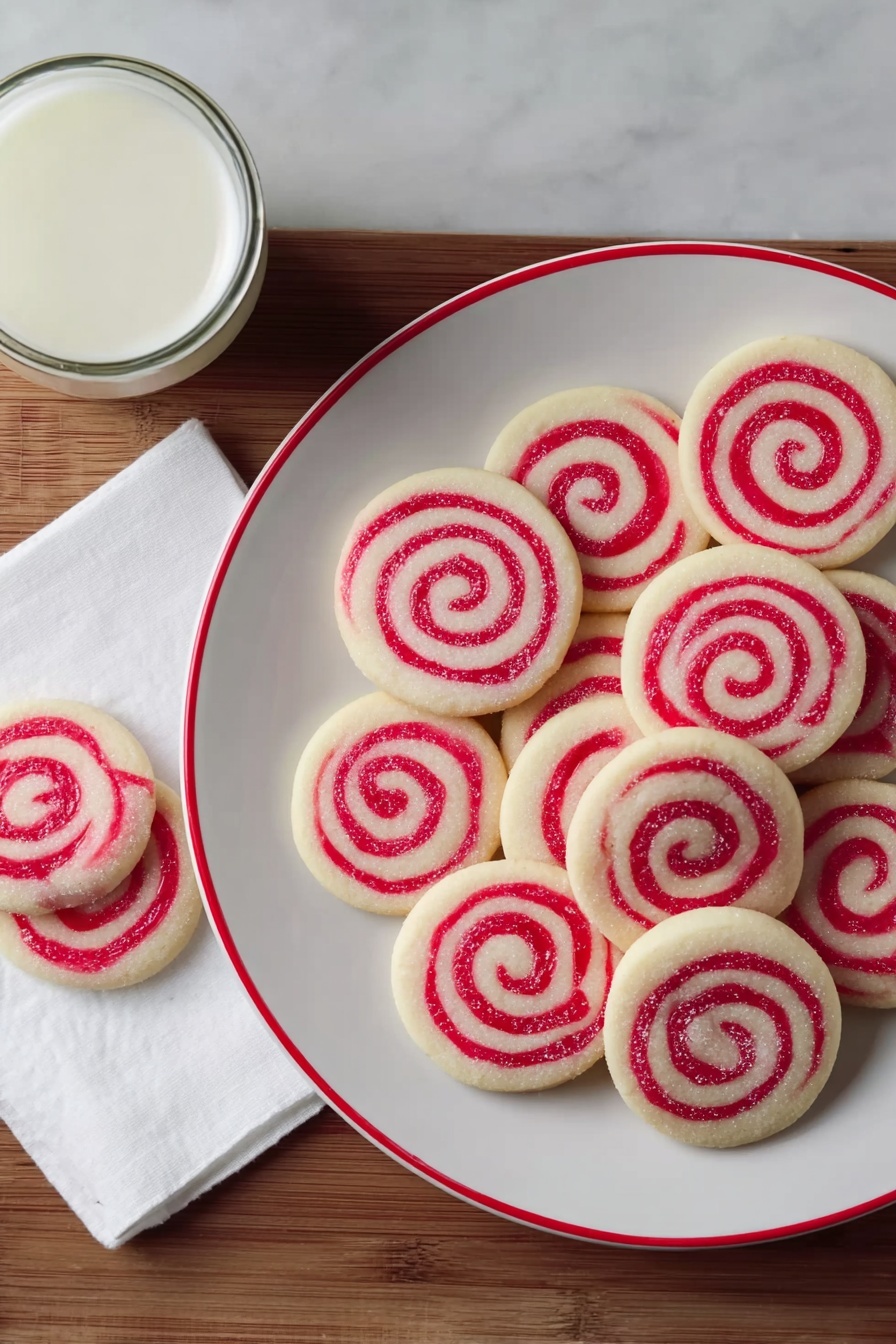
If you’re looking for a charming and delicious festive treat, you’ve got to try this Holiday Pinwheel Cookies Recipe. These cookies are not just eye-catching with their swirl of colors, but they also have that perfect buttery, slightly fruity flavor combo that makes everyone come back for more. When I first made these, I couldn’t believe how simple it was to create such a stunning cookie that instantly brightens up any holiday cookie tray. Trust me, you’ll want to keep these in your recipe arsenal year after year!
Why You’ll Love This Recipe
- Visually Stunning: The swirl pattern is a guaranteed crowd-pleaser that makes your cookie platter pop.
- Simple Ingredient List: You likely already have most of the ingredients in your pantry, making it easy to whip up anytime.
- Make-Ahead Friendly: You can freeze the dough logs for up to a month, so holiday baking can be stress-free.
- Perfect Balance of Flavors: The hint of raspberry extract pairs beautifully with buttery vanilla dough for an irresistible taste.

Ingredients You’ll Need
This Holiday Pinwheel Cookies Recipe uses classic baking staples, but what really makes it special are the raspberry extract and red food coloring blending into one half of the dough, giving that festive twist. I recommend using good-quality butter and pure vanilla extract to make all the flavors shine through.
- White granulated sugar: Adds sweetness and helps create that soft, tender texture you want in cookies.
- Unsalted butter: Room temperature butter is key here to cream well with sugar and deliver that rich flavor.
- Vanilla extract: Choose pure vanilla extract for the best depth of flavor.
- Baking powder: Helps give the cookies a light lift, preventing them from being too dense.
- Salt: Enhances all the flavors and balances the sweetness perfectly.
- Egg: Binds the dough and adds moisture.
- All-purpose flour: The sturdy base that shapes your cookies and holds the pinwheel pattern.
- Liquid red food coloring: Use just enough to get a festive red without overwhelming the dough texture.
- Raspberry extract: This is the secret ingredient that gives a subtle fruity punch complementing the red dough.
Variations
I love to switch up the colors and flavors to match different holidays or personal preferences. This recipe is a fantastic base for experimenting, so don’t hesitate to get creative with it.
- Different Extracts: Once, I swapped raspberry for peppermint extract, and the cookies tasted like cozy winter magic – so refreshing with those subtly sweet swirls!
- Food Coloring Alternatives: Use green and red for Christmas or orange for Halloween to get festive in minutes.
- Chocolate Pinwheels: Try replacing one dough ball’s raspberry extract and red coloring with cocoa powder for a rich chocolate swirl.
- Gluten-Free Version: Use a reliable gluten-free baking flour blend and adjust as needed for the texture—you might find chilling the dough a bit longer helps.
How to Make Holiday Pinwheel Cookies Recipe
Step 1: Cream the Butter and Sugar to Perfection
Start by beating together sugar, room temperature butter, vanilla extract, baking powder, and salt. I use my stand mixer with the paddle attachment and mix on medium speed for about 2 minutes until the batter becomes creamy, pale, and clings nicely to the bowl. This step is crucial because it builds the cookie’s tender crumb and prevents it from becoming dense. If you don’t have a stand mixer, a hand mixer works fine too—just scrape the bowl a few times to get an even mix.
Step 2: Mix in the Egg and Flour
Scrape down the sides of the bowl, then add the egg and mix until fully combined. Next, toss in the flour a bit at a time on low speed, just until no streaks of flour remain. This helps prevent overmixing, which can make cookies tough. When your dough is ready, turn it out on a clean surface and divide it in half.
Step 3: Color and Flavor Half the Dough
Place one half back in the mixing bowl and add the red food coloring along with the raspberry extract. I usually start with half a teaspoon of each, but you can adjust to taste or color preference. Mix gently until the color is even. Now divide each plain and colored half again, so you have four dough portions—two plain, two raspberry-colored. Shape each into a rough square or rectangle and tightly wrap with plastic wrap. Chill for at least 30 minutes or up to a day. This step makes rolling much easier.
Step 4: Roll Out Dough and Stack
Take one dough piece, unwrap it, and sandwich it between two pieces of parchment or wax paper. Roll it out to about a 6 by 12-inch rectangle, flipping carefully as you go to keep thickness even and avoid creases in the paper transferring to your dough. If the dough feels too firm, let it sit at room temperature for a few minutes to soften slightly. Repeat for all four pieces, stacking them on a cookie sheet, then chill the whole stack in the freezer for 15 minutes. This step firms up the dough so it’s easier to handle when you assemble your pinwheels.
Step 5: Assemble and Roll the Pinwheel Logs
Remove one plain and one raspberry dough sheet from the freezer, peel off the top parchment, then carefully flip the raspberry sheet onto the plain dough; this creates your colorful sandwich. Trim edges for a neat fit. Roll the dough from the long side into a tight 12-inch log, peeling back the bottom parchment as you roll. Then repeat the process with the raspberry sheet on the bottom this time (so the red dough spirals differently). Wrap both logs tightly in plastic wrap and chill in the fridge for at least 2 hours or overnight. You can even freeze these logs for up to a month—slice and bake whenever you want yummy cookies with no fuss.
Step 6: Slice and Bake the Cookies
Preheat your oven and line a baking sheet with parchment or a silicone mat. Take the chilled dough logs out, smooth minor flat edges by gently rolling with your hands, and slice into 1/4 to 1/2-inch thick rounds. Place them about an inch apart to allow for spreading. Bake until the edges just start turning golden—about 10 minutes, depending on your oven. The smell while these cookies bake is unreal, so brace yourself to enjoy that warm, cozy kitchen magic. Transfer to a wire rack to cool completely before storing.
Pro Tips for Making Holiday Pinwheel Cookies Recipe
- Chill Time Is Your Friend: I learned the dough is much easier to work with if you don’t rush the chilling steps, so be patient!
- Use Parchment Paper to Avoid Rolling Mess: Rolling between sheets keeps the dough from sticking and helps keep edges even.
- Even Slicing for Uniform Cookies: A sharp knife and steady hand make all the difference so cookies bake evenly.
- Don’t Overbake: Watch carefully—you want just a hint of browning on the edges to keep them tender inside.
How to Serve Holiday Pinwheel Cookies Recipe
Garnishes
I like keeping it simple with these cookies because their pinwheel colors are the star. But for gatherings, a light dusting of powdered sugar makes them feel even more festive. You could also serve with a drizzle of white chocolate or a sprinkle of festive colored sugar for a bit of sparkle.
Side Dishes
Pair these cookies with a warm cup of spiced tea, cocoa, or even mulled wine for adult holiday parties. They also go surprisingly well with a scoop of vanilla ice cream if you want a sweet snack upgrade.
Creative Ways to Present
For holiday parties, I’ve arranged the pinwheels vertically in tall mason jars or placed stacks on festive tiered trays. Wrapping them in clear cellophane tied with ribbons also makes for a charming homemade gift that everyone adores.
Make Ahead and Storage
Storing Leftovers
Store your baked pinwheel cookies in an airtight container at room temperature; they stay fresh and chewy for up to three days. If you want to keep them longer, they freeze beautifully baked as well.
Freezing
One of the best things about this Holiday Pinwheel Cookies Recipe is how easy it is to freeze the dough logs before baking. Wrap them tightly in plastic wrap and foil, then pop in the freezer for up to a month. When you’re ready to bake, just thaw in the fridge overnight and slice as usual.
Reheating
If you want to warm leftovers, I recommend popping a couple of cookies in the microwave for 10-15 seconds or into a 300°F oven for about 5 minutes. This softens them up and lifts back that fresh-baked aroma and texture.
FAQs
-
Can I use gel food coloring instead of liquid?
Absolutely! Gel food coloring works well and won’t add extra moisture to the dough. Just start with less—about a quarter teaspoon—and add more if needed to get that perfect red hue without affecting texture.
-
What if I don’t have raspberry extract?
If raspberry extract isn’t available, you can substitute with almond or vanilla extract, or even a teaspoon of raspberry jam mixed into the colored dough for a slightly different but delicious flair.
-
How thick should I slice the cookie dough logs?
Slicing the dough between 1/4 and 1/2 inch thick is ideal. Thinner slices bake up crispier, while thicker slices keep a soft, chewy center. I usually go right in the middle at about 3/8 inch for the best texture.
-
Can I make these cookies without a stand mixer?
Yes! You can cream the butter and sugar by hand with a sturdy wooden spoon or use a handheld mixer. It just might take a bit more effort to get that light, fluffy texture, but it’s definitely doable.
Final Thoughts
This Holiday Pinwheel Cookies Recipe has become one of my absolute favorites to bake during the festive season. There’s something so magical about seeing those bright swirls come together and then tasting that buttery, lightly fruity cookie fresh from the oven. It’s a simple, impressive treat that anyone can make, and sharing them with friends and family always feels extra special. I really can’t recommend giving this recipe a go — trust me, once you try it, it’ll be a holiday tradition in your kitchen too!
Print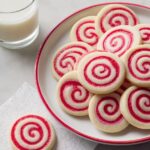
Holiday Pinwheel Cookies Recipe
- Prep Time: 30 minutes
- Cook Time: 10 minutes
- Total Time: 4 hours 40 minutes
- Yield: About 48 cookies
- Category: Dessert
- Method: Baking
- Cuisine: American
Description
Holiday Pinwheel Cookies are delightful and festive treats made by layering and rolling two differently flavored doughs—vanilla and raspberry—into charming pinwheel shapes. These slice-and-bake cookies offer a beautiful swirled appearance with a tender, buttery texture. Perfect for holiday celebrations or gift-giving, they can be prepared in advance and stored frozen, making holiday baking stress-free and fun.
Ingredients
For the Dough
- 1 1/4 cup (250 g) white granulated sugar
- 1 cup (225 g or 2 sticks) unsalted butter, at room temperature
- 1 teaspoon vanilla extract
- 1/2 teaspoon baking powder
- 1/2 teaspoon salt
- 1 large egg
- 3 cups (420 g) all-purpose flour
For the Raspberry Dough
- 1/2 teaspoon liquid red food coloring
- 1/2 teaspoon raspberry extract
Instructions
- Prepare the Base Dough: Place the sugar, butter, vanilla extract, baking powder, and salt into the bowl of a stand mixer fitted with a paddle attachment. Beat on medium speed for about 2 minutes until the mixture is creamy, lighter in color, and clings to the bowl sides.
- Add Egg: Scrape down the bowl sides, then add the egg, mixing until fully incorporated.
- Add Flour: Gradually add the all-purpose flour on low speed until the dough is homogeneous with no streaks of flour.
- Divide and Color Dough: Scrape dough onto a clean surface and divide it in half. Set one half aside. To the other half in the mixer bowl, add red food coloring and raspberry extract, mixing thoroughly until uniformly colored. Then divide each half into two equal portions for a total of four balls: two vanilla and two raspberry.
- Shape and Chill Dough: Shape each dough ball into a square or rectangle roughly, wrap each tightly in plastic wrap, and refrigerate for at least 30 minutes or up to 24 hours to firm up.
- Roll Out Dough Layers: On a piece of wax or parchment paper, unwrap one dough portion, cover with another sheet, and roll into a 6 x 12 inch rectangle. Flip periodically during rolling to avoid sticking. If dough is too hard, allow it to soften slightly. Transfer rolled dough (sandwiched between parchment) onto a baking sheet. Repeat with the remaining dough pieces, stacking the sheets.
- Freeze Rolls: Place the stack of rolled dough sheets in the freezer for 15 minutes to firm without fully freezing.
- Assemble Pinwheel Logs: Remove one vanilla and one raspberry dough sheet from freezer. Peel top parchment from both and flip the raspberry sheet onto the vanilla sheet, aligning edges and trimming if necessary. Roll the combined dough lengthwise into a 12-inch log, peeling parchment as you go. Repeat the process with remaining sheets, alternating which dough color is on the outside.
- Final Chill: Wrap each log tightly in parchment or plastic wrap. Chill in the refrigerator for at least 2 hours or overnight; or freeze up to one month.
- Slice and Bake: Preheat oven to 350°F (175°C). Line baking sheets with parchment paper or silicone mats. Remove dough logs from fridge; smooth edges by gently rolling on the counter. Slice logs into 1/4- to 1/2-inch thick cookies. Place slices about 1 inch apart on baking sheets.
- Bake: Bake for approximately 10 minutes, or until cookie edges begin to slightly brown.
- Cool and Store: Transfer cookies to a wire rack to cool completely. Store cooled cookies in an airtight container for up to 3 days.
Notes
- For a festive holiday touch, simply roll together two colors of dough to create beautiful pinwheel patterns.
- Freeze the rolled dough logs for up to a month for easy slice-and-bake cookies whenever you want.
- If the dough is too hard to roll, let it soften a few minutes to avoid cracking.
- Be sure to keep dough chilled to maintain shape during slicing and baking.
- Align dough edges carefully when assembling layers to achieve clean pinwheel swirls.
Nutrition
- Serving Size: 1 cookie
- Calories: 88 kcal
- Sugar: 5 g
- Sodium: 29 mg
- Fat: 4 g
- Saturated Fat: 2 g
- Unsaturated Fat: 0 g
- Trans Fat: 0 g
- Carbohydrates: 12 g
- Fiber: 0 g
- Protein: 1 g
- Cholesterol: 14 mg


