If you’re looking for a bite-sized dessert that’s as adorable as it is delicious, you’re going to want to try this Mini Pecan Pies in Mini Muffin Pan Recipe. I absolutely love how these little treats pack all the rich, nutty flavor of a traditional pecan pie into perfectly portioned mini pies. When I first made them, I was amazed at how easy the mini muffin pan transforms this classic southern dessert into a fun, crowd-pleasing snack. Grab your pan and let’s dive into why this recipe will become your go-to for celebrations or anytime sweet cravings strike!
Why You’ll Love This Recipe
- Perfectly Portion-Controlled: Each mini pie is just the right size to satisfy without overindulging.
- Easy to Make: Using a mini muffin pan simplifies the baking process and yields consistent results every time.
- Impressively Flavorful: The rich pecan filling tastes just like the classic, only mini and cuter!
- Great for Any Occasion: These are the perfect party favors, holiday treats, or afternoon pick-me-ups.

Ingredients You’ll Need
Getting your ingredients right is half the battle, and for these mini pecan pies, I’ve found that using quality nuts and real butter gives you that deep, luxurious flavor and perfect texture. You’ll also want to have everything prepped and ready because things move quickly once you start assembling these bite-sized delights!
- Pie Crust Dough: Homemade or store-bought, but I recommend a flaky, buttery crust to complement the filling.
- Chopped Pecans: Freshly chopped pecans add a fantastic crunch; toast them lightly for an extra nutty punch.
- Light Corn Syrup: This classic sweetener gives the filling that glossy, gooey texture pecan pies are famous for.
- Brown Sugar: Adds rich caramel notes; packed brown sugar works best.
- Unsalted Butter: Melted butter enriches the filling and helps bind everything together.
- Egg: Acts as a binder and gives the pies a custard-like consistency.
- Vanilla Extract: Just a splash adds warmth and depth to the flavor.
- Salt: Enhances sweetness and balances all the flavors.
Variations
I love how versatile this Mini Pecan Pies in Mini Muffin Pan Recipe can be. Whether you want to swap out nuts or adjust sweetness to your liking, it’s easy to personalize and still get that comforting pecan pie flavor you crave!
- Nut Swap: I once tried using walnuts instead of pecans and loved the slightly earthier flavor — it gave a nice twist while keeping that classic vibe.
- Gluten-Free Crust: Using a gluten-free pie crust mix works beautifully without sacrificing texture, so your friends with sensitivities won’t miss out.
- Spiced Filling: Adding a pinch of cinnamon or pumpkin pie spice can give your mini pies a cozy seasonal feel.
- Chocolate Drizzle: For a decadently fun variation, drizzle melted dark chocolate on top after baking — my family goes crazy for this one!
How to Make Mini Pecan Pies in Mini Muffin Pan Recipe
Step 1: Prepare Your Mini Muffin Pan and Crust
Before you start, preheat your oven to 350°F (175°C). Spray your mini muffin pan lightly with non-stick spray to ensure easy removal later. Roll out your pie crust dough on a lightly floured surface until it’s about 1/8-inch thick. Use a small round cookie cutter or shot glass to cut circles just big enough to line each mini muffin cup. Gently press the dough circles into each cavity, making sure to cover the bottom and sides without stretching the dough.
Step 2: Mix the Pecan Pie Filling
In a bowl, whisk together the eggs, browned sugar, corn syrup, melted butter, vanilla, and a pinch of salt until smooth. Then fold in the chopped pecans until evenly combined. This filling is what gives the pies their luscious, gooey texture with just the right amount of crunch from the nuts.
Step 3: Fill and Bake
Spoon the filling into each prepared crust-lined muffin cup, filling about 2/3 full—you don’t want to overfill, or they’ll spill over while baking. Place the pan on the middle rack and bake for about 20-25 minutes, or until the filling is set and golden around the edges. I often keep an eye in the last 5 minutes to catch that perfect golden color.
Step 4: Cool and Remove
Once baked, allow the mini pecan pies to cool in the pan for about 10 minutes before carefully removing them with a small offset spatula or butter knife. Transfer to a wire rack to cool completely; this helps them firm up so you get that clean slice when eating.
Pro Tips for Making Mini Pecan Pies in Mini Muffin Pan Recipe
- Use a Mini Muffin Pan: This is a game changer—traditional pie tins just don’t give you that perfect mini size and shape.
- Don’t Overfill: Filling the crusts too full leads to spills and sticky messes—stick to about two-thirds full for neat pies.
- Chill the Dough: I learned this trick for extra flaky crusts—pop your dough in the fridge for 15-20 mins before cutting out the circles.
- Let Them Cool Before Removing: Pies can break if too hot; a bit of patience here keeps them intact and beautiful.
How to Serve Mini Pecan Pies in Mini Muffin Pan Recipe
Garnishes
For me, a dollop of freshly whipped cream or a small scoop of vanilla ice cream on the side elevates these mini pies to dessert-star status. Sometimes I sprinkle a little powdered sugar on top for a pretty finishing touch without overpowering the flavors.
Side Dishes
These mini pecan pies pair beautifully with a hot cup of coffee or spiced chai for fall breakfasts or afternoon coffee breaks. For festive occasions, I like to serve them alongside warm apple cider or a small cheese plate to balance the sweetness.
Creative Ways to Present
I once arranged these mini pies on a tiered dessert stand lined with autumn leaves for a Thanksgiving centerpiece that was not only stunning but totally irresistible to guests. Wrapping them individually in tiny cellophane bags tied with ribbon also makes charming party favors or gifts.
Make Ahead and Storage
Storing Leftovers
Leftover mini pecan pies keep beautifully at room temperature when stored in an airtight container for up to 2 days. I recommend placing parchment paper between layers if stacking to avoid them sticking together.
Freezing
I’ve frozen these mini pies successfully by first flash-freezing them on a baking sheet, then transferring them to a freezer-safe container. They thaw overnight in the fridge and taste nearly as fresh as the day they were baked!
Reheating
To reheat, I pop them in a preheated 325°F oven for about 5-7 minutes. This brings back the warm gooey filling and slightly crisp edges without drying them out.
FAQs
-
Can I use store-bought pie crust for this Mini Pecan Pies in Mini Muffin Pan Recipe?
Absolutely! Store-bought pie crust works wonderfully and saves time. I recommend choosing one that’s buttery and flaky for the best texture. Just be sure to chill it before cutting to make handling easier.
-
How do I prevent the mini pecan pies from sticking to the muffin pan?
Lightly spray your mini muffin pan with non-stick cooking spray before pressing the dough in, and avoid overfilling the pies. Letting them cool in the pan for a bit before removing also helps them come out cleanly.
-
Can I make these mini pecan pies ahead of time?
Yes! You can prepare the pies up to the baking step and refrigerate them for a few hours before baking. Just add a couple of extra minutes to the bake time if chilled. They also freeze well baked, making them great for preparing in advance.
-
What can I serve alongside these mini pecan pies?
They’re delightful with whipped cream, vanilla ice cream, or a hot cup of coffee or tea. For a festive spread, add fresh fruit or a cheese board to balance the richness of the pies.
Final Thoughts
This Mini Pecan Pies in Mini Muffin Pan Recipe holds a special place in my heart because it turns a beloved classic into something fun and approachable. Whether you’re baking for the holidays, a party, or just a sweet snack craving, these mini pies hit the spot every time. Trust me, once you try making these, you’ll be as hooked as I am — and your family will beg for them again and again. Give it a go, you’ll love how easy and delightful these little pies are!
Print
Mini Pecan Pies in Mini Muffin Pan Recipe
- Prep Time: 20 minutes
- Cook Time: 10 minutes
- Total Time: 45 minutes
- Yield: 8 donuts
- Category: Dessert
- Method: Baking
- Cuisine: American
Description
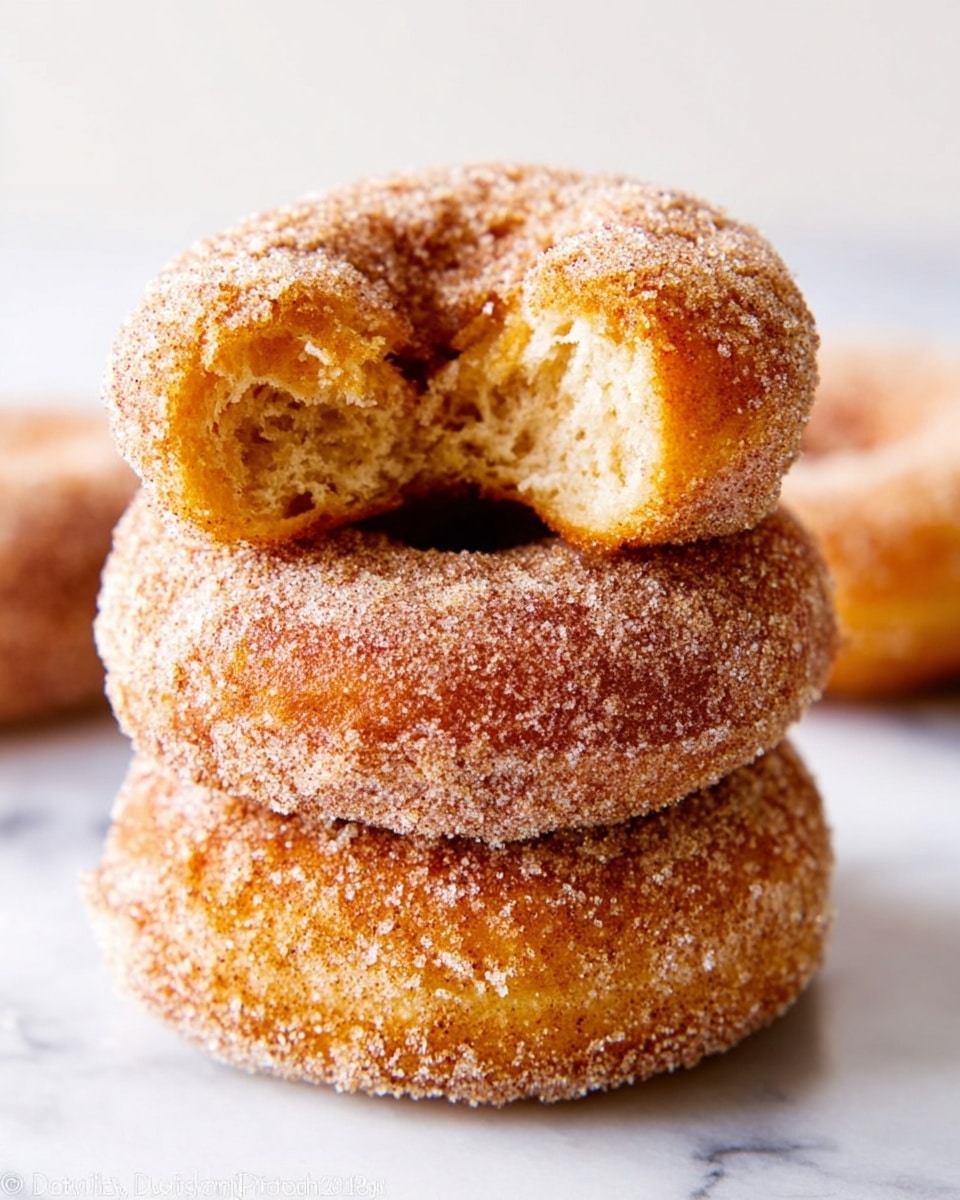
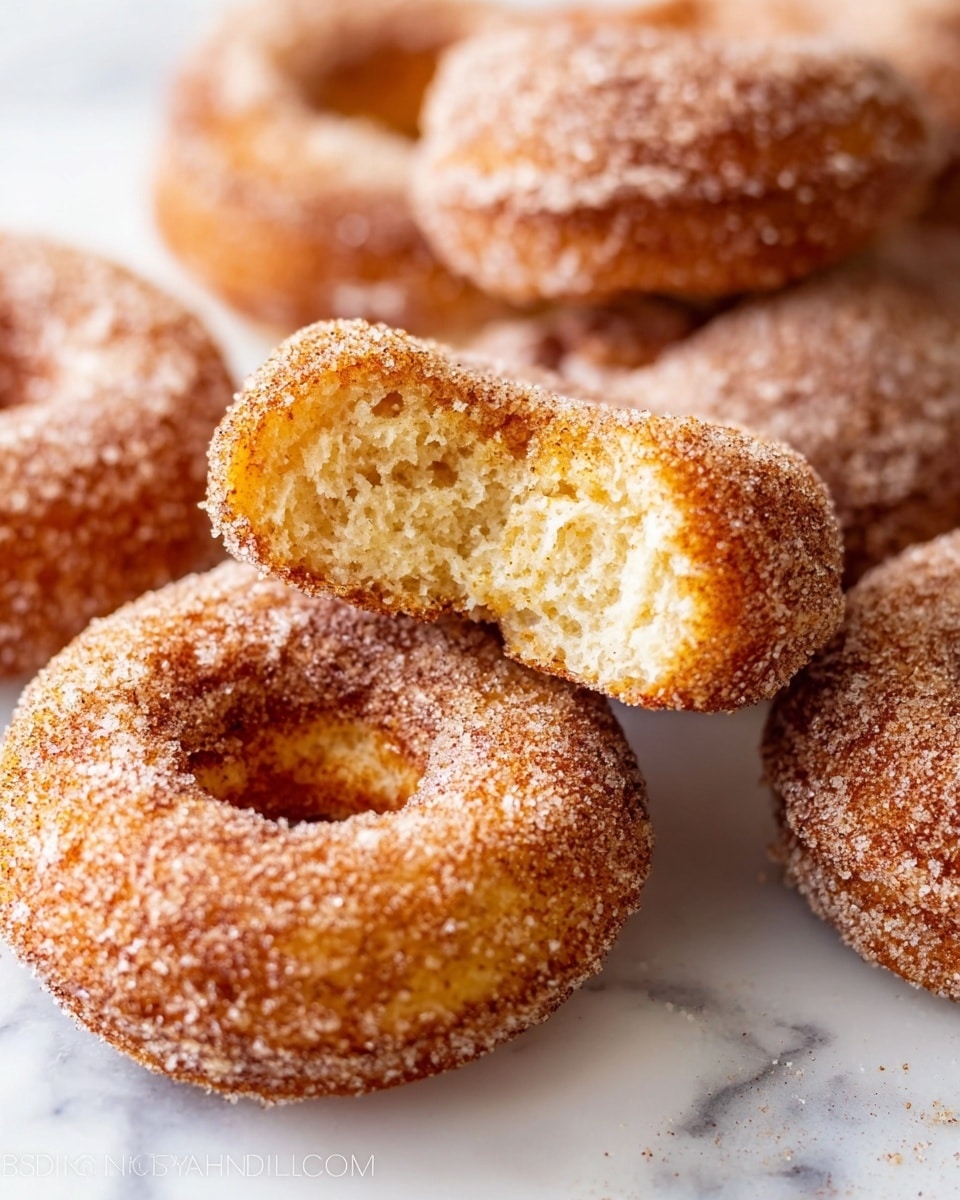
These baked cinnamon sugar donuts are a deliciously easy treat perfect for breakfast or a sweet snack. Lightly spiced with cinnamon and nutmeg, soft and tender inside, and coated in a buttery cinnamon sugar glaze, they come together quickly with simple ingredients and bake to perfection in just 10 minutes.
Ingredients
Dry Ingredients
- 1 cup (125g) all-purpose flour (spooned & leveled)
- 1 teaspoon baking powder
- 1/4 teaspoon baking soda
- 1/2 teaspoon salt
- 1/2 teaspoon ground cinnamon
- 1/4 teaspoon ground nutmeg
Wet Ingredients
- 1 large egg, at room temperature
- 1/3 cup (65g) packed light brown sugar
- 1/4 cup (60ml) milk
- 1/4 cup (60g) yogurt
- 2 Tablespoons (28g) unsalted butter, melted
- 1 and 1/2 teaspoons pure vanilla extract
Topping
- 1 cup (200g) granulated sugar
- 1 teaspoon ground cinnamon
- 1/2 cup (8 Tbsp; 113g) unsalted butter, melted
Instructions
- Preheat and prepare pan: Preheat your oven to 350°F (177°C). Spray a donut pan generously with non-stick spray to prevent sticking. Set the pan aside as you prepare the batter.
- Mix dry ingredients: In a medium bowl, whisk together the all-purpose flour, baking powder, baking soda, salt, ground cinnamon, and ground nutmeg until well combined. Set aside this dry mixture.
- Mix wet ingredients: In another bowl, whisk the large egg and packed light brown sugar until smooth. Add the milk and yogurt and continue whisking. Then whisk in the melted unsalted butter and pure vanilla extract until fully incorporated.
- Combine wet and dry: Pour the wet ingredients into the bowl with the dry ingredients. Gently fold or mix just until combined. The batter will be very thick, so avoid overmixing to keep the donuts tender.
- Fill donut pan: Spoon the batter into a large zip-top bag and cut off one bottom corner to create a piping bag. Pipe the batter evenly into the donut cavities, filling each about two-thirds to three-quarters full.
- Bake the donuts: Place the donut pan in the oven and bake for 9-10 minutes, or until the edges turn lightly golden brown. Remove the pan and allow the donuts to cool in the pan for about two minutes before transferring them to a wire rack set over parchment paper or a baking sheet. Repeat baking with any remaining batter.
- Prepare cinnamon sugar coating: In a medium bowl, mix together granulated sugar and ground cinnamon until well blended. Melt the 1/2 cup unsalted butter in a separate bowl.
- Coat the donuts: Dip each cooled donut first into the melted butter, then immediately into the cinnamon sugar mixture, coating all sides evenly for that classic sweet and buttery finish.
- Serve and store: Donuts are best enjoyed fresh and warm. Leftovers can be stored tightly covered at room temperature for up to two days without losing flavor or texture.
Notes
- This recipe is incredibly easy to make, especially with the piping bag method for filling the donut pan.
- Donuts bake quickly, so watch closely to avoid over-baking.
- Using yogurt adds moisture and tenderness to the donuts.
- Freshly baked donuts taste best; leftovers remain good for up to two days if stored properly.
Nutrition
- Serving Size: 1 donut
- Calories: 220
- Sugar: 18g
- Sodium: 200mg
- Fat: 10g
- Saturated Fat: 6g
- Unsaturated Fat: 3g
- Trans Fat: 0g
- Carbohydrates: 29g
- Fiber: 1g
- Protein: 3g
- Cholesterol: 40mg


