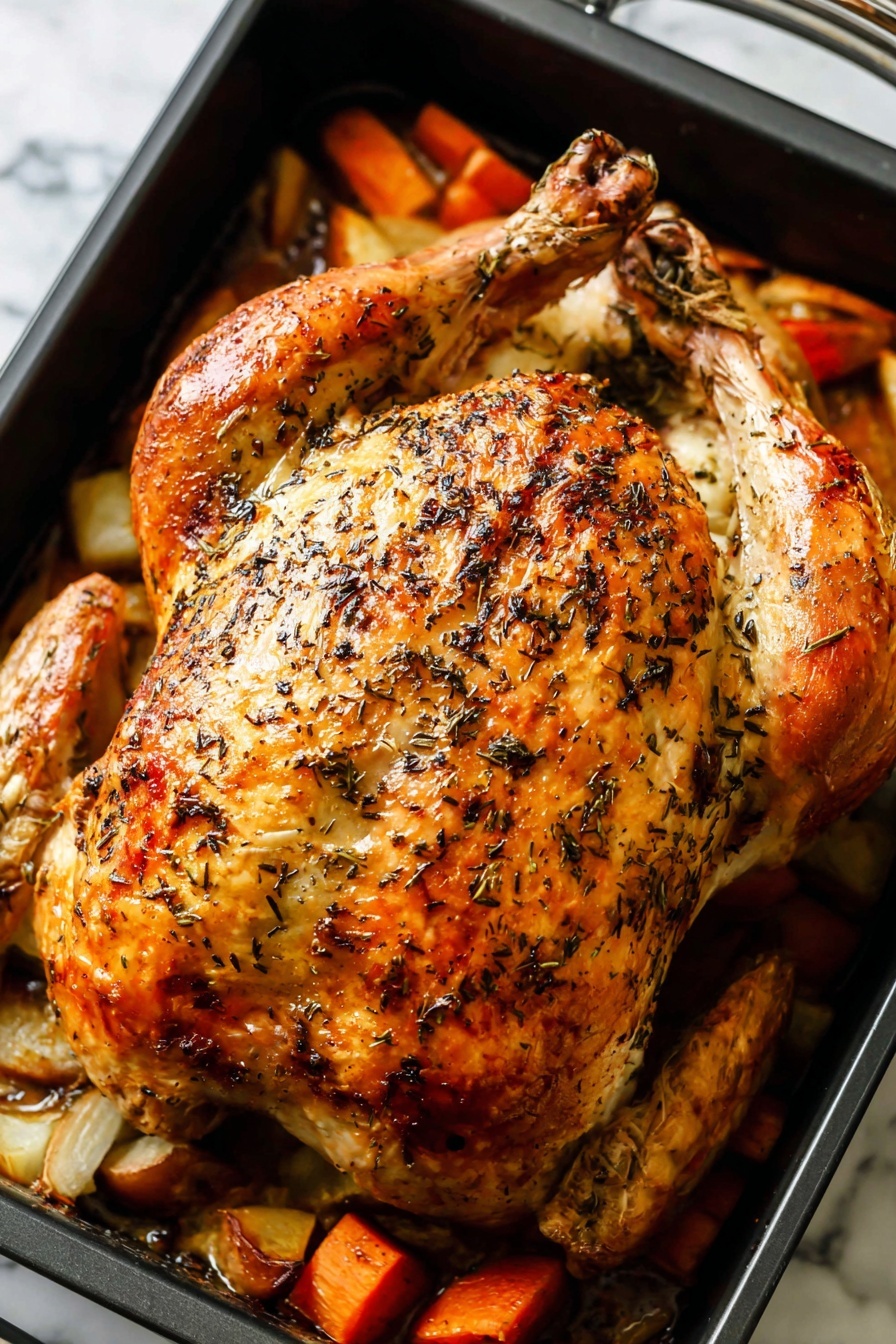
If you’ve ever struggled to get moist, flavorful turkey that doesn’t taste like shoe leather, I’ve got something that will change your holiday game forever. I’m talking about my Perfectly Juicy Dry Brine Turkey Recipe — a simple, foolproof way to get the juiciest, most delicious turkey that’s bursting with flavor. Trust me, after trying this method, you’ll never want to go back to wet brining or bland roasting again.
Why You’ll Love This Recipe
- Super Moist Turkey: The dry brine locks in juicy flavor without extra fuss or mess.
- Simple Ingredients: With just kosher salt, rosemary, and lemon zest, you keep things clean but delicious.
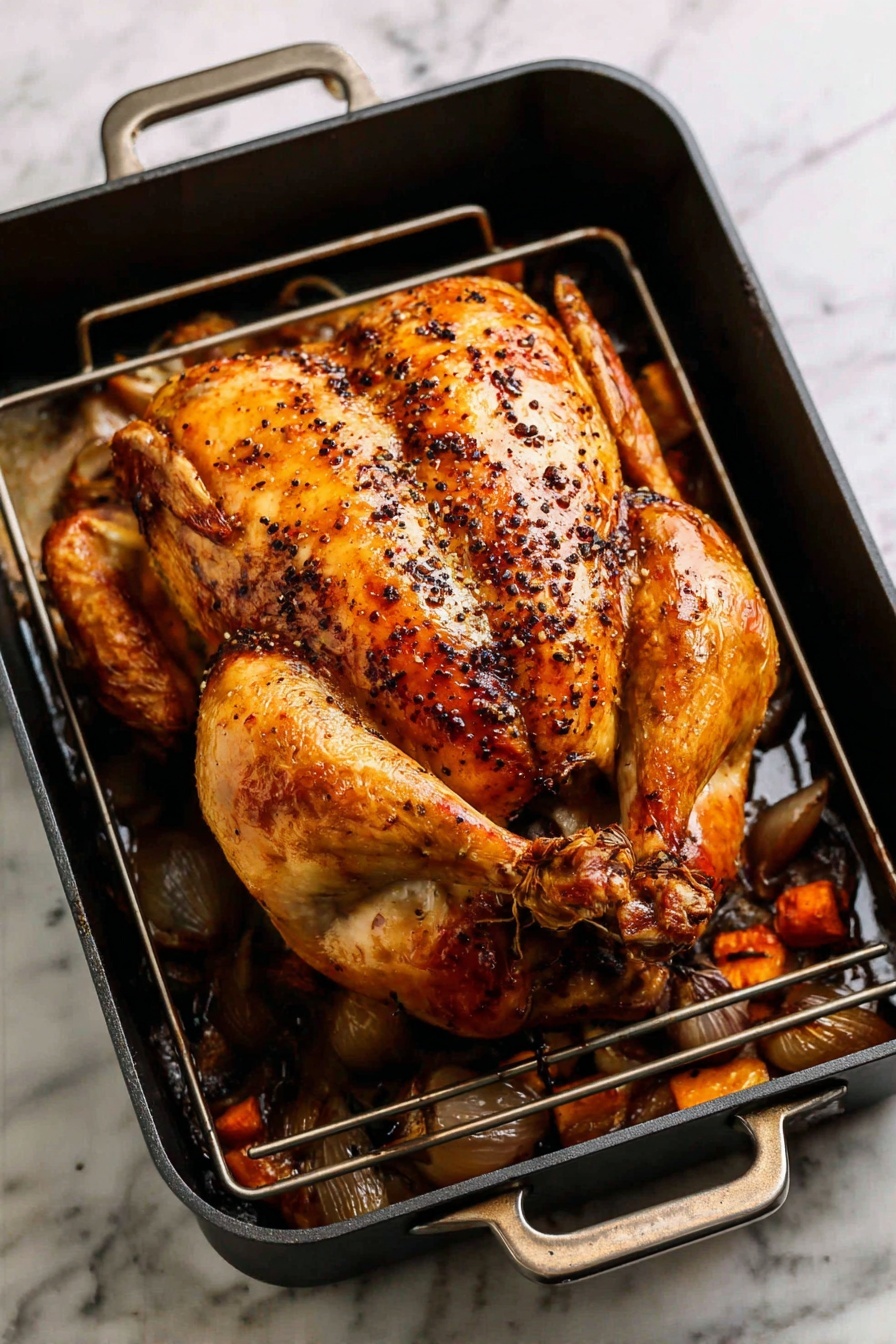
- Crispy Skin Every Time: The overnight drying step is my secret weapon for that perfect golden crunch.
- Less Time and Stress: Dry brining means no big tubs of water or last-minute prep, freeing you up for other holiday tasks.

Ingredients You’ll Need
This recipe is as straightforward as it gets—no complicated marinades or spices. Each ingredient plays a starring role in bringing out the turkey’s natural flavor and making sure it stays tender and juicy.
- Whole turkey (14- to 16-pound): Look for fresh or properly thawed; a good-quality bird makes a huge difference here.
- Kosher salt: I rely on Morton’s kosher salt for its purity and perfect crystal size that penetrates meat well during brining.
- Fresh rosemary: Minced finely, it adds just the right herbal note without overpowering the turkey.
- Lemon zest: I use zest from small lemons; it brightens the flavor beautifully and pairs perfectly with rosemary.
Variations
I love making this recipe my own depending on the mood and occasion. You can easily customize the dry brine to suit personal taste or dietary needs without sacrificing juiciness.
- Herb Variation: I sometimes swap rosemary for sage or thyme for a different herbal twist—both work beautifully!
- Citrus Twist: Adding orange zest instead of lemon gives the turkey a sweeter, more fragrant aroma—my family goes crazy for it.
- Spice Kick: For a little heat, I add a pinch of cayenne to the dry brine mix, which provides warmth without overpowering.
- Diet-Friendly: This recipe is naturally gluten-free and paleo-friendly, so you can serve it confidently to most guests.
How to Make Perfectly Juicy Dry Brine Turkey Recipe
Step 1: Thaw Your Turkey Properly
You want to start with a completely thawed bird—that’s key for even brining and cooking. I follow the rule of thumb: 24 hours in the fridge for every 5 pounds of turkey. For a 15-pound turkey, that means about 3 days. If you’re short on time, a cold water bath works well, just remember to change the water every 30 minutes to keep it safe (it’ll take roughly 8 hours for your bird). When I first tried this, rushing thawing led to uneven brine absorption, so be patient here!
Step 2: Mix and Apply the Dry Brine
Combine kosher salt, minced rosemary, and lemon zest in a bowl. Don’t skip zesting the lemon – that citrus punch makes a surprising difference. Remove the neck and giblets, then pat the turkey completely dry (skip rinsing — it doesn’t help and risks spreading bacteria). Sprinkle one tablespoon of your salt mixture inside the cavity, then rub the rest all over the outside, focusing on the breast, under wings, and legs. Trust me, this even coverage is what makes the turkey sing with flavor later.
Step 3: Refrigerate and Let the Magic Happen
Place your turkey on a rimmed baking sheet, cover tightly with plastic wrap, and refrigerate for 24 to 48 hours. Your timing depends on when you want to cook it, but the longer it brines within this window, the better the flavor penetration. I once underestimated the timing and my turkey wasn’t as juicy as I hoped — lesson learned: don’t rush the brine.
Step 4: Dry the Skin for Crispy Perfection
After the brine period, uncover the bird and leave it in the fridge uncovered for another 24 hours or at least one hour. This step dries out the skin so it crisps beautifully in the oven. When I skipped this drying time once, the skin was noticeably less crunchy — don’t make the same mistake!
Step 5: Bring to Room Temperature and Cook
An hour before roasting, take the turkey out of the fridge to come to room temperature (don’t brush off the brine). Removing the plastic carrier attached to the legs now makes carving easier after roasting. From there, cook using your favorite method — I love roasting at 325°F, but spatchcocking or smoking works wonderfully too. Cooking until the internal temperature reaches 165°F in the breast is your goal for juicy, safe to eat turkey.
Pro Tips for Making Perfectly Juicy Dry Brine Turkey Recipe
- Patience is Key: Give the dry brine at least 24 hours to work its magic for the juiciest turkey.
- Don’t Rinse the Turkey: It’s tempting, but rinsing only spreads bacteria and washes away seasoning.
- Dry Skin Means Crispy Skin: Always dry the turkey uncovered in the fridge before roasting for that perfect crunch.
- Use a Meat Thermometer: This helped me avoid overcooking and maintain ideal juiciness every single time.
How to Serve Perfectly Juicy Dry Brine Turkey Recipe
Garnishes
I love garnishing with fresh rosemary sprigs and lemon wedges — not only do they make the platter pop visually, but they also add an extra hit of aroma when you serve. Some toasted nuts or lightly charred herbs scattered around add a rustic touch that gets compliments every time.
Side Dishes
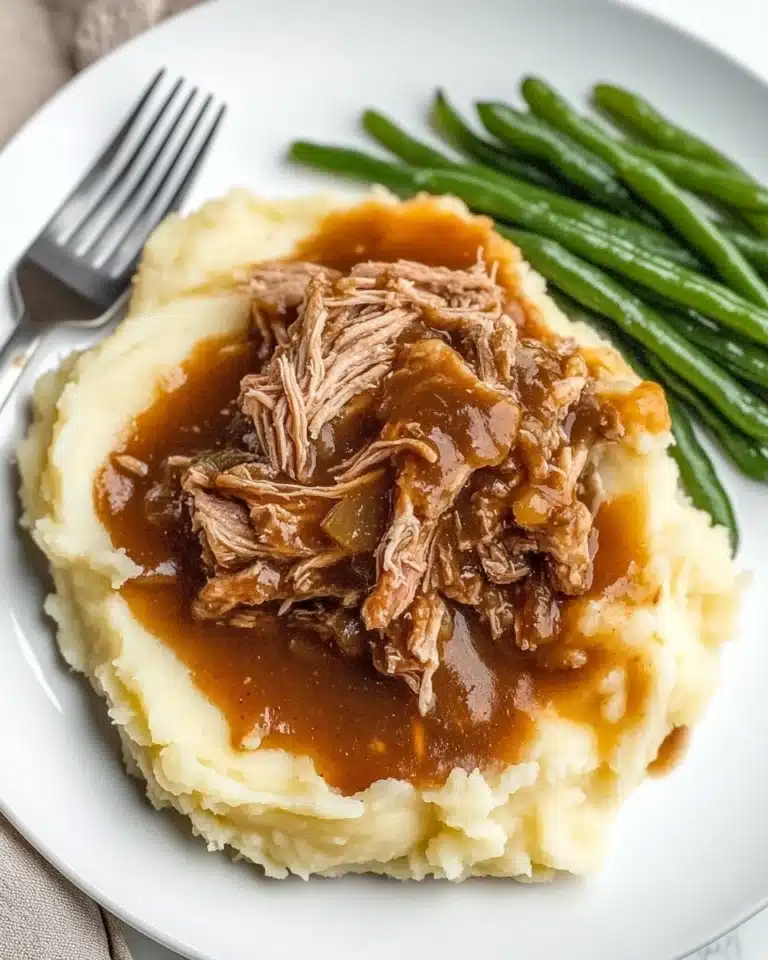
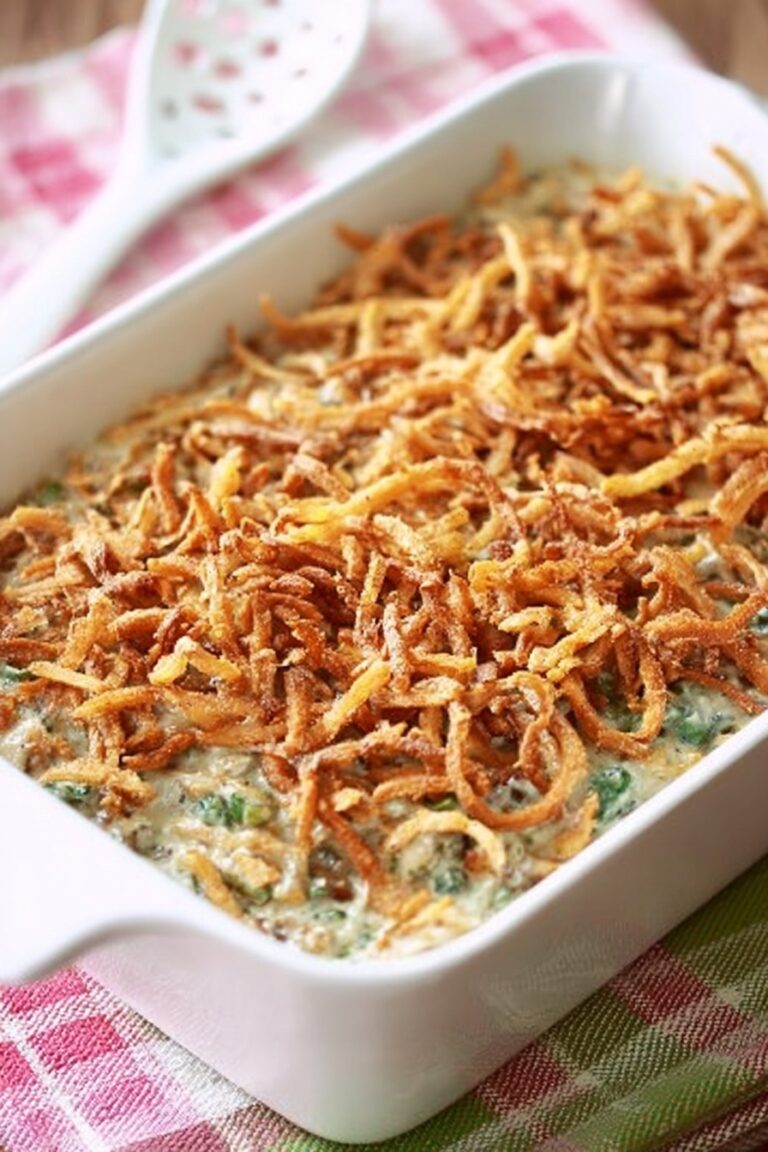
This turkey pairs beautifully with classic mashed potatoes, buttery green beans almondine, and a bright cranberry sauce. For a modern twist, I also like roasted root vegetables tossed with fresh herbs and a drizzle of honey—such a crowd-pleaser.
Creative Ways to Present
For holiday dinners, I’ve served this turkey on a large wooden board surrounded by seasonal fruits like pomegranate seeds and sliced apples for a festive vibe. Another idea is slicing the breast and presenting it fan-style with a drizzle of pan juices — elegant and impressive without extra effort.
Make Ahead and Storage
Storing Leftovers
Once the turkey cools, I carve it into portions and store leftovers in airtight containers in the fridge. Using shallow containers helps it cool evenly and keeps meat juicy for up to 4 days. I’ve found that loosely covering with foil helps prevent the meat from drying out in the fridge.
Freezing
If I know we won’t finish the turkey soon, I freeze portions in vacuum-sealed bags or heavy-duty freezer containers. This turkey freezes incredibly well; when thawed, it retains that moist, juicy texture I love. Just make sure to label and date for best results.
Reheating
To reheat, I preheat the oven to 325°F and cover the turkey slices with foil to keep moisture locked in. Heating in 15-minute increments until warmed through keeps the meat tender. I avoid microwaves because they tend to dry meat out, but if you must, pop an ice cube or damp paper towel alongside your plate.
FAQs
-
Can I dry brine my turkey too far in advance?
Ideally, dry brine for 24 to 48 hours before cooking. Going longer than 48 hours can cause the texture to become too salty or a bit mealy, especially with less fatty turkeys. For best results, stick within that window.
-
Do I need to rinse the salt off before cooking?
Nope! Don’t rinse the turkey after dry brining — rinsing can spread bacteria around your kitchen and washes away the flavorful seasoning. Just cook it as is for perfectly salty, juicy results.
-
Can I use this recipe on a frozen turkey?
You want your turkey fully thawed before you start the dry brine process. This ensures the brine penetrates evenly and the turkey cooks safely and thoroughly.
-
What’s the best way to get crispy skin?
The key is drying the skin uncovered in the fridge after applying the dry brine. This step allows the skin to lose moisture and crisp up beautifully during roasting. Also, avoid covering the turkey tightly right before roasting.
-
Can I use coarse sea salt instead of kosher salt?
Kosher salt is preferred because of its size and purity, which helps it dissolve and penetrate the meat evenly. Coarse sea salt can work, but you may want to use slightly less due to its stronger saltiness and finer grains.
Final Thoughts
This Perfectly Juicy Dry Brine Turkey Recipe has become my go-to for holiday gatherings and special Sunday dinners alike. It’s simple, reliable, and delivers juicy, flavorful turkey every time without extra fuss or complicated prepping. I’ve shared this with friends who now swear by it, and I know once you try it, you’ll love the ease and the amazing results just as much as I do. So go ahead, plan ahead, and get ready to enjoy the best turkey you’ve ever had!
Print
Perfectly Juicy Dry Brine Turkey Recipe
- Prep Time: 20 minutes
- Cook Time: Varies depending on cooking method (typically 3 to 4 hours roasting for a 14-pound turkey)
- Total Time: 72 hours (including thawing and dry brine resting time)
- Yield: 10 to 12 servings; 1 14- to 16-pound turkey
- Category: Main Course
- Method: Roasting
- Cuisine: American
Description
This Dry Brine Turkey recipe uses a simple mixture of kosher salt, fresh rosemary, and lemon zest to enhance the turkey’s natural flavor and ensure a juicy, moist bird with a crispy skin. The process involves seasoning the turkey days ahead to tenderize and deeply season the meat, making it the easiest way to cook a flavorful turkey without the risk of dryness.
Ingredients
Turkey
- 1 14- to 16-pound turkey, thawed
Dry Brine Mixture
- 3 tablespoons kosher salt (Morton’s recommended)
- 1 ½ tablespoons minced fresh rosemary
- Zest of 2 small or 1 large lemon (reserve lemons for stuffing if desired)
Instructions
- Thaw Your Turkey: Place the frozen turkey in the refrigerator 4 to 6 days before cooking, allowing 24 hours of thawing for every 5 pounds of turkey (approximately 3 days for a 15-pound bird). Alternatively, use a cold water bath changing water every 30 minutes, which takes about 8 hours for a 15-pound bird.
- Prepare the Dry Brine and Apply: 1 to 2 days before cooking, combine kosher salt, minced rosemary, and lemon zest in a small bowl. Remove neck and giblets from the turkey and pat the turkey very dry with paper towels. Place the turkey on a rimmed baking sheet or shallow pan. Sprinkle 1 tablespoon of the salt mixture inside the cavity, then rub the remaining mixture all over the outside of the turkey, including under wings and legs, focusing on the breast but not the backside touching the pan.
- Refrigerate the Turkey Covered: Cover the turkey tightly with plastic wrap and refrigerate for 24 to 48 hours until the day before or morning of cooking, depending on how early you started.
- Dry Out the Skin: One day before or the morning of cooking, uncover the turkey and refrigerate it uncovered for 24 hours or until 1 hour before cooking. This step dries the skin to help it crisp and it will appear translucent.
- Rest at Room Temperature: Remove the turkey from the refrigerator 1 hour before cooking, letting it come to room temperature without disturbing the brine. Remove any plastic carrier attached to the legs.
- Cook as Desired: Proceed to cook your turkey using your preferred method such as roasting or smoking. This recipe prepares the turkey for any classic cooking technique that suits your preference.
Notes
- Dry brining ensures a juicy, moist turkey with flavorful, crispy skin without extra effort.
- The combination of kosher salt, fresh rosemary, and lemon zest is simple yet provides excellent flavor.
- Do not rinse the turkey after applying the dry brine to avoid spreading bacteria.
- Patting the turkey dry before applying the brine is very important for effective seasoning and drying the skin.
- Refrigerating the turkey uncovered for drying is key to achieving crispy skin.
Nutrition
- Serving Size: 1 serving (1/10th of a 14-pound dry brined turkey)
- Calories: 636 kcal
- Sugar: 0.3 g
- Sodium: Approx. 450 mg
- Fat: 25 g
- Saturated Fat: 7 g
- Unsaturated Fat: 15 g
- Trans Fat: 0.3 g
- Carbohydrates: 0.2 g
- Fiber: 0.1 g
- Protein: 98 g
- Cholesterol: 325 mg


