If you’re looking for a delightful, crowd-pleasing dessert that’s bursting with seasonal flavors, this Pumpkin Cheesecake Bars Recipe is just what you need. It’s creamy, perfectly spiced, and has that irresistible pumpkin goodness wrapped in a luscious cream cheese swirl—total comfort food for fall and beyond. I promise, once you try it, you’ll be making these bars over and over again!
Why You’ll Love This Recipe
- Perfectly Balanced Flavors: The creamy cheesecake and spiced pumpkin layers complement each other flawlessly.
- Easy to Make: You’ll find that the bars come together with simple steps and common ingredients.
- Great for Any Occasion: Whether it’s a casual weeknight treat or a holiday party, these bars shine.
- Make-Ahead Friendly: You can prep them in advance, making your life easier on busy days.

Ingredients You’ll Need
To nail this Pumpkin Cheesecake Bars Recipe, you want to gather some key ingredients that really bring out the best in pumpkin desserts. Fresh spices and room temperature cream cheese make a huge difference, so pay attention to those details!
- All-purpose flour: This helps create a sturdy yet tender crust and base for the bars.
- Sugar: Sweetens both the crust and cheesecake layers—granulated works best here.
- Unsalted butter: Essential for richness and to control the salt level.
- Pumpkin puree: Use pure pumpkin (not pie filling) for that authentic flavor.
- Cream cheese: The star ingredient for the creamy swirl—make sure it’s softened for smooth mixing.
- Eggs: Help bind everything together and add structure.
- Vanilla extract: Adds depth and warmth to the flavors.
- Spices (cinnamon, nutmeg, ginger, cloves): Classic pumpkin pie spices that make this taste just like fall in every bite.
- Baking powder: For a slight lift to your crust or filling, depending on your recipe version.
- Salt: Balances the sweetness and enhances all flavors.
Variations
I like to switch things up every now and then with this Pumpkin Cheesecake Bars Recipe to keep it exciting—and you should too! It’s such a flexible recipe that can easily match whatever you’re craving or need for the occasion.
- Mini pumpkin spice chips: I once added these to the batter and it gave the bars an extra pop of cinnamon flavor and texture that my family adored.
- Gluten-free crust: Using almond flour or a gluten-free blend works nicely if you have friends with dietary needs.
- Maple syrup glaze: Drizzling a little maple syrup on top before serving adds a sweet, sticky finish that’s irresistible.
- Vegan adaptation: Swapping in vegan cream cheese and flax eggs can make these bars suitable for a plant-based diet.
How to Make Pumpkin Cheesecake Bars Recipe
Step 1: Prepare Your Crust Base
First things first, you’ll want to mix your dry ingredients like flour, baking powder, and salt, then blend them with softened butter and sugar until you get a crumbly yet dough-like texture. Press this mixture firmly into a lined baking pan to create an even, sturdy base — I like to use a square 9×9 inch pan for easy slicing later. Pro tip: pressing evenly is key so the crust doesn’t bake unevenly or get too thick in spots.
Step 2: Whip Up the Cream Cheese Swirl
Cream your softened cream cheese with sugar until it’s super smooth and silky. Adding an egg and vanilla extract will help it hold together nicely without separating. This creamy layer is what makes these bars so heavenly, so don’t rush this step—you want your cream cheese fully softened and well mixed for that perfect swirl.
Step 3: Mix the Pumpkin Layer
In a separate bowl, combine pumpkin puree with sugar and the warm spices—think cinnamon, nutmeg, ginger, and a pinch of cloves. Adding an egg here is also important to keep the filling stable as it bakes. I always taste a tiny bit of this mixture before combining; it’s like a sneak peek at the final flavor!
Step 4: Assemble and Create the Famous Swirl
Pour the pumpkin mixture over your crust layer. Then drop spoonfuls of the cream cheese mixture on top and use a butter knife or skewer to gently swirl the two layers together. Don’t overmix—just enough to get that gorgeous marbled look that makes these bars so special.
Step 5: Bake and Cool
Bake in a preheated oven (usually around 350°F) until the edges are set and the center looks just slightly jiggly; this usually takes about 35-40 minutes. Cooling completely is crucial—these bars firm up and slice beautifully only once cooled fully, so be patient! I usually leave mine in the fridge a couple of hours before cutting.
Pro Tips for Making Pumpkin Cheesecake Bars Recipe
- Room Temperature Ingredients: Make sure eggs and cream cheese are at room temp to avoid lumps and ensure smooth mixing.
- Don’t Overbake: The center should be slightly jiggly when you take them out to keep the bars creamy and avoid cracking.
- Swirl Gently: Use a light hand when swirling cream cheese and pumpkin layers to create beautiful patterns without blending them too much.
- Use Parchment Paper: Lining your pan makes it super easy to lift the bars out without breaking them.
How to Serve Pumpkin Cheesecake Bars Recipe
Garnishes
I love topping these bars with a simple dusting of powdered sugar or a dollop of whipped cream for an elegant touch. Sometimes, I add a sprinkle of crushed pecans or a cinnamon stick on the side for visual appeal and extra crunch. Fresh thyme sprigs can add a surprising but wonderful herbaceous aroma that pairs beautifully with the pumpkin spices.
Side Dishes
These bars go great alongside a warm cup of spiced tea or coffee—perfect for cozy afternoons. If you want to turn dessert into a full experience, I like serving them with fresh fruit like sliced pears or baked apple slices that complement the pumpkin flavor without competing.
Creative Ways to Present
For holiday parties, I’ve arranged the bars on a wooden board with scattered fresh cranberries and orange slices around for a festive look. Wrapping individual bars in parchment paper with a little twine makes a charming gift or grab-and-go snack. Getting creative with presentation makes a big difference when you want to impress your guests!
Make Ahead and Storage
Storing Leftovers
After baking, I keep leftover Pumpkin Cheesecake Bars tightly covered in the fridge, usually wrapped in plastic wrap and stored in an airtight container. They stay fresh and creamy for up to 4 days—though they rarely last that long in my house. The flavors even get better after a day or two!
Freezing
If you want to freeze these bars, I recommend slicing them first, then placing parchment sheets between layers to prevent sticking. Wrap securely in foil or freezer bags and freeze for up to 3 months. When you’re ready, thaw in the fridge overnight for perfect texture and taste.
Reheating
Though I typically enjoy these bars chilled, you can warm them slightly in the microwave for about 15 seconds if you prefer a softer texture. Just don’t overheat, or you risk melting the cream cheese swirl too much. Alternatively, pop them in a low oven (about 300°F) wrapped in foil for 10 minutes to gently warm.
FAQs
-
Can I use canned pumpkin puree for this Pumpkin Cheesecake Bars Recipe?
Absolutely! Just make sure to use plain canned pumpkin puree, not pumpkin pie filling, which includes added sugars and spices that can throw off the recipe’s balance.
-
How do I prevent cracks in the cheesecake swirl?
Using room temperature cream cheese and eggs helps the filling blend smoothly without air bubbles that cause cracks. Also, avoid overbaking—take the bars out when the center is still a little jiggly.
-
Can I make these bars gluten-free?
Yes! Swap the all-purpose flour with a gluten-free flour blend that measures cup-for-cup. Your crust might have a slightly different texture, but the bars will still be delicious.
-
How long do Pumpkin Cheesecake Bars last?
Stored tightly covered in the refrigerator, they last up to 4 days. Beyond that, they can lose moisture and texture, so try to enjoy them within that time frame.
Final Thoughts
This Pumpkin Cheesecake Bars Recipe has become one of my absolute favorites to share with friends and family, especially when that pumpkin craving hits hard. It strikes the perfect balance between creamy and spiced, and it’s surprisingly simple to pull off even when you’re short on time. I hope you have as much fun making it as I do eating it—and trust me, your taste buds will thank you!
Print
Pumpkin Cheesecake Bars Recipe
- Prep Time: 120 min
- Cook Time: 30 min
- Total Time: 150 min
- Yield: 12 servings
- Category: Dessert
- Method: Baking
- Cuisine: American
- Diet: Vegetarian
Description
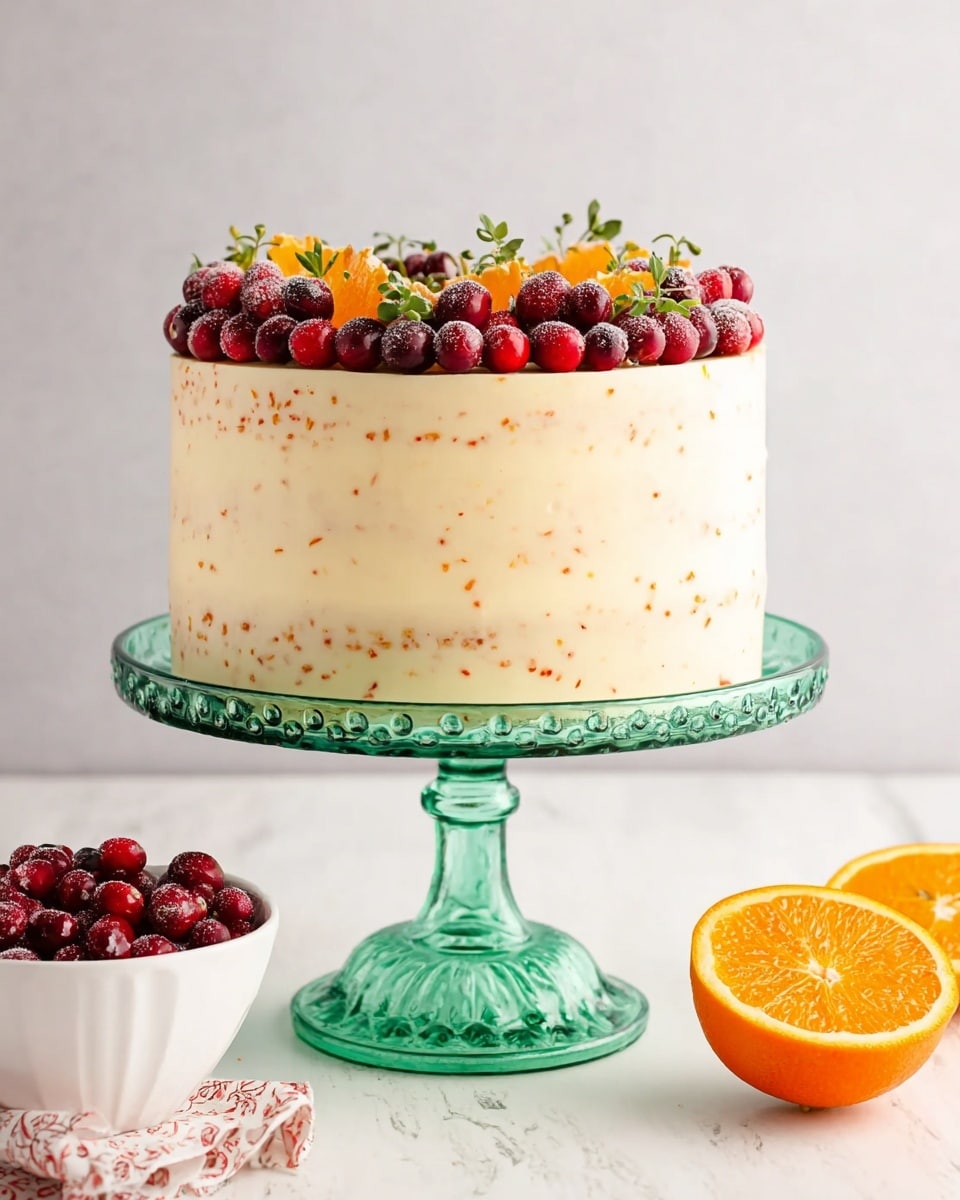
This Cranberry Orange Cake is a moist, flavorful dessert bursting with fresh cranberries and vibrant orange zest. Topped with a rich and creamy orange cream cheese frosting, this cake is perfect for holiday gatherings or any special occasion where a delightful citrus and berry treat is welcomed.
Ingredients
Cake
- 2 1/2 cups all-purpose flour
- 2 1/2 tsp baking powder
- 1/2 tsp salt
- 3/4 cup unsalted butter (room temperature)
- 1 Tbsp orange zest (from one large orange)
- 1 1/2 cup granulated sugar
- 3 large eggs (room temperature)
- 1 tsp vanilla extract
- 3/4 cup milk (room temperature)
- 1/2 cup orange juice (fresh squeezed, from one large orange)
- 1 cup cranberries (coated in 1 Tbsp flour)
Frosting
- 2 cups unsalted butter (room temperature)
- 1 Tbsp orange zest
- 8 oz cream cheese (full fat, softened)
- 5 cups powdered sugar
- 1 tsp vanilla extract
Garnish
- Fresh cranberries
- Orange slices (if desired)
- Thyme sprigs (if desired)
Instructions
- Preheat Oven and Prepare Pans: Preheat your oven to 350°F (175°C). Grease and flour your cake pans or line them with parchment paper to ensure the cake releases easily after baking.
- Mix Dry Ingredients: In a medium bowl, whisk together the all-purpose flour, baking powder, and salt. This helps distribute the leavening agents and salt evenly throughout the batter.
- Cream Butter and Sugar: In a large mixing bowl, beat the 3/4 cup room temperature unsalted butter, orange zest, and granulated sugar on medium speed until light and fluffy, about 3-5 minutes. This incorporates air into the batter for a tender crumb.
- Add Eggs and Vanilla: Add the eggs one at a time, beating well after each addition, followed by the vanilla extract. This ensures a smooth and homogenous batter.
- Alternate Adding Dry Ingredients and Liquids: Reduce mixer speed to low. Alternately add the flour mixture and the combination of milk and orange juice to the butter mixture in about three additions, starting and ending with the dry ingredients. Mix just until combined each time to avoid overmixing.
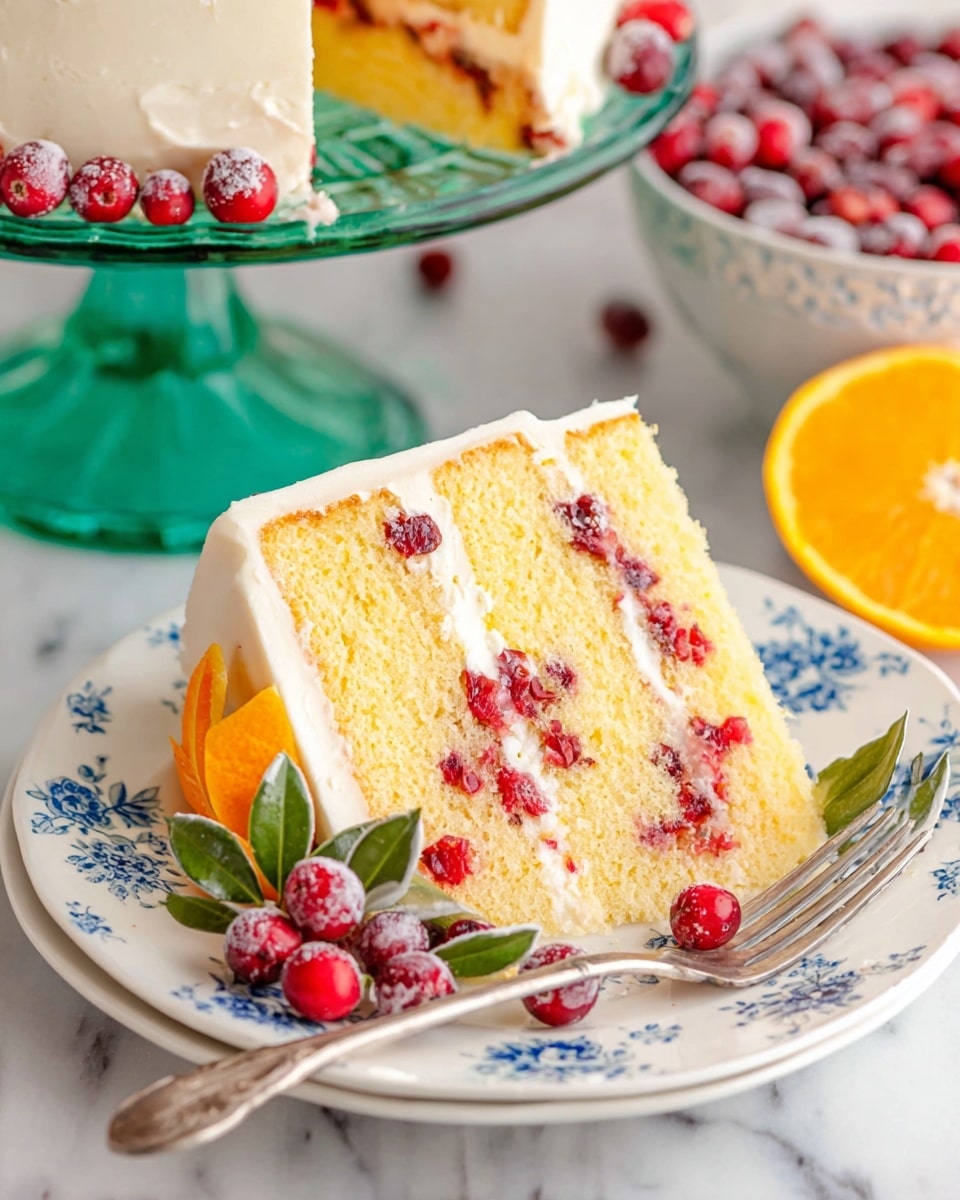
- Fold in Cranberries: Gently fold the floured cranberries into the batter using a spatula. Coating the cranberries with flour helps prevent them from sinking to the bottom of the cake during baking.
- Pour Batter and Bake: Divide the batter evenly between the prepared pans. Bake in the preheated oven for approximately 30 minutes or until a toothpick inserted in the center comes out clean.
- Cool the Cakes: Allow the cakes to cool in their pans for about 10 minutes, then turn them out onto wire racks to cool completely to room temperature. This prevents the frosting from melting when applied.
- Prepare the Frosting: In a large bowl, beat together the 2 cups room temperature unsalted butter, orange zest, and softened cream cheese until smooth and creamy. Gradually add the powdered sugar, about one cup at a time, beating well after each addition. Finally, mix in the vanilla extract until the frosting is light and fluffy.
- Assemble the Cake: If necessary, level the cake layers using a serrated knife. Spread a generous amount of frosting on the first layer, then place the second layer on top and cover the entire cake with the remaining frosting.
- Garnish and Serve: Decorate the cake with fresh cranberries, orange slices, and thyme sprigs if desired for an elegant presentation. Slice and enjoy your vibrant cranberry orange cake!
Notes
- This cake is loaded with fresh cranberries and packed with fresh orange flavor, making it a perfect festive treat.
- Coating the cranberries with flour prevents them from sinking during baking.
- Ensure all cold ingredients are brought to room temperature for the best texture.
- For extra citrus flavor, add additional orange zest to the frosting.
- Store leftovers in an airtight container in the refrigerator for up to 5 days.
- Allow the cake to come to room temperature before serving for the best taste experience.
Nutrition
- Serving Size: 1 slice
- Calories: 756 kcal
- Sugar: 66 g
- Sodium: 189 mg
- Fat: 42 g
- Saturated Fat: 26 g
- Unsaturated Fat: 14 g
- Trans Fat: 0.5 g
- Carbohydrates: 89 g
- Fiber: 1 g
- Protein: 6 g
- Cholesterol: 160 mg
