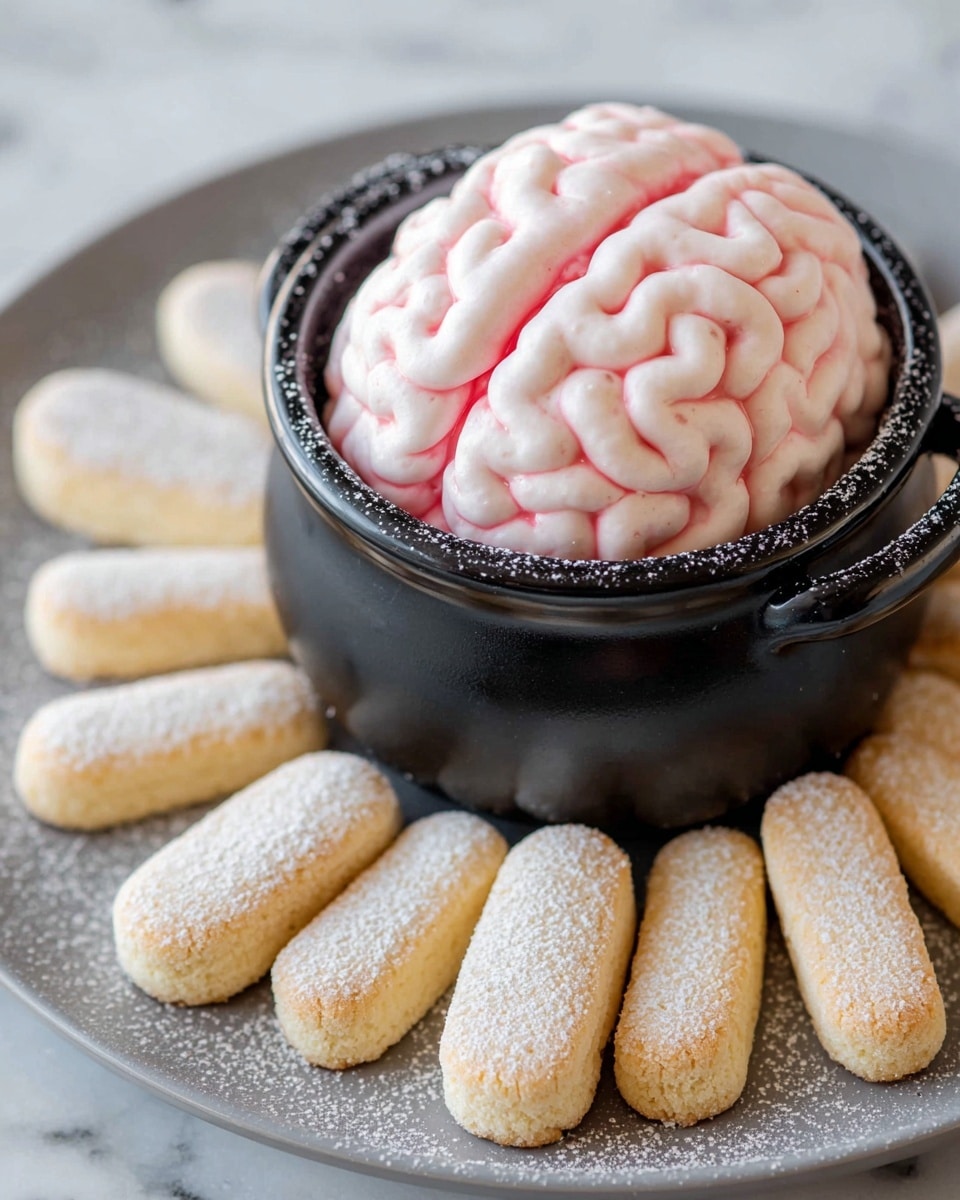
If you’re looking to wow your guests with a spooky, yet delicious treat this Halloween, you’ve got to try my Red Velvet Brain Dip with Cream Cheese Frosting and Ladyfinger Dippers Recipe. I absolutely love how this dip looks just like a wrinkly brain — it’s as much a conversation starter as it is a crowd-pleaser. It’s creamy, sweet, and perfect for dipping, making it one of my go-to festive recipes that never fails to impress. Stick around, and I’ll walk you through every step so you can nail it too!
Why You’ll Love This Recipe
- Show-Stopping Presentation: The brain-shaped piped cream cheese frosting makes this dip a Halloween centerpiece.
- Delicious Flavor Combo: Red velvet and cream cheese create that irresistible classic pairing everyone loves.
- Super Easy to Make: No fancy techniques — just mix, chill, and pipe with a little patience.
- Perfect for Parties: Comes with ladyfinger dippers making it easy for guests to enjoy mess-free snacking.

Ingredients You’ll Need
Each ingredient in this Red Velvet Brain Dip with Cream Cheese Frosting and Ladyfinger Dippers Recipe brings something special — the cream cheese keeps it creamy, the red velvet cake mix packs that iconic flavor, and the ladyfingers? Well, they’re the perfect dippers for the whole experience. Here’s what you’ll want on hand:
- Unsalted butter: Use softened butter for smooth mixing and rich flavor without extra saltiness.
- Cream cheese: The star of the show! Softened cream cheese ensures a luscious, creamy dip and frosting.
- Vanilla extract: Adds a warm background note that elevates the sweetness.
- Powdered sugar: Gives sweetness without grittiness and helps with the dip’s smooth texture.
- Red food coloring and gel food coloring: These bring the iconic vibrant red hue to make your brain pop visually.
- Red velvet cake mix: Adds the rich flavor and subtle cocoa that defines red velvet.
- Light brown sugar: Balances with a touch of molasses depth in the dip.
- Salted butter: Using salted here contrasts nicely with the sweet elements, but feel free to adjust to taste.
- Ladyfinger cookies: The best dippers — light, crispy, and sturdy enough for scooping.
Variations
I love putting my own twist on the classic Red Velvet Brain Dip with Cream Cheese Frosting and Ladyfinger Dippers Recipe, and I encourage you to have fun with it too! Whether you want it a little lighter or a bit more decadent, there’s plenty of room to play around.
- Make it gluten-free: I once swapped the red velvet cake mix for a gluten-free version and used gluten-free ladyfingers—my guests never complained, and it still tasted fantastic!
- Add a chocolatey edge: Mixing in a handful of mini chocolate chips into the dip adds a lovely texture and surprise bite that my family goes crazy for.
- Boost the brain effect: Try using a piping tip with ridges to enhance the “brain wrinkles.” This time, I used a small round tip that made it look even more realistic.
How to Make Red Velvet Brain Dip with Cream Cheese Frosting and Ladyfinger Dippers Recipe
Step 1: Whip Up the Creamy Red Velvet Dip Base
Start by combining the softened salted butter with the softened cream cheese in a mixing bowl — I usually use a hand mixer here to get super smooth and creamy consistency. Then, stir in the red velvet cake mix, brown sugar, powdered sugar, vanilla extract, and a few drops of red gel food coloring until everything is just blended and vibrantly red. The dip will be sweet but not too overpowering, so taste as you go if you want it sweeter or richer. Pop this mixture into a serving bowl and smooth the top—you’re laying the perfect foundation for your brain!
Step 2: Make the Cream Cheese “Frosting Brain” Topping
In another bowl, beat the unsalted butter, cream cheese, powdered sugar, vanilla extract, and red food coloring until smooth and spreadable. This frosting is what you’ll pipe on top, so getting the right consistency is key—not too stiff, not too runny. I like using gel food coloring here because it gives that rich hue without watering down the frosting. Transfer it to a piping bag fitted with a round tip, and get ready to channel your inner artist.
Step 3: Pipe Your Brain
This part is so fun and just a little bit therapeutic! Pipe continuous squiggly lines over the surface of the red velvet base to mimic brain folds — don’t worry about being perfect, the more natural and wrinkly it looks, the better. If your piping feels too stiff, try warming the bag slightly in your hands. When I first did this, I accidentally made the lines too tight and small, so loosening up makes the final dip pop way more visually. Chill the dip for at least 30 minutes to let the frosting set and the flavors meld.
Step 4: Serve with Ladyfinger Dippers
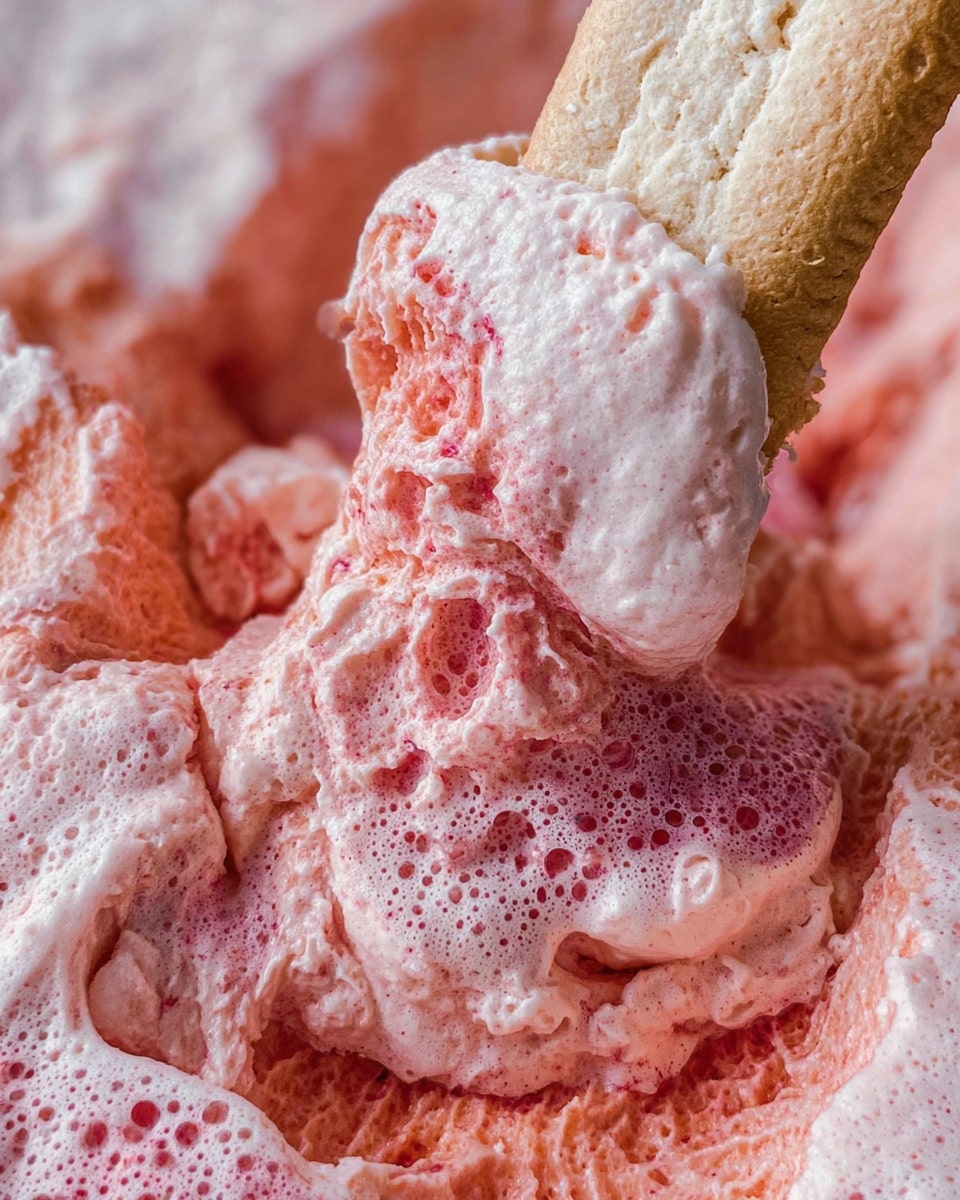
Arrange your ladyfinger cookies around the bowl as dippers. These cookies are fabulously light yet sturdy enough to scoop up a generous helping of dip without breaking. I love how their delicate crunch balances the creamy dip. Trust me, your guests will be reaching for seconds!
Pro Tips for Making Red Velvet Brain Dip with Cream Cheese Frosting and Ladyfinger Dippers Recipe
- Use Room Temperature Ingredients: This helps the dip and frosting blend super smoothly without lumps.
- Choose Gel Food Coloring: It doesn’t thin out your frosting but gives you the vibrant red color every time.
- Take Your Time Piping: Go slow when piping the brain swirls to build natural-looking folds that wow your guests.
- Chill to Set: Let the dip chill well before serving so it holds its shape and tastes even better.
How to Serve Red Velvet Brain Dip with Cream Cheese Frosting and Ladyfinger Dippers Recipe
Garnishes
While the brain shape is the star, I like adding a few extra touches on the side for visual and taste appeal. A sprinkle of mini heart-shaped sprinkles or edible glitter can add a festive flair that really makes the dip pop on your Halloween table. I’ve also dusted around the edge with a bit of cocoa powder to add subtle color contrast that looks super cool.
Side Dishes
Pair this dip with some fresh fruit like raspberries or strawberries to cut through the sweetness. It also goes well with simple crackers or even slightly salted pretzels for a salty contrast. One Halloween party, I even served it alongside spicy roasted nuts — believe it or not, that combo was a hit!
Creative Ways to Present
Whenever I want to take this recipe up a notch, I serve it in a hollowed-out pumpkin or a large red glass bowl to really amp up the creepy vibe. You can place the dip on a platter surrounded by faux spiders or dry ice for an eerie fog effect — just a tip to wow your guests if you’re hosting a Halloween bash. I also like to line the serving area with red or black lace doilies to add a spooky, elegant touch.
Make Ahead and Storage
Storing Leftovers
Leftover brain dip? No problem! I store it tightly covered in the fridge — it keeps well for up to 3 days. Just remember to bring it back to room temperature for about 20 minutes before serving again so it’s soft and scoopable, not rock hard.
Freezing
I typically don’t recommend freezing this dip because the texture can change after thawing, especially the cream cheese frosting on top. But if you do freeze it, wrap it super tight and thaw slowly overnight in the fridge to minimize separation.
Reheating
This dip is best served chilled or at room temperature, so reheating isn’t really necessary. If you want it softer, just leave it on the counter for a bit. If it’s gotten too firm, a quick 10-second zap in the microwave can soften it gently — just watch closely to avoid melting the frosting shape.
FAQs
-
Can I make the Red Velvet Brain Dip ahead of time?
Absolutely! You can prepare both the dip base and the frosting topping a day in advance. Just keep them covered in the refrigerator separately if you want the freshest piping texture. Assemble and pipe the brain on the day you plan to serve it for the best effect.
-
What if I don’t have a piping bag?
No worries! You can use a sturdy plastic sandwich bag and snip a tiny hole in one corner to pipe the brain folds. Just make sure the hole is small to replicate those wrinkly lines well.
-
Can I use another type of cookie for dipping?
Definitely! While ladyfinger cookies are ideal because of their texture and size, pretzels, graham crackers, or even sturdy fruit slices like apple wedges make excellent dippers too.
-
Is this dip very sweet?
The dip strikes a nice balance—sweet but not overwhelming. The cream cheese adds tang that offsets the sugars, and the red velvet cake mix gives a subtle cocoa flavor that deepens the overall taste.
Final Thoughts
This Red Velvet Brain Dip with Cream Cheese Frosting and Ladyfinger Dippers Recipe is one of those special treats I look forward to making every Halloween. It’s fun, festive, and surprisingly easy, yet it delivers the kind of wow factor that’ll have your family and friends talking. I love it because it brings a little playful creepiness to the table while tasting utterly scrumptious. So, grab your piping bag, get your ingredients ready, and enjoy the process — you’re going to nail this and have a blast doing it!
Print
Red Velvet Brain Dip with Cream Cheese Frosting and Ladyfinger Dippers Recipe
- Prep Time: 25 minutes
- Cook Time: 0 minutes
- Total Time: 55 minutes
- Yield: 8 servings
- Category: Dessert
- Method: No-Cook
- Cuisine: American
- Diet: Vegetarian
Description
This spooky Brain Dip is a perfect Halloween treat featuring a creamy red velvet cake base mixed with cream cheese and butter, topped with smooth cream cheese frosting piped to resemble a realistic brain. Served with ladyfinger cookies for dipping, it combines rich flavors and a creepy presentation that’s sure to impress your guests.
Ingredients
Brain Dip Base
- 1/2 cup unsalted butter, softened
- 3 ounces cream cheese, softened
- 1/2 tablespoon vanilla extract
- 1 1/2 cups powdered sugar
- Red food coloring (to desired shade)
- 8 ounces cream cheese, softened
- 1/2 cup salted butter, softened
- 1 1/2 cups dry red velvet cake mix
- 1/2 cup powdered sugar
- 2 tablespoons light brown sugar
- 1/2 teaspoon vanilla extract
- Red gel food coloring (for vibrant color)
For Serving
- Ladyfinger cookies (for dipping)
Instructions
- Prepare the Dip Base: In a large mixing bowl, combine 1/2 cup unsalted butter and 3 ounces cream cheese, both softened, until smooth and creamy. Add 1/2 tablespoon vanilla extract and 1 1/2 cups powdered sugar, mixing well to incorporate. Gradually add red food coloring until the mixture reaches a deep red hue resembling blood.
- Make the Red Velvet Cake Mixture: In a separate bowl, blend 8 ounces softened cream cheese, 1/2 cup softened salted butter, 1 1/2 cups dry red velvet cake mix, 1/2 cup powdered sugar, 2 tablespoons light brown sugar, and 1/2 teaspoon vanilla extract. Mix thoroughly until all ingredients form a thick, spreadable batter. Add red gel food coloring as needed for a rich red color.
- Combine and Chill: Fold the red velvet cake mixture into the first cream cheese mixture gently until well combined. Transfer the dip into a shallow serving bowl, smoothing the surface evenly. Cover and refrigerate for at least 30 minutes to allow flavors to meld and the texture to firm slightly.
- Prepare the Brain Frosting: Use additional cream cheese frosting made by mixing cream cheese with powdered sugar and a bit of butter until fluffy and pipeable. Tint with red gel food coloring to a desired pinkish-red tone.
- Pipe the Brain Design: Using a piping bag fitted with a small round tip, pipe the cream cheese frosting over the chilled dip in winding layers following the brain’s natural folds and wrinkles. This will create a realistic brain effect.
- Serve: Present the brain dip with ladyfinger cookies arranged around the serving dish for dipping. Keep refrigerated until ready to serve.
Notes
- This brain dip uses a cream cheese and red velvet cake mix base for a rich and creamy texture.
- Adjust the amount of red food coloring to achieve your preferred brain color.
- Ladyfinger cookies are ideal dippers because of their firm yet light texture that complements the dip.
- Chill the dip well before piping the brain design to help the frosting set properly.
- This recipe is perfect for Halloween parties and adds a fun, spooky visual element.
Nutrition
- Serving Size: 1/8 of recipe
- Calories: 290
- Sugar: 22g
- Sodium: 140mg
- Fat: 20g
- Saturated Fat: 12g
- Unsaturated Fat: 7g
- Trans Fat: 0g
- Carbohydrates: 18g
- Fiber: 1g
- Protein: 3g
- Cholesterol: 50mg

