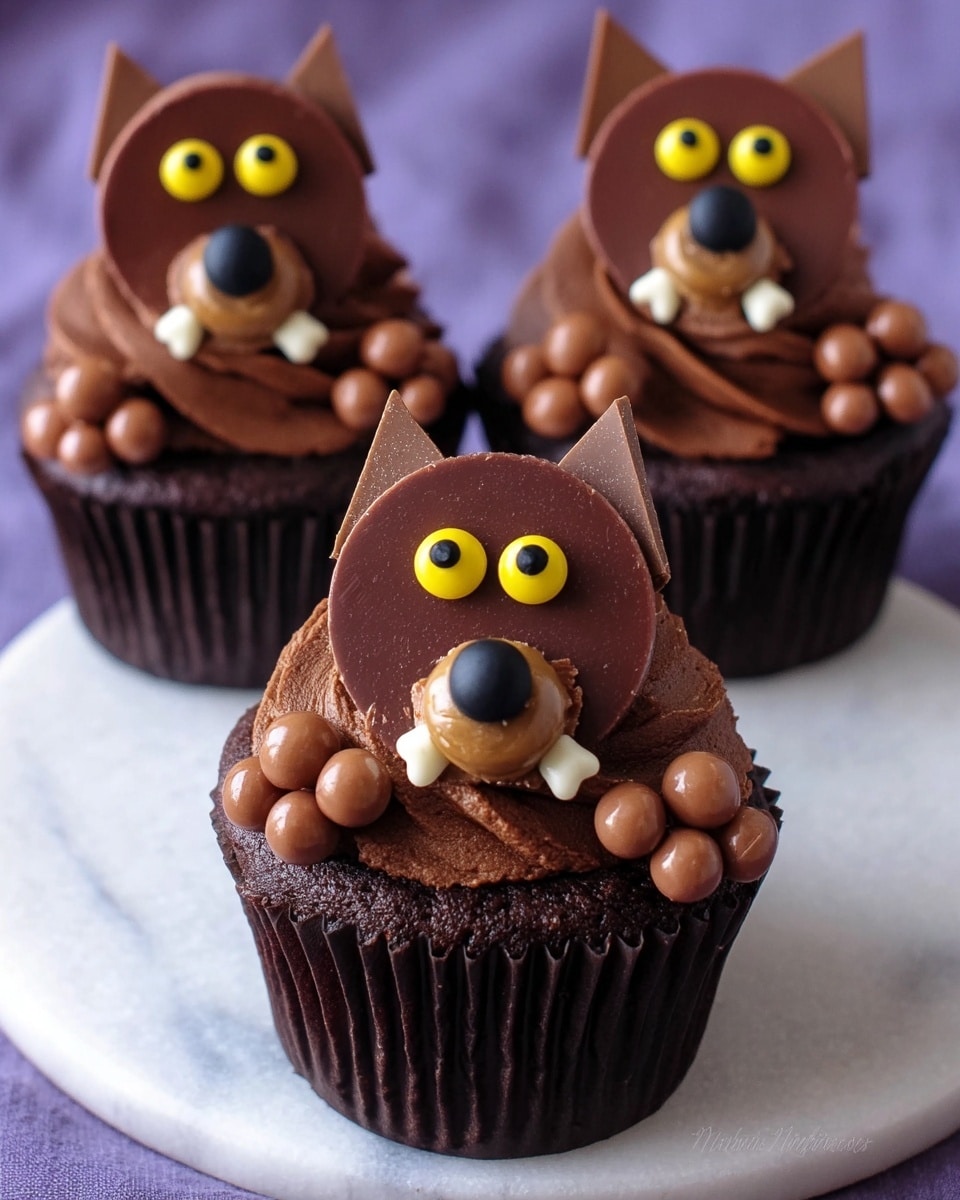
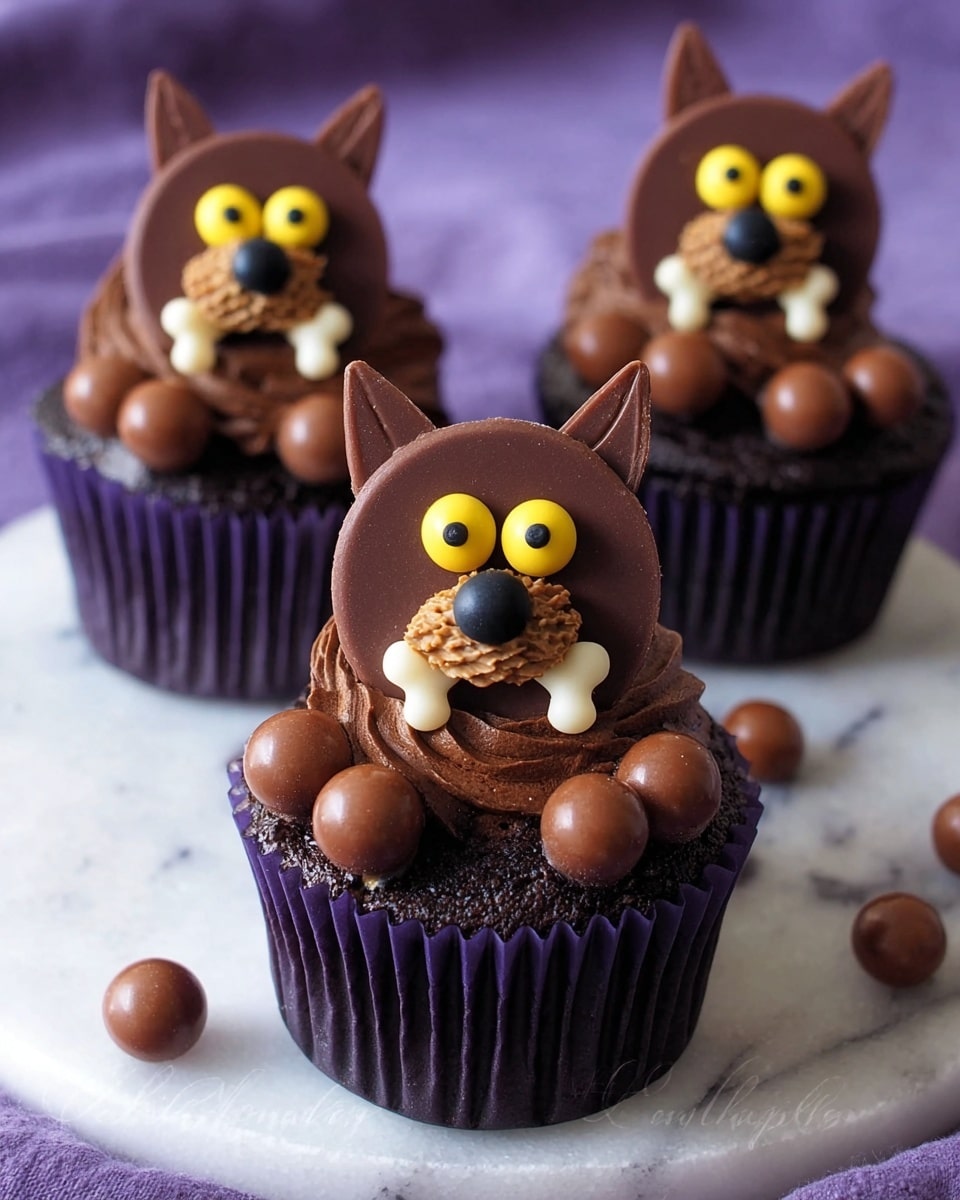
If you’re on the hunt for a spooky, fun dessert that doubles as a delight for both kids and adults, you’re in for a treat. I’m so excited to share this Werewolf Cupcakes Recipe that I absolutely love because it’s easy, playful, and really impresses when you serve them at any Halloween gathering or monster-themed party. The mix of rich chocolate, fuzzy candy textures, and that perfect spooky vibe makes these cupcakes a fan-freaking-tastic choice you’ll want to add to your baking rotation.
Why You’ll Love This Recipe
- Super Easy to Assemble: You don’t have to be a baking pro to make these – just simple decorating skills and some fun candy work.
- Perfect for Halloween and Beyond: These cupcakes bring the spooky factor your party needs without sacrificing flavor or texture.
- Unique Furry Werewolf Design: I discovered a neat trick with candy melts that makes the werewolf “fur” really come alive, and your friends will be amazed.
- Fun for All Ages: Whether you’re baking with kids or for adult guests, these cupcakes hit the sweet spot every time.

Ingredients You’ll Need
To make these werewolf cupcakes, you’ll want to gather simple candy and baking essentials. Each ingredient works together to create cupcakes that are as tasty as they are spooky, plus the candy melts are easy to work with—even if you’ve never done candy art before.
- Light cocoa candy melts: These give you that rich, furry texture on the werewolf and are easy to melt and manipulate.
- White candy melts: Perfect for piping on details like fangs, adding that spooky contrast.
- Reese’s Cups (regular and mini): The base of your werewolf head and snout—who doesn’t love Reese’s in any form?
- Black M&M’s: Make great noses for your werewolves; their size fits perfectly.
- Yellow candy eyes: These give your werewolves that haunting look—so important for character!
- Candy melt wafers: Used to create the triangle-shaped ears, easy to shape and decorate.
- Chocolate cupcakes: I like to use rich, moist chocolate cupcakes as the base, but you can swap these for your favorite flavor.
- Thick chocolate frosting: To swirl on the cupcakes and stick everything together—go for a richness that complements the candy.
- Whoppers (small malted milk balls): These act as adorable werewolf paws placed on each side of the cupcake.
- Candy bones (bone sprinkles): To add that extra spooky detail between the paws—so cute and thematic.
Variations
I love playing around with this Werewolf Cupcakes Recipe depending on the occasion or who I’m making them for. Feel free to get creative and make it your own — these cupcakes lend themselves well to customization!
- Nut-Free Version: I once swapped Reese’s for peanut butter-free cups and used allergy-safe candy melts to make these kid-friendly.
- Vegan Treats: Using dairy-free chocolate cupcakes and vegan candy melts works great if you want to make these for friends with dietary restrictions.
- Spooky Color Swap: Try purple or green candy melts with different colored candy eyes for a classic monster twist instead of the brown werewolves.
How to Make Werewolf Cupcakes Recipe
Step 1: Creating the Furry Werewolf Heads
Start by melting your light cocoa candy melts—microwave them in 20-second bursts, stirring in between, until smooth. Spread a thin layer of the melted candy over each full-size Reese’s Cup using a food-use-only brush. Then here’s the fun part: press the bristles into the candy and quickly pull up to create little spikes that look like fur. This trick makes all the difference in the werewolf’s rugged appearance.
Step 2: Attaching Snouts and Features
Attach a mini Reese’s Cup to each full-size cup as the werewolf’s snout, brushing more melted candy around it to blend it into the furry look. Add a black M&M as the nose and stick on yellow candy eyes with more melted candy acting as glue. Pop everything into the freezer for about a minute so it sets nicely. Cut two triangle ears from candy wafer melts, attach them, and fur them up again with the melted candy brush technique. For the fangs, you can pipe white candy melts on or press on small white heart sprinkles—both look fantastic and spooky!
Step 3: Piping the Candy Moon Picks
Pipe little candy moons onto parchment paper using white candy melts, stick a pick into each, and freeze for 3 to 5 minutes until hardened. These will give your cupcakes that whimsical full-moon look behind each werewolf.
Step 4: Decorating the Cupcakes
Pipe a generous swirl of thick chocolate frosting onto each cupcake. Place one werewolf head on top, followed by inserting the moon pick behind it. Add two Whoppers on either side to create “paws,” then tuck in a candy bone between them. This final touch ties the whole scene together—your cupcakes will look like little werewolf creatures ready to pounce!
Pro Tips for Making Werewolf Cupcakes Recipe
- Brush Technique: When creating the furry effect with the candy melts, make sure the brush is wet with melted candy but not dripping to get those perfect spikes.
- Freezing Helps: Don’t skip the freezing step after attaching pieces—it keeps everything firm and makes decorating much easier.
- Candy Melts Consistency: If your candy melts thicken while working, add a tiny bit of vegetable oil to smooth them back out.
- Work Quickly: Candy melts harden fast so prep all your components and have your tools ready before starting.
How to Serve Werewolf Cupcakes Recipe
Garnishes
Personally, I stick with the candy bones and Whoppers as paws because they add texture and theme perfectly. But you could sprinkle on some edible glitter or use red gel icing for a little “bloodthirsty” effect around the fangs if you want to get ghoulish!
Side Dishes
These cupcakes shine as a standalone treat but pairing them with a spooky punch or a creamy hot chocolate makes your dessert table even more inviting. I’ve also served them alongside salted caramel popcorn for a sweet-savory combo guests rave about.
Creative Ways to Present
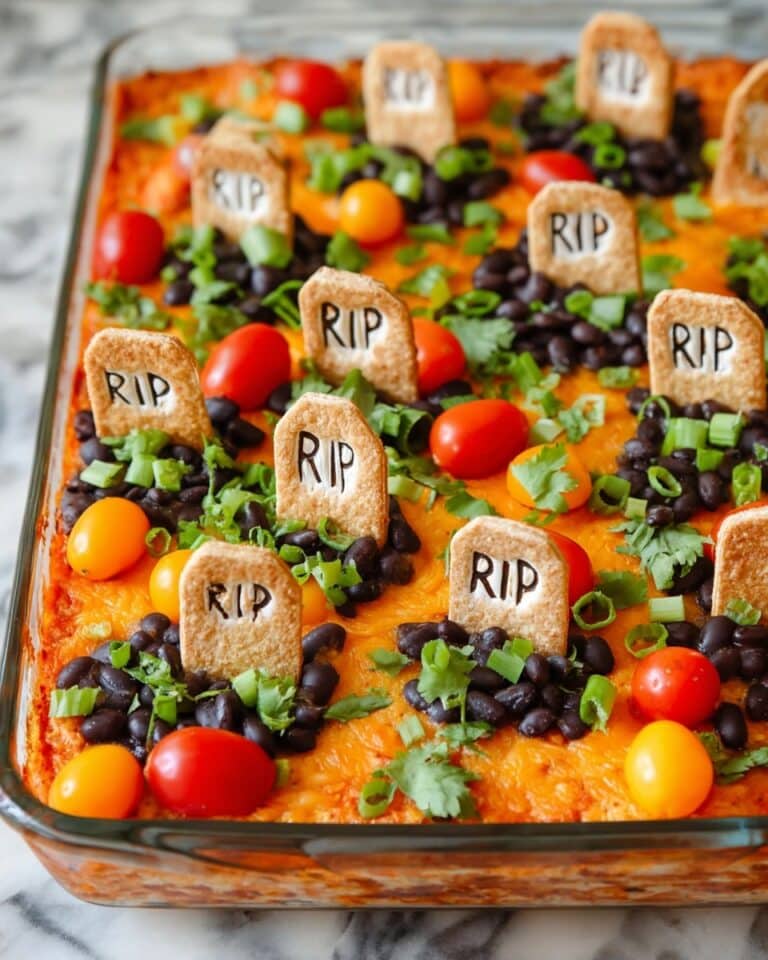
For Halloween parties, I’ve placed the cupcakes on a tray lined with faux spider webs and little plastic spiders to really heighten the creepy effect. Another fun idea is to serve them in mini “graveyard” cupcake wrappers with edible tombstones you can make from cookie cutters.
Make Ahead and Storage
Storing Leftovers
I usually keep leftover cupcakes at room temperature, lightly covered with a dome or plastic wrap, so the frosting stays nice and soft. They hold up well for up to 3 days this way without losing any of their charm or flavor.
Freezing
If I need to store them longer, I carefully freeze the undecorated cupcakes wrapped well, and add the candy werewolf toppers after thawing. Freezing with frosting and decorations sometimes sogs the candy melts.
Reheating
There’s no reheating needed here since cupcakes are best served at room temp. Just let frozen cupcakes thaw fully before adding the werewolf decorations for the best results.
FAQs
-
Can I use different candy instead of Reese’s Cups for the werewolf heads?
Absolutely! While Reese’s Cups add that perfect peanut butter-chocolate flavor and shape, you can experiment with other peanut butter-free chocolates or even round chocolate candies. Just make sure they’re sturdy enough to hold up when you apply the candy melts and decorations.
-
What’s the best way to melt candy melts without burning them?
I recommend melting candy melts slowly in 20-second intervals in the microwave, stirring between each burst to ensure even melting. Avoid overheating, as candy melts can seize or burn quickly. You can also melt them over a double boiler for more control.
- Can I prepare the werewolf decorations ahead of time?
Yes! I like to make the werewolf heads a day or two before the party and store them in an airtight container in a cool place. Just add them to the frosted cupcakes the day you’re ready to serve to keep them looking fresh.
- Do the cupcakes need to be refrigerated?
These cupcakes store best at room temperature for up to three days. Unless your room is very warm or humid, refrigeration isn’t necessary, and chilling can sometimes harden the frosting and candy melts, impacting the texture.
Final Thoughts
This Werewolf Cupcakes Recipe has become my go-to for when I want something that’s equal parts whimsical and delicious. I used to struggle with creating fun Halloween treats that actually tasted great, but this recipe hit the perfect balance. I think you’ll love how your guests react when they see these furry little monsters perched on frosted cupcakes, especially knowing how easy they are to make. Honestly, once you try it, you’ll want to make them every year—trust me, they’re THAT much fun!
Print
Werewolf Cupcakes Recipe
- Prep Time: 10 mins
- Cook Time: 0 mins
- Total Time: 10 mins
- Yield: 6 cupcakes
- Category: Dessert
- Method: No-Cook
- Cuisine: American
Description
These Werewolf Cupcakes combine rich chocolate cupcakes with creatively decorated Reese’s Cup werewolves made from candy melts and mini candies. Perfect for Halloween or themed parties, these spooky treats feature furry candy-coated werewolves with candy bone accents and malted milk ball paws, all topped with a crescent moon candy decoration.
Ingredients
Werewolf Decorations
- 4 ounces light cocoa candy melts, melted
- 6 full size Reese’s Cups
- 6 Reese’s Cup Minis
- 6 black M&M’s
- 12 yellow candy eyes
- 12 light cocoa candy melt wafers
- 4 ounces white candy melts, melted
Decorating the Cupcakes
- 6 chocolate cupcakes
- 1 ½ cups thick chocolate frosting
- 12 Whoppers (small malted milk balls)
- 6 candy bones (bone sprinkles)
Instructions
- Prepare Reese’s Cup Werewolves: Spread melted light cocoa candy melts evenly over each full size Reese’s Cup. Using a food-use-only paintbrush, press the brush into the wet candy melts and quickly pull up to create furry spikes texture across the candy surface.
- Add the Snout and Details: Attach a mini Reese’s Cup as the snout on each full size Reese’s Cup, brushing candy melts all around it to make it furry as well. Adhere a black candy nose and yellow candy eyes onto each snout using additional candy melts as glue. Freeze the completed werewolves in the freezer for 1 minute to set.
- Attach the Ears: Cut two triangle-shaped ears from the light cocoa candy melt wafers and attach them to the top of each Reese’s Cup werewolf. Use more melted candy melts and the paintbrush technique to make the ears furry, consistent with the werewolf’s texture.
- Create Fangs: Using white candy melts, either pipe on small fang shapes or attach four small white heart sprinkles per werewolf to serve as fangs, securing them with more light cocoa candy melts.
- Make Candy Moons: Pipe six crescent moon shapes from white candy melts onto a piece of parchment paper, attaching a pick to each. Freeze these candy moons for 3-5 minutes until hardened.
- Decorate the Cupcakes: Pipe a generous swirl of thick chocolate frosting onto each chocolate cupcake. Place one Reese’s Cup werewolf on top of each frosted cupcake.
- Assemble Final Touches: Insert one candy moon pick behind the werewolf into the frosting on each cupcake for a moonlit effect. Position two Whoppers on either side of the werewolf to resemble its paws, and press a candy bone between the Whoppers to complete the werewolf’s look.
Notes
- Store the decorated cupcakes at room temperature for up to 3 days to maintain freshness and candy texture.
- Use a food-safe paintbrush for texturing the candy melts to create the furry werewolf effect.
- Freezing the candy elements briefly helps to set and stabilize the decorations prior to assembling on cupcakes.
- Ensure candy melts are fully melted and smooth for easy application and adhesion of decorations.
Nutrition
- Serving Size: 1 cupcake
- Calories: 350
- Sugar: 30g
- Sodium: 150mg
- Fat: 20g
- Saturated Fat: 10g
- Unsaturated Fat: 8g
- Trans Fat: 0g
- Carbohydrates: 40g
- Fiber: 3g
- Protein: 5g
- Cholesterol: 30mg


